How to Make a 3D Printed Desk Pal

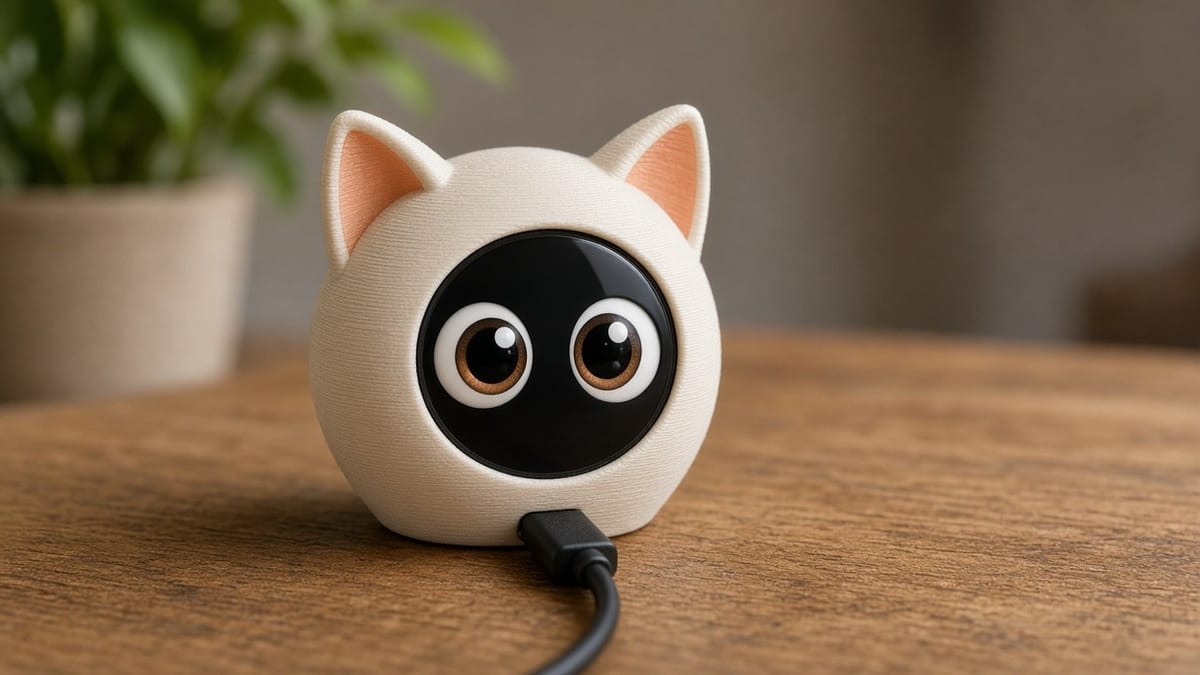
A Desk Pal is a head that sits on your desk and looks back. There is no body, no legs, and no separate bezel to design. A 1.28 inch round touchscreen is the face, and the printed shell is the rest of the character: ears, a sprout, a robot box, whatever you pick. Tap it, tilt it, or leave it alone and the eyes react.
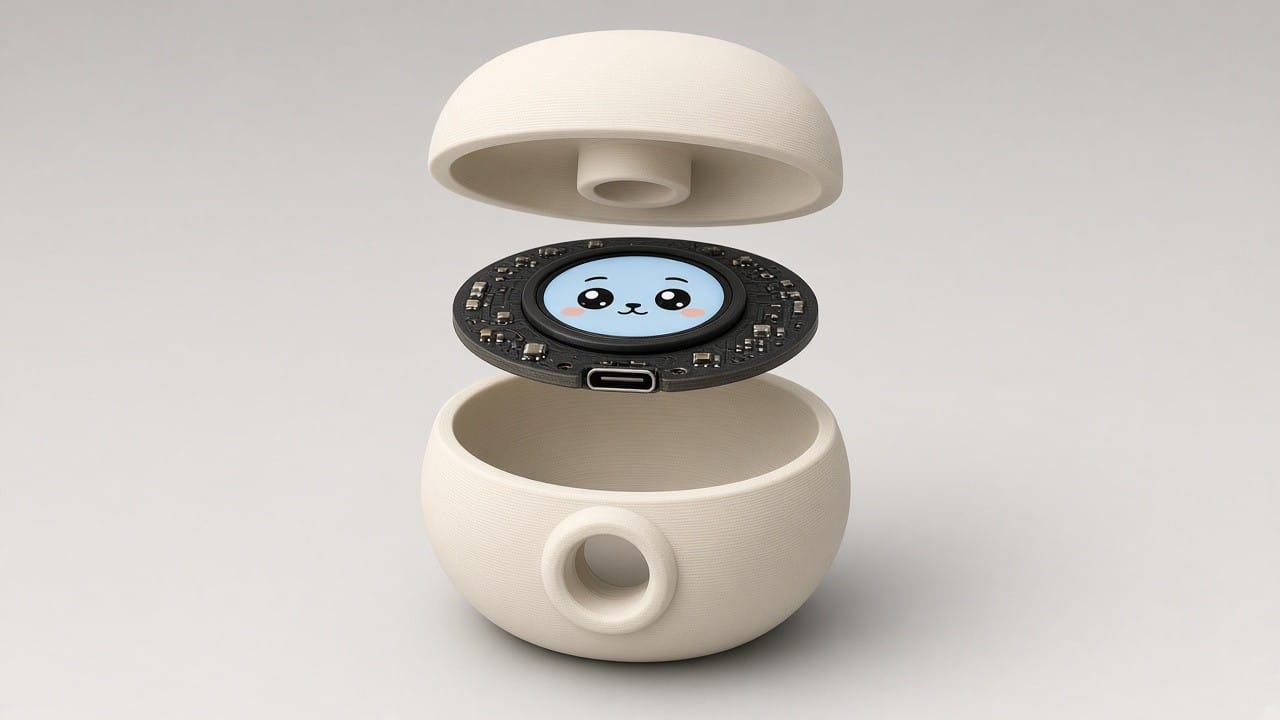
The PrintPal Desk Pal Maker builds that shell for the Waveshare ESP32-S3-Touch-LCD-1.28, the round puck sold as Amazon B0CM68M8LR. You choose a head, put the screen where the face should be, and download two snap-together parts with the cavity, bezel, USB-C slot, and locating ring already cut. No CAD file to set up.
What you need
- The Waveshare ESP32-S3-Touch-LCD-1.28 (Φ38.5 mm, GC9A01 240×240, touch, IMU). About $20. Waveshare's page or Amazon B0CM68M8LR.
- A data-capable USB-C cable. Charge-only cables will power the board and will not flash it.
- Optional: a 3.7 V Li-ion cell with an MX1.25 2-pin plug if you want it cordless.
- The two printed shells from the tool. PLA or PETG is enough.
Other 1.28 inch round boards in the Φ38–39 mm range often drop into the same cavity. The USB-C channel and the firmware image are made for this Waveshare puck.
Design the head
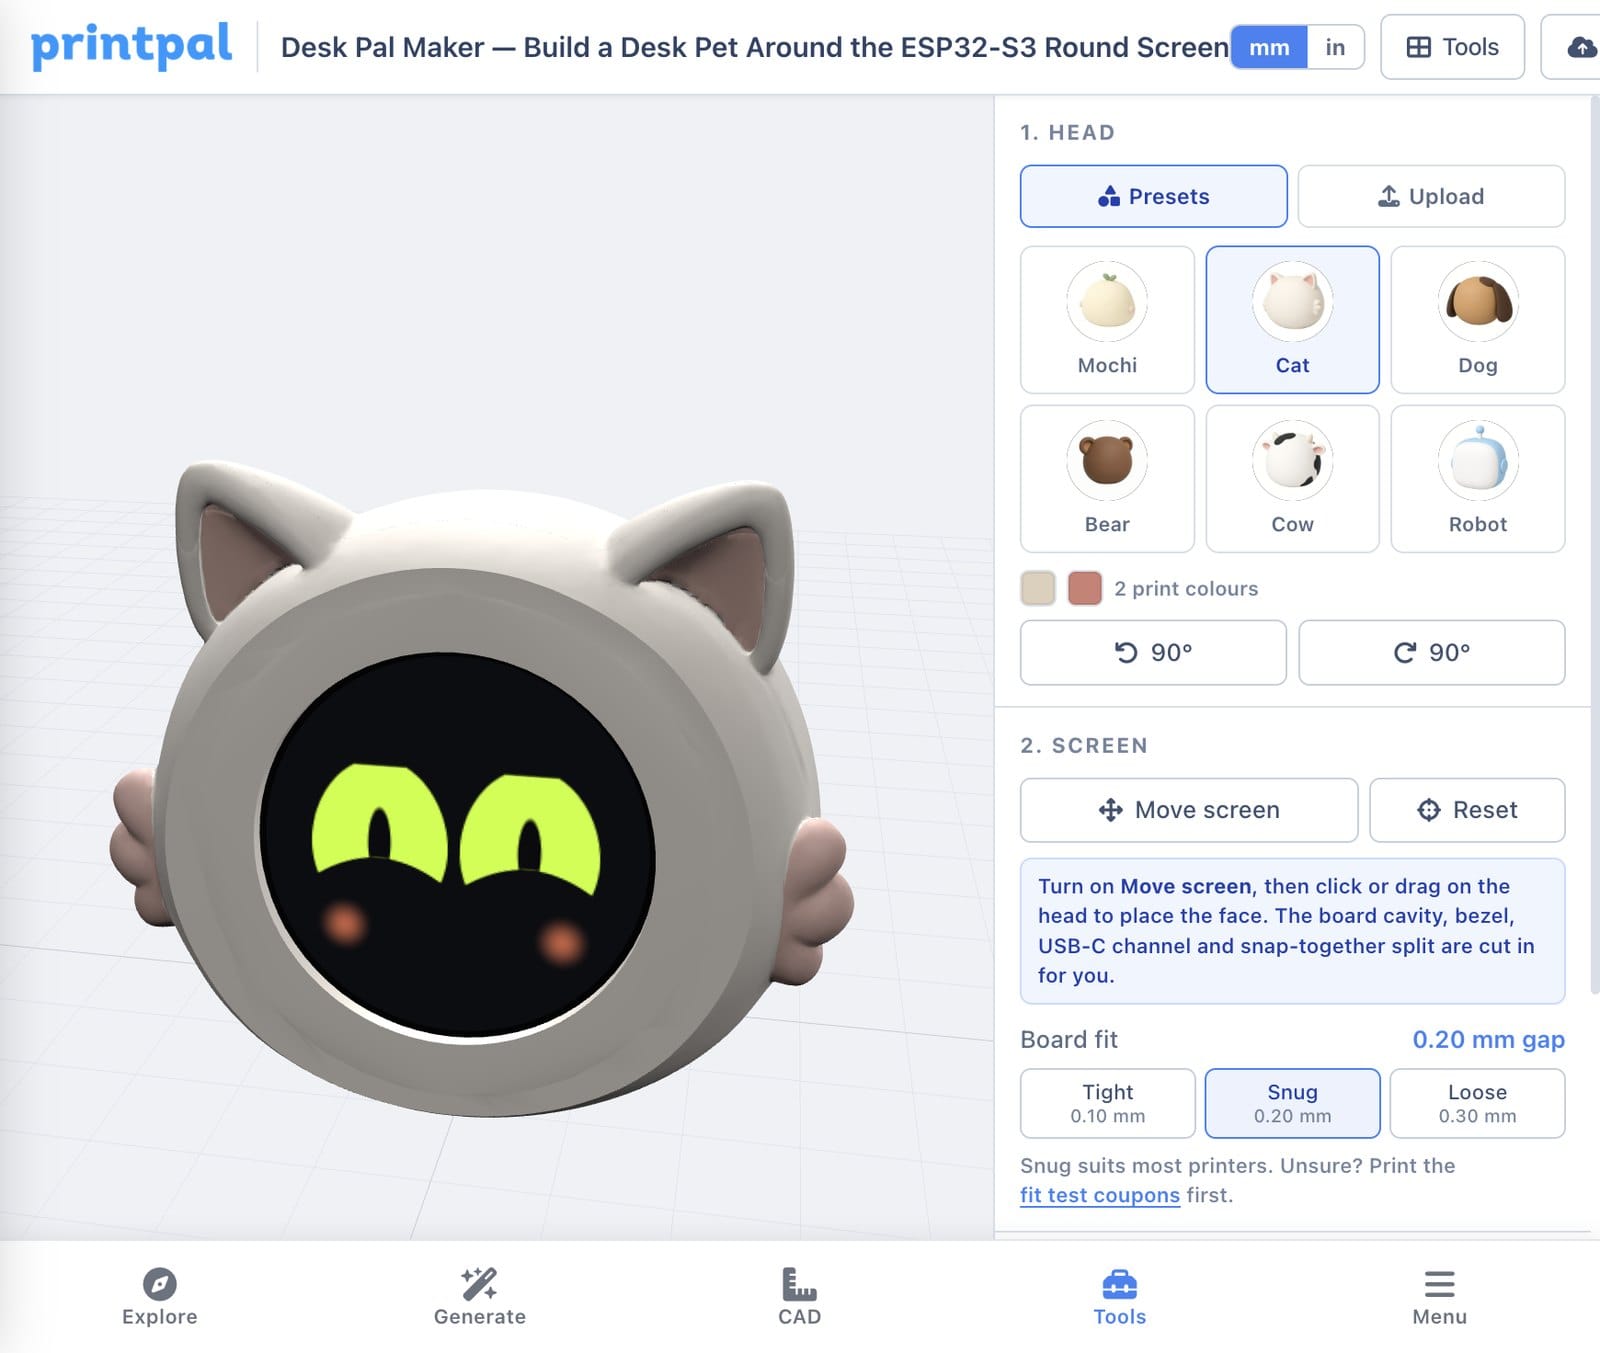
- Open the Desk Pal Maker. The Presets tab starts on Mochi. The heads you can pick are Mochi, Cat, Dog, Bear, Cow, and Robot.
- Recolor it. Each preset has a head, a face, and an accent (sprout, inner ears, spots, mane). Some add a fourth swatch. The preview uses those filament colors, and the 3MF export keeps them.
- Or upload your own STL, OBJ, GLB, or a textured OBJ in a ZIP. Set the height (the slider runs from 52 mm to 110 mm; 62 mm is a good desk size), spin it with the 90° buttons until the face points forward, and choose how many print colors to keep if the file is textured. Auto keeps up to four and drops lighting shades.
- Click Move screen and drag on the head until the round face sits where you want it. Reset puts it back. The cavity, 1.5 mm bezel, USB-C channel, and the split between the two shells update as you move it. The eyes in the preview are the same renderer the board runs, so you can see blinks and moods before you print.
- Leave Board fit on Snug (0.20 mm gap) unless you have already test-fit the puck. Tight is 0.10 mm, Loose is 0.30 mm.
If you are not sure how your printer holds a 0.2 mm gap, export the fit test coupons first. They are three 5 mm slices of the cavity — one bump, two, or three, for Tight, Snug, and Loose. Print them, push the board in, and pick the tightest slice that seats fully with a firm push and no side rattle. Set that fit, then export the head.
Export and print
Color 3MF (Bambu / Orca) writes both shells with filament slots already assigned, the same paint data Bambu Studio and OrcaSlicer use. Open it and map the slots to your AMS. STL parts (ZIP) is the single-color path: two shells, already in print orientation.
Print settings that behave:
- 0.16–0.20 mm layers, 3 walls, 15–20% infill.
- Print the files in the orientation they export. The face shell is bezel-down, cavity open toward the nozzle, so the bezel is a clean first layer and the locating ring prints on top. The back shell sits on its flat split face.
- Most heads do not need supports. Ears or horns that stick straight out may want tree supports.
The face opening is Φ33.6 mm through a 1.5 mm bezel, which shows the full 32.4 mm viewing area without a tunnel. Five small ribs inside the cavity take up the clearance so the black frame of the board does not rattle, whichever fit you chose.
Flash the eyes
Chrome or Edge, not Safari, and not an iPhone.
- Plug the puck into the computer with the data USB-C cable.
- On the tool page, click Flash to board and pick the serial port.
- If no port appears, install the WCH CH34x driver on Windows or some Macs. If it still does not show, hold BOOT, tap RESET, release BOOT, and click Flash again.
The browser writes a precompiled image. You do not compile anything for the normal path. A source ZIP is on the page if you want Arduino or PlatformIO later. A black screen after a source build almost always means USE_HSPI_PORT was left out. The browser image already has it.
Assemble
- Slide the puck into the face shell from the back, glass toward the bezel, USB-C pointing down into the channel. The ribs make it a firm push. Stop when the glass sits flat on the bezel.
- Route the cable, or tuck the battery into the pocket in the back shell.
- Press the back shell on. Two keys in the ring mean it only goes on one way and cannot twist afterward. The nubs click, and pads on the back shell hold the PCB against the bezel so the screen does not rock.
Tap, swipe, tilt, shake, or flip it. It cycles through more than ten moods and goes to sleep when you leave it.
A custom creature from a text prompt is in the same tool when AI generation is turned on. That path uses a PrintPal login and AI credits, then reduces the texture to a few filament colors. Presets and your own uploaded mesh do not need an account.
If you would rather follow a full build with a bill of materials and photos, the same kind of guide lives on PrintPal Projects. The design step itself stays in the Desk Pal Maker.