How to Generate Full Color, AMS Ready 3D Prints

Multi material printing changed what a desktop printer can do. With an AMS or a multi color unit, you can print a model in four, six, or eight colors in one go, no painting and no swapping filament by hand. The hard part has always been getting a model that actually carries color information the slicer can use.
That is the gap PrintPal's 3D Model Generator fills. You generate a model from a photo or a text prompt, keep the color baked into the surface, and export it in a format your slicer reads as separate filament colors. This guide walks through the whole thing.
What "AMS ready" actually means
An AMS, or Automatic Material System, lets a printer pull from several filament spools and switch between them mid print. To use it, your slicer needs a model that defines which areas are which color. PrintPal handles this by baking color directly into the model per vertex, then exporting it so Bambu Studio or OrcaSlicer can map each color to an AMS slot.
In short, the tool does the color work for you. You just choose how many colors to use and which filaments go where.
What you will need
- A PrintPal account with credits
- A printer with an AMS or multi material unit (Bambu Lab, or any setup running OrcaSlicer)
- A few filament colors loaded and ready
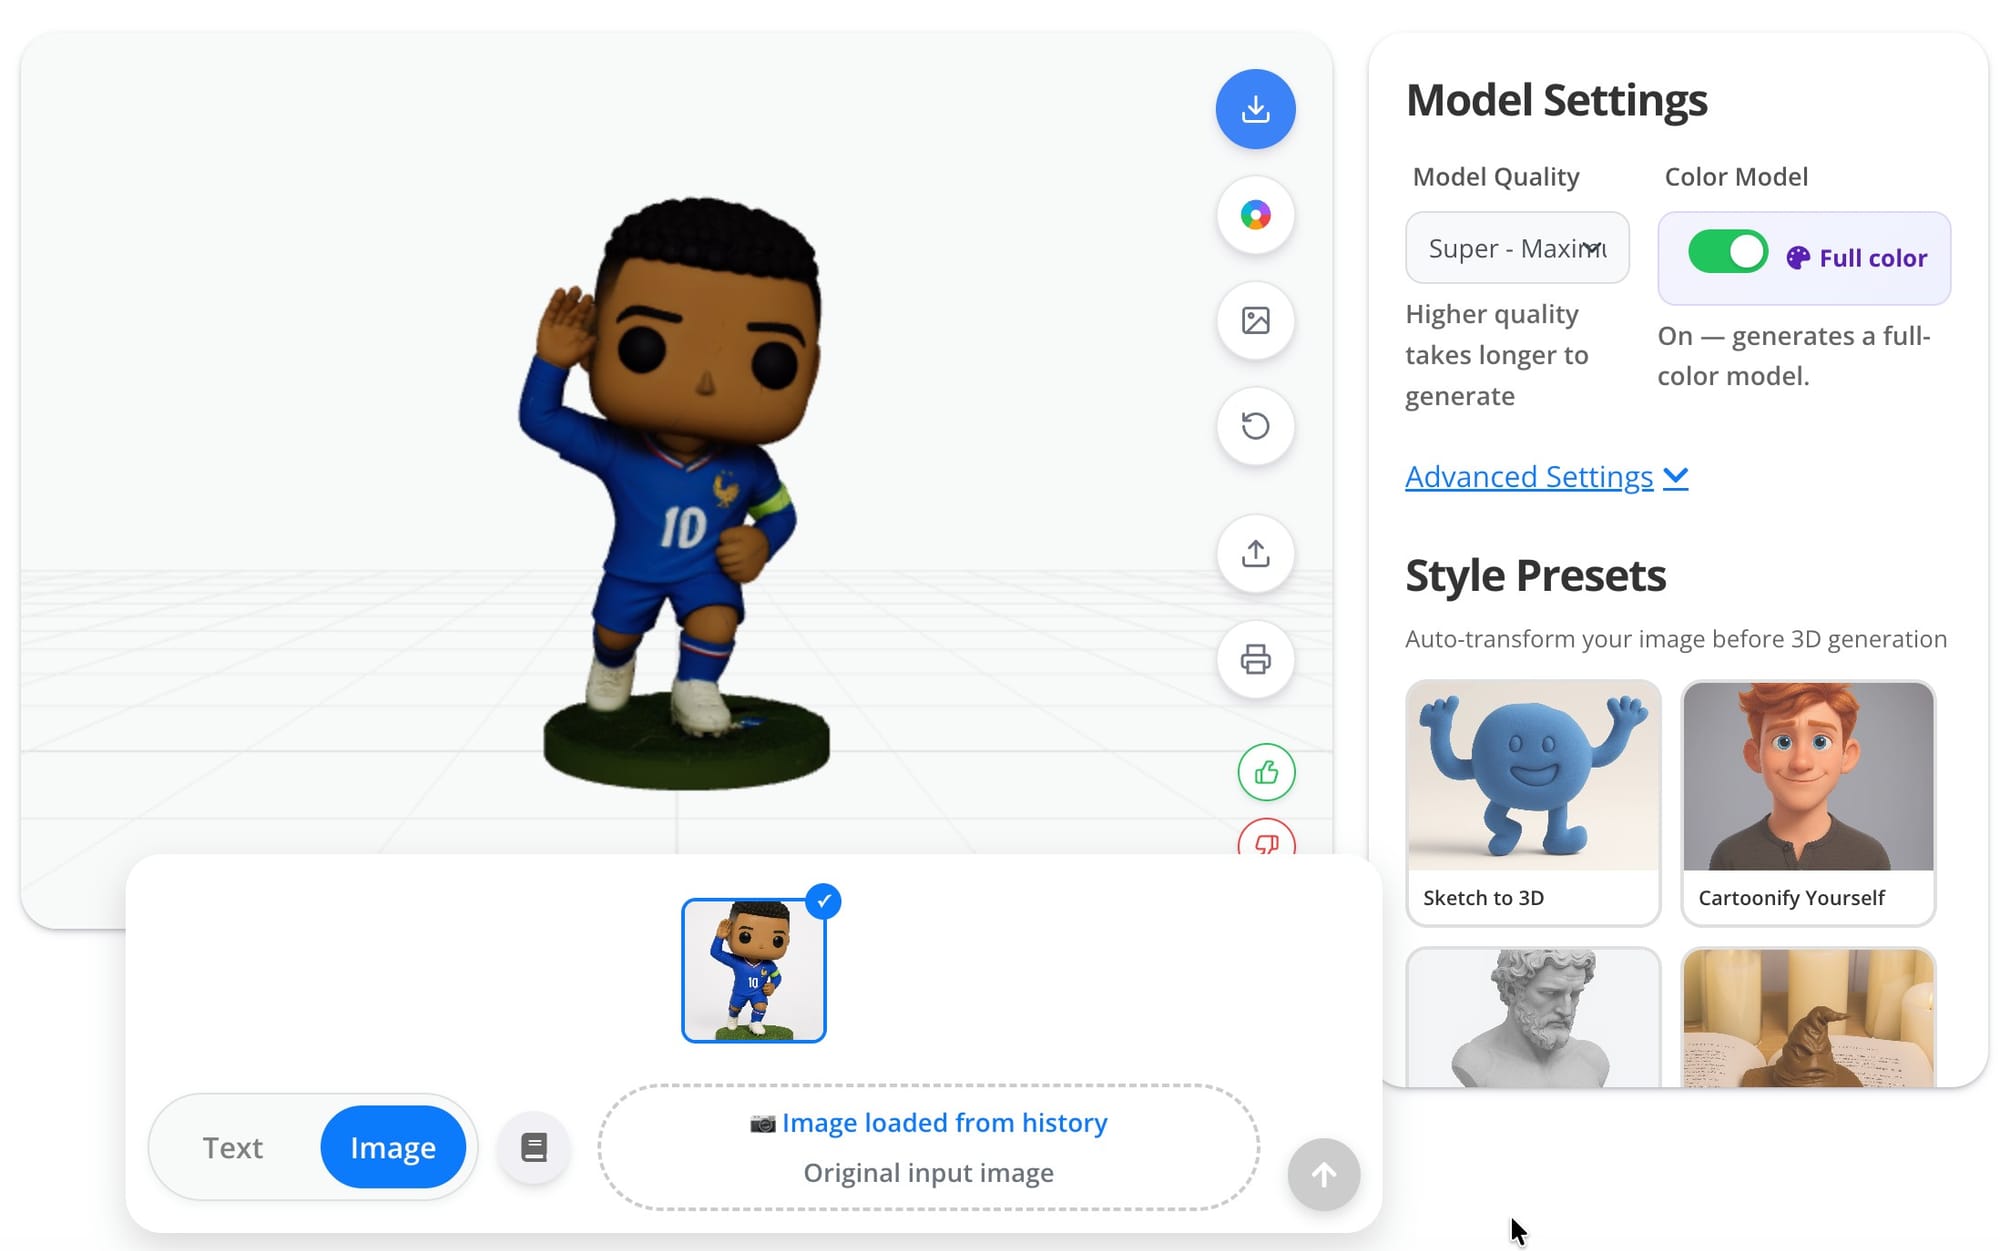
Step 1: Generate a model with full color turned on
Open the 3D Model Generator and upload an image or type a prompt. Before you generate, find the Color Model setting and turn on the Full color toggle. This is the part that matters. Without it, you get a single color mesh, and there is nothing for the AMS to separate later.
With full color on, the generator builds the model and paints the surface to match your input, so the colors are part of the model from the start.
Step 2: Open the AMS export
Once your colored model finishes, a Multi-color / AMS export button appears next to the download button. It only shows up for full color models, so if you do not see it, check that the Full color toggle was on when you generated.
Click it to open the AMS / Multi-Color Export panel. You get a live preview on the left and the controls on the right.
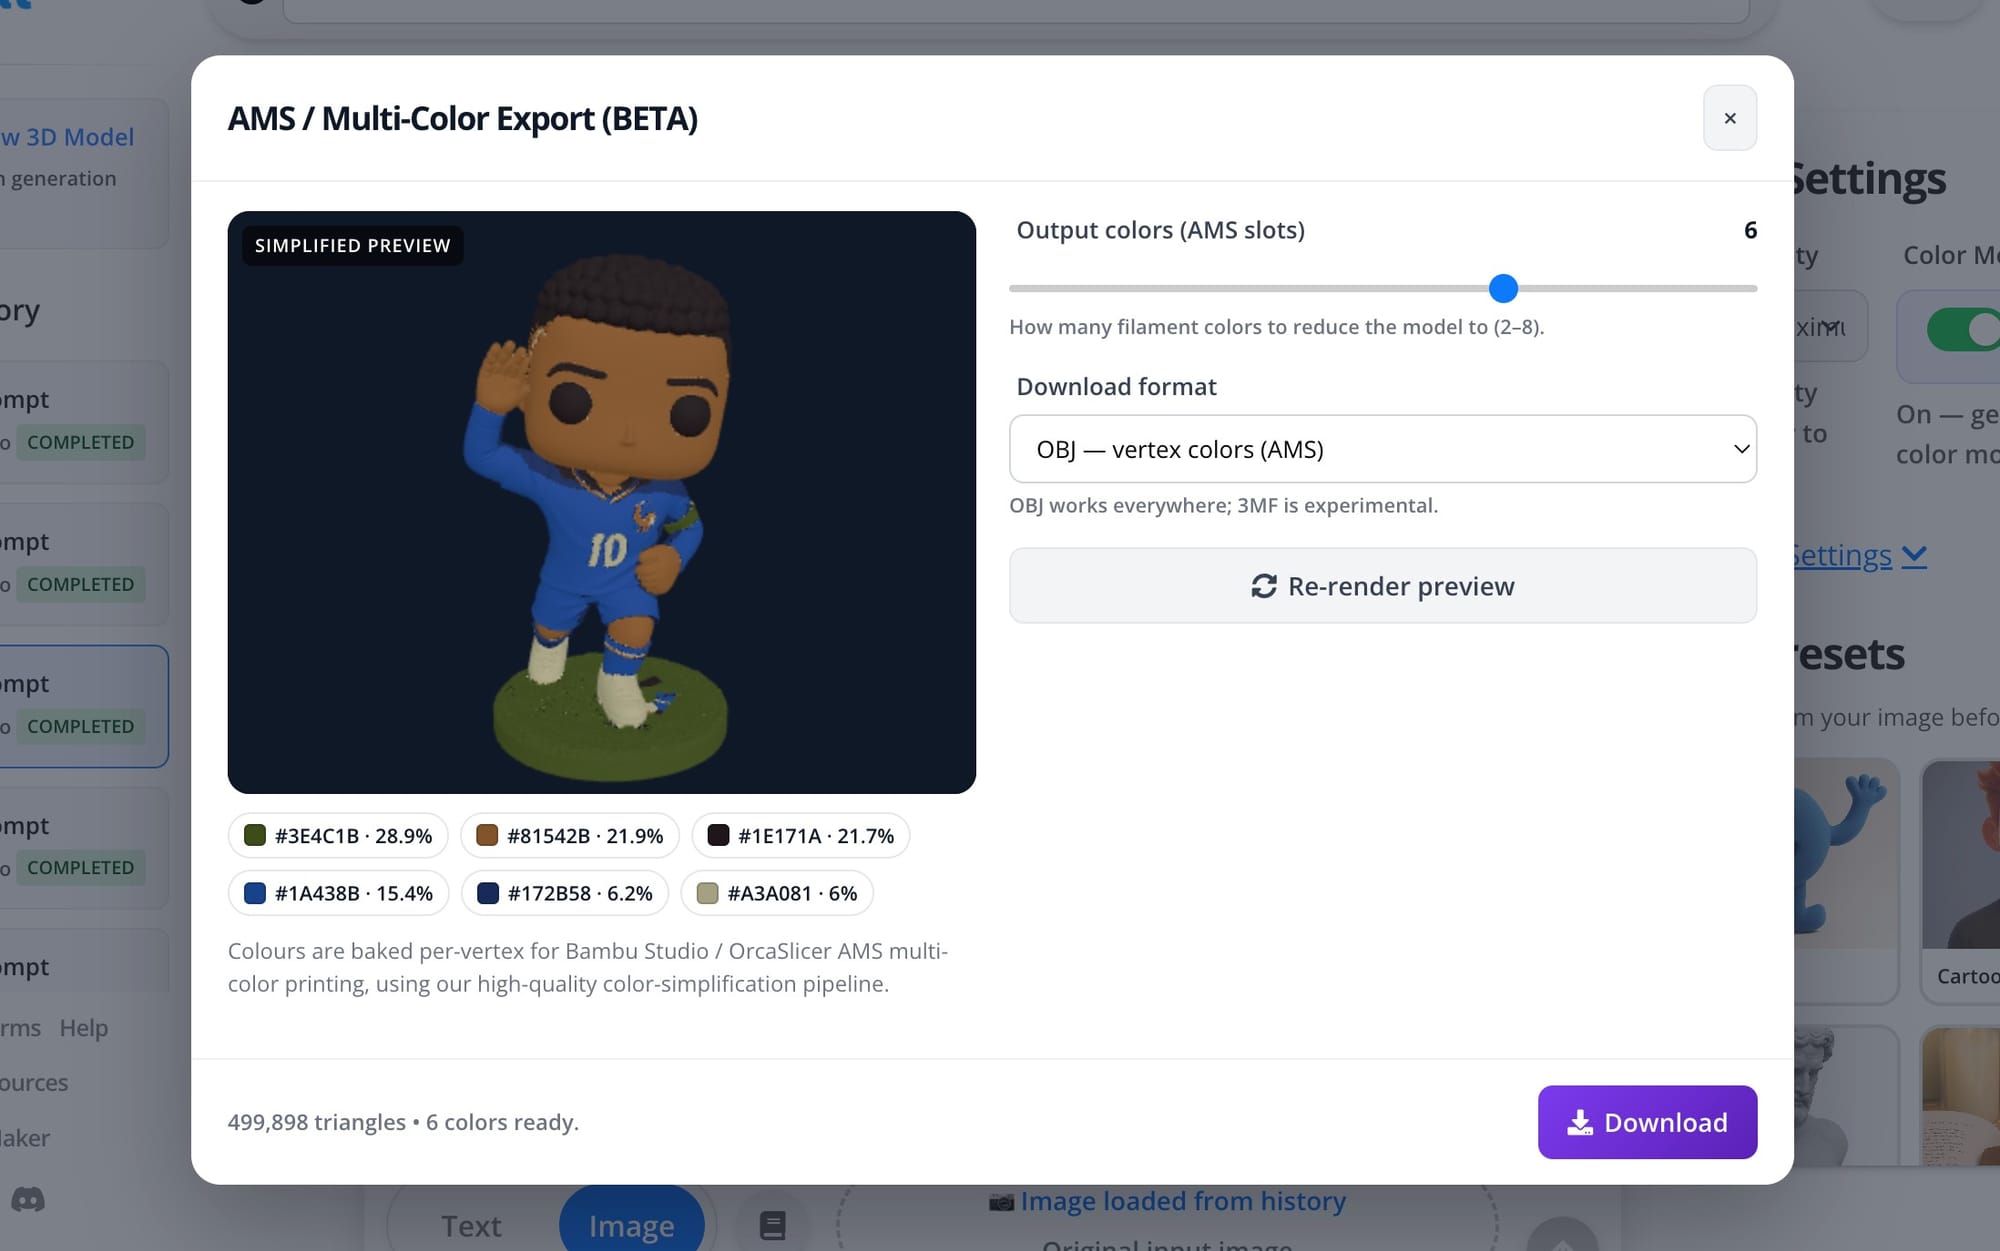
Step 3: Choose how many colors to print
Use the Output colors (AMS slots) slider, which runs from 2 to 8. This is the number of filament colors the model gets reduced down to, and it should match how many slots you actually plan to load.
Most prints look great at four colors. Set it to match your AMS, so if you only want to load three spools, set it to three. Fewer colors print faster and waste less filament on purges, while more colors capture finer detail. PrintPal handles the rest of the color work for you, so this is the one setting to focus on.
As you change the count, the preview updates and the color chips below it show exactly which colors you will need to load.
Step 4: Pick a format and download
You have two Download format options:
- OBJ with vertex colors is the safe choice. It works in Bambu Studio, OrcaSlicer, and just about everywhere.
- 3MF with color groups is a newer, experimental option.
Stick with OBJ unless you have a reason not to. Click Download and save the file.
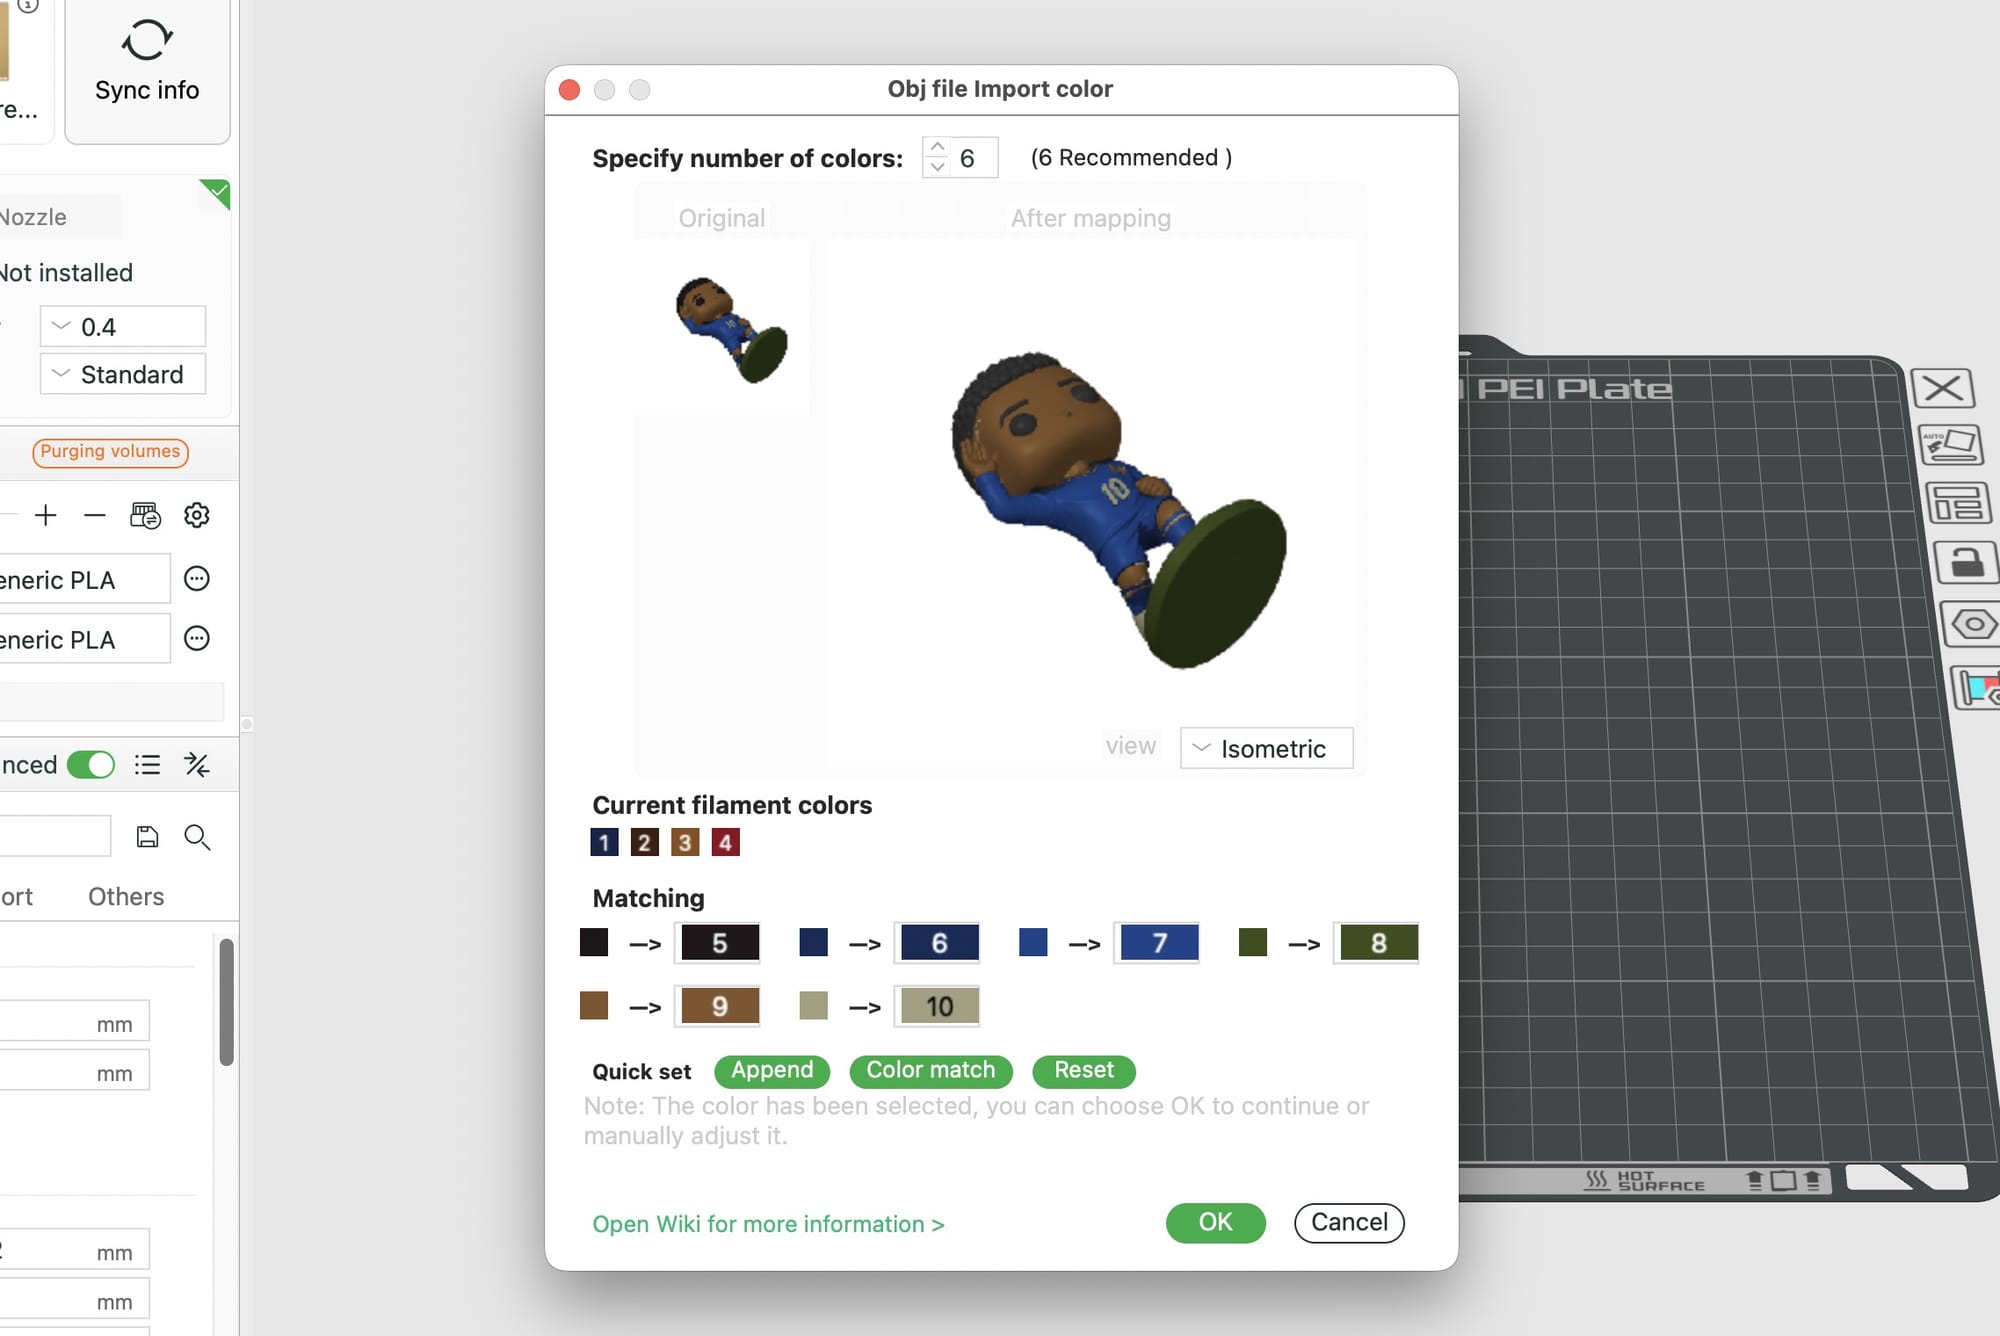
Step 5: Import into your slicer and assign filaments
Open Bambu Studio or OrcaSlicer and import the file you just downloaded. The model comes in with its color regions already defined, so you are not painting anything by hand.
Now map each color to a filament. Match the palette chips you saw in PrintPal to the spools in your AMS, and load those colors into the matching slots. Take a second to confirm the assignment before slicing, since this is where most mistakes happen.
Step 6: Slice and print
Slice as you normally would. A few settings that help with color prints:
- Keep your flush volumes reasonable. Higher color counts mean more purging on every swap, so the slicer's default purge can use a lot of filament.
- A 0.2 mm layer height is a solid balance of detail and speed for most figures.
- If your printer supports it, a purge or poop chute keeps the bed clean during swaps.
Start the print, and the AMS handles the color changes for you.
Tips for cleaner color prints
- Match slots to your real spools. Set the output color count to the number of filaments you actually plan to load, not more.
- Check the palette before you commit. Look at the color chips and confirm the count. It is much easier to adjust in PrintPal than after slicing.
- Start at four colors. It is the sweet spot for detail without long print times, then go up or down from there.
Frequently asked questions
Do I need a Bambu printer? No. Any printer running OrcaSlicer with a multi material unit works. Bambu Studio is just one common option.
Why is the AMS export button missing? It only appears for full color models. Regenerate with the Full color toggle turned on.
Which format should I download? OBJ with vertex colors. It is the most compatible. The 3MF option is still experimental.
How many colors can I print? Between 2 and 8. Set the slider to match the number of filaments you plan to load.
Will the colors look exactly like the preview? The preview is simplified, but the palette chips show the real colors you will print. Final results depend on your filament shades, so pick spools close to the palette.
Start printing in color
Generate a full color model, dial in your AMS slots, and export a file your slicer can print without a single brush stroke. Open the PrintPal 3D Model Generator and make your first AMS ready print today.