How to 3D Print Your Minecraft World in Full Color

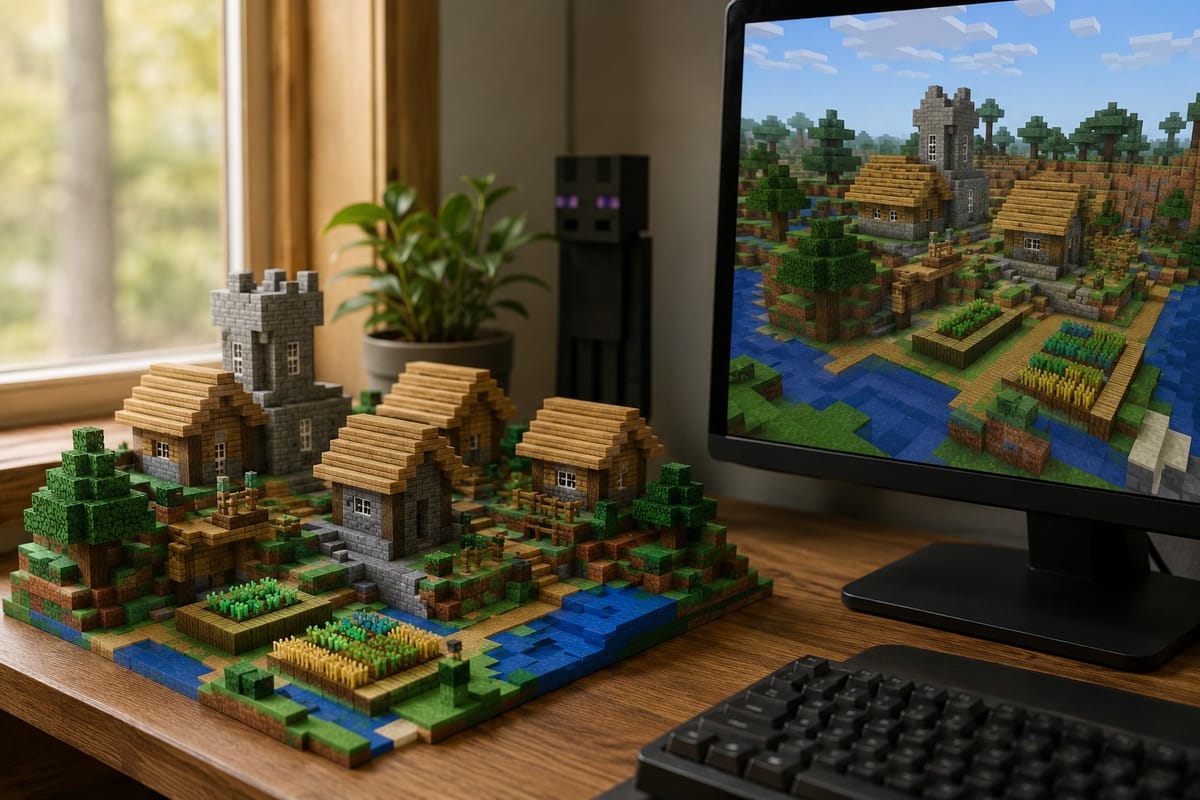
You spent months building that base. The crops, the towers, the little dock you are weirdly proud of. It feels like it should exist on a shelf, not just on a hard drive. The good news is that getting your Minecraft build off the screen and onto your 3D printer is now a five minute job, and it can come out in full color with the blocks mapped straight to your filaments.
This guide walks through the whole thing using the PrintPal Minecraft Map to 3D Print tool. No CAD skills, no mesh repair, no command line. Everything happens in your browser, and your save file never leaves your computer.
What This Tool Actually Does
It reads your Minecraft Java world files, shows you a top down map so you can pick exactly the part you want, and builds a real 3D model from those blocks. You crop it, clean it up, and export a print ready file. The colors of your blocks are written into the file, so a slicer like Bambu Studio, OrcaSlicer, or PrusaSlicer can assign each one to a filament for AMS multi color printing.
A few things worth knowing before you start:
- It works with Minecraft Java Edition, version 1.13 and newer, which uses the Anvil region format. Bedrock worlds are not supported yet.
- It runs fully client side. Nothing gets uploaded to a server.
- It exports 3MF (best for color), OBJ with materials, or plain STL for a quick test.
Step 1: Find and Upload Your World
First you need your world files. In Minecraft, open Singleplayer, select your world, click Edit, then Open World Folder. That opens the folder for that save. You can drag the whole folder into the tool, zip it first and drop the zip, or grab just the region files if you only want a specific area.
If you ever need to find saves manually, they live in %AppData%\.minecraft\saves on Windows and ~/Library/Application Support/minecraft/saves on Mac.
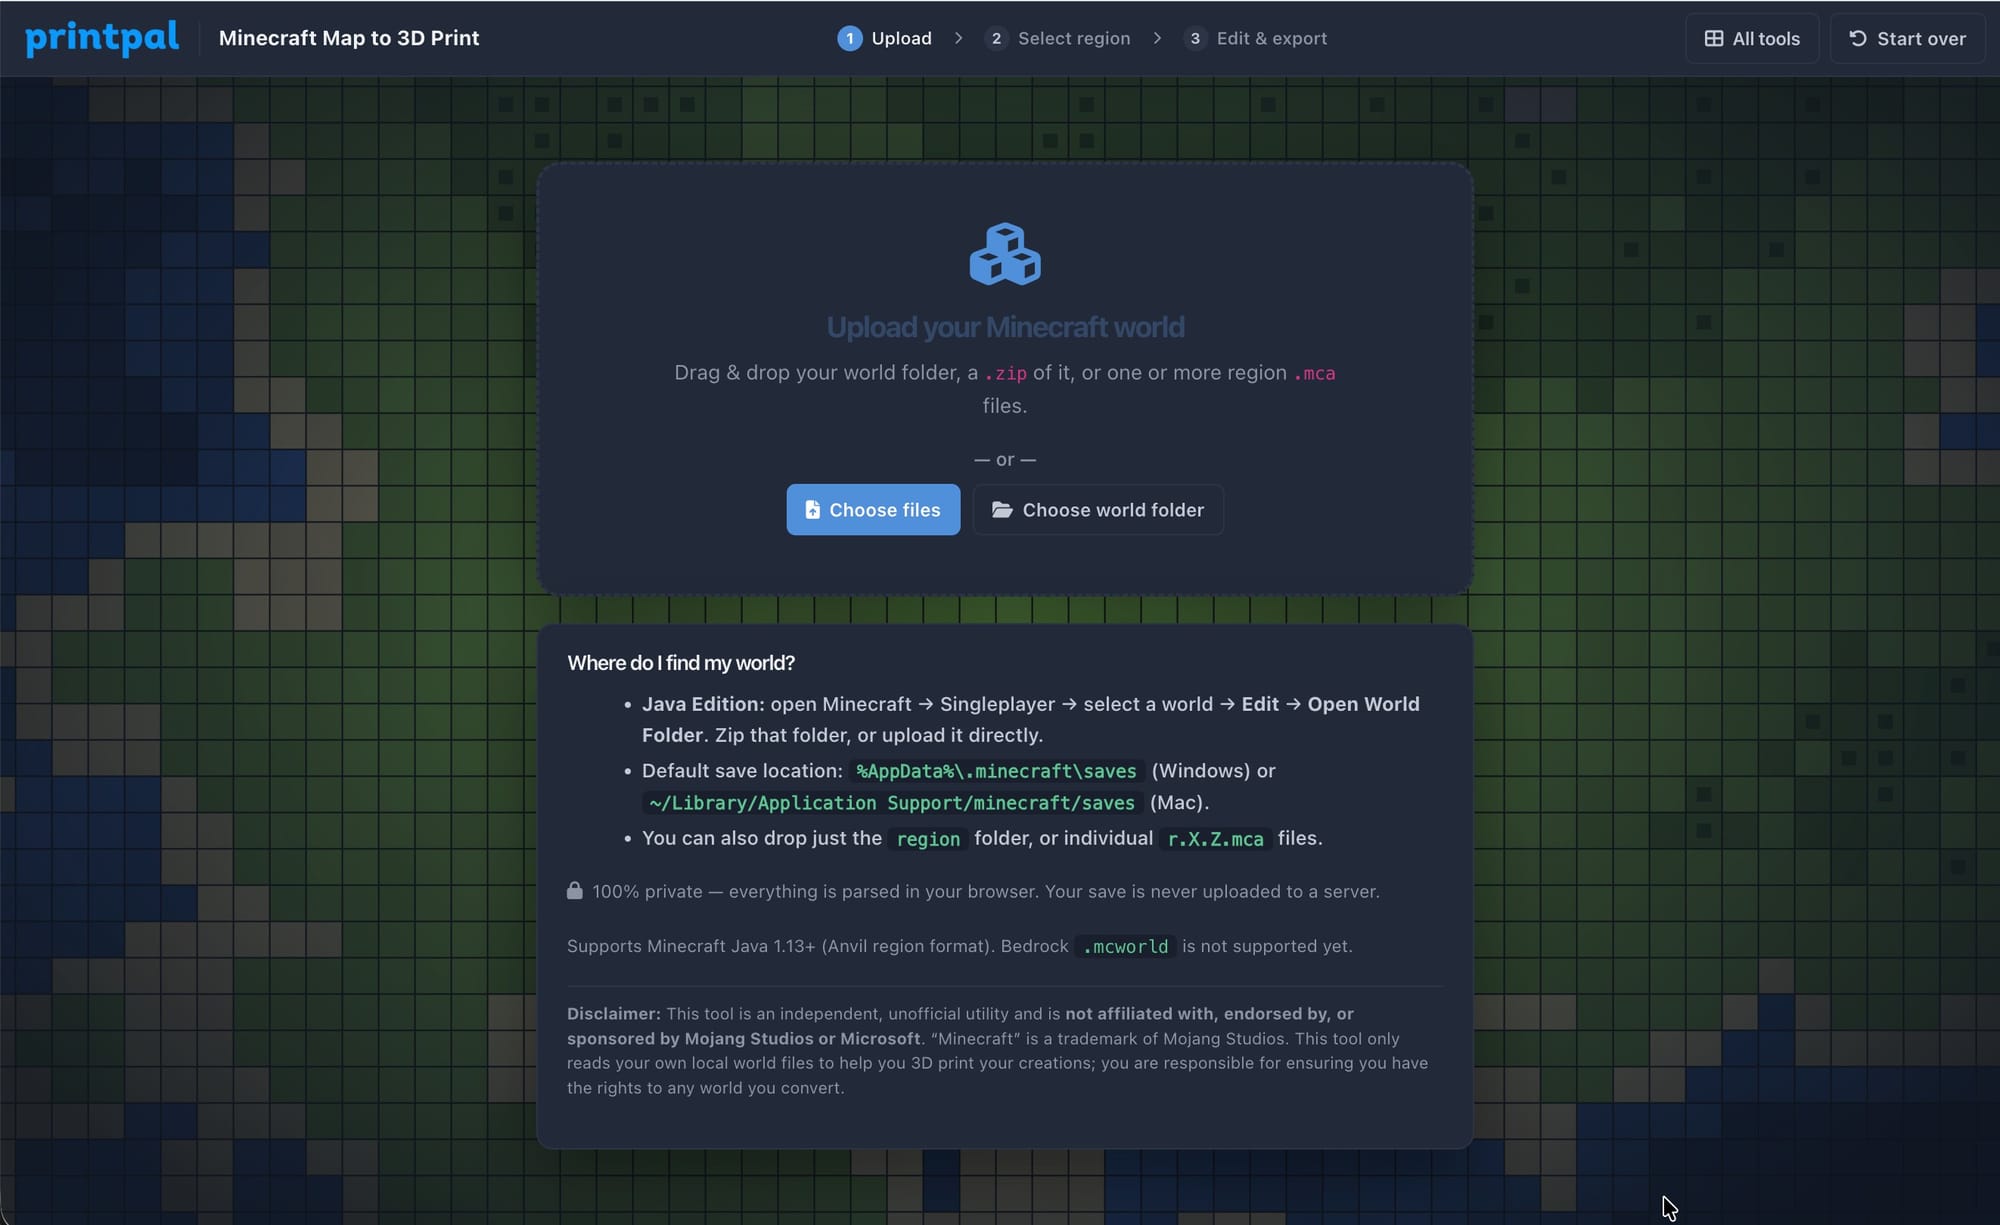
Drag your folder or zip onto the drop zone, or use the buttons to pick it. The tool parses it right there in the browser.
Step 2: Pick Your Region on the Map
Once your world loads, you get a bird's eye view of it, colored by the top surface of every block. This is where you decide what to print. Maybe it is your whole village, maybe it is just one castle.
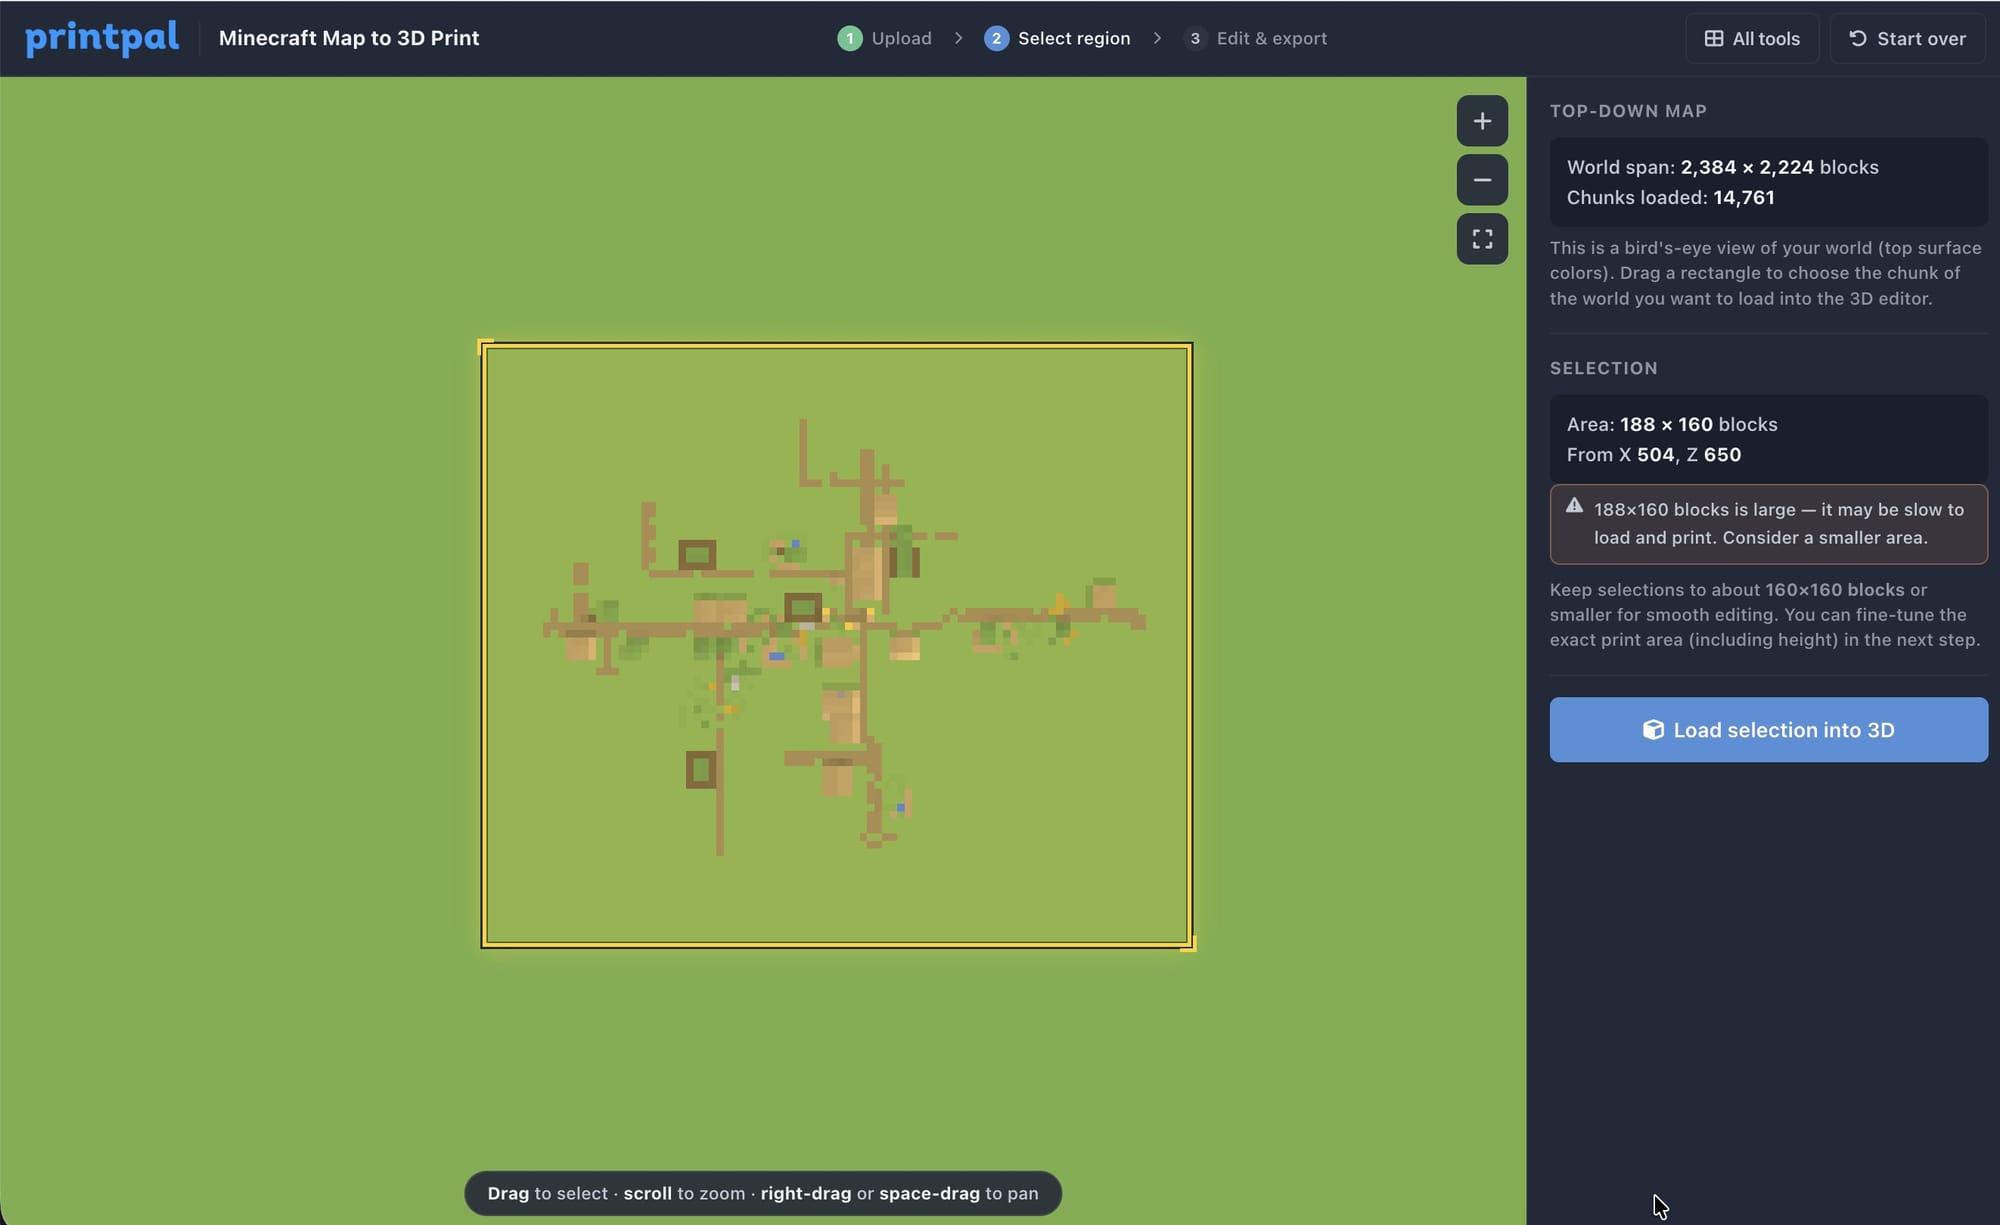
Scroll to zoom, right click and drag (or hold space and drag) to pan, and then drag a rectangle over the part you want. Keep your selection to roughly 160 by 160 blocks or smaller for smooth editing. You can fine tune the exact area, including the height, in the next step. When you are happy, click Load selection into 3D.
Step 3: Crop and Clean Up in 3D
Now your selection becomes a real 3D model you can spin around. This is the fun part.
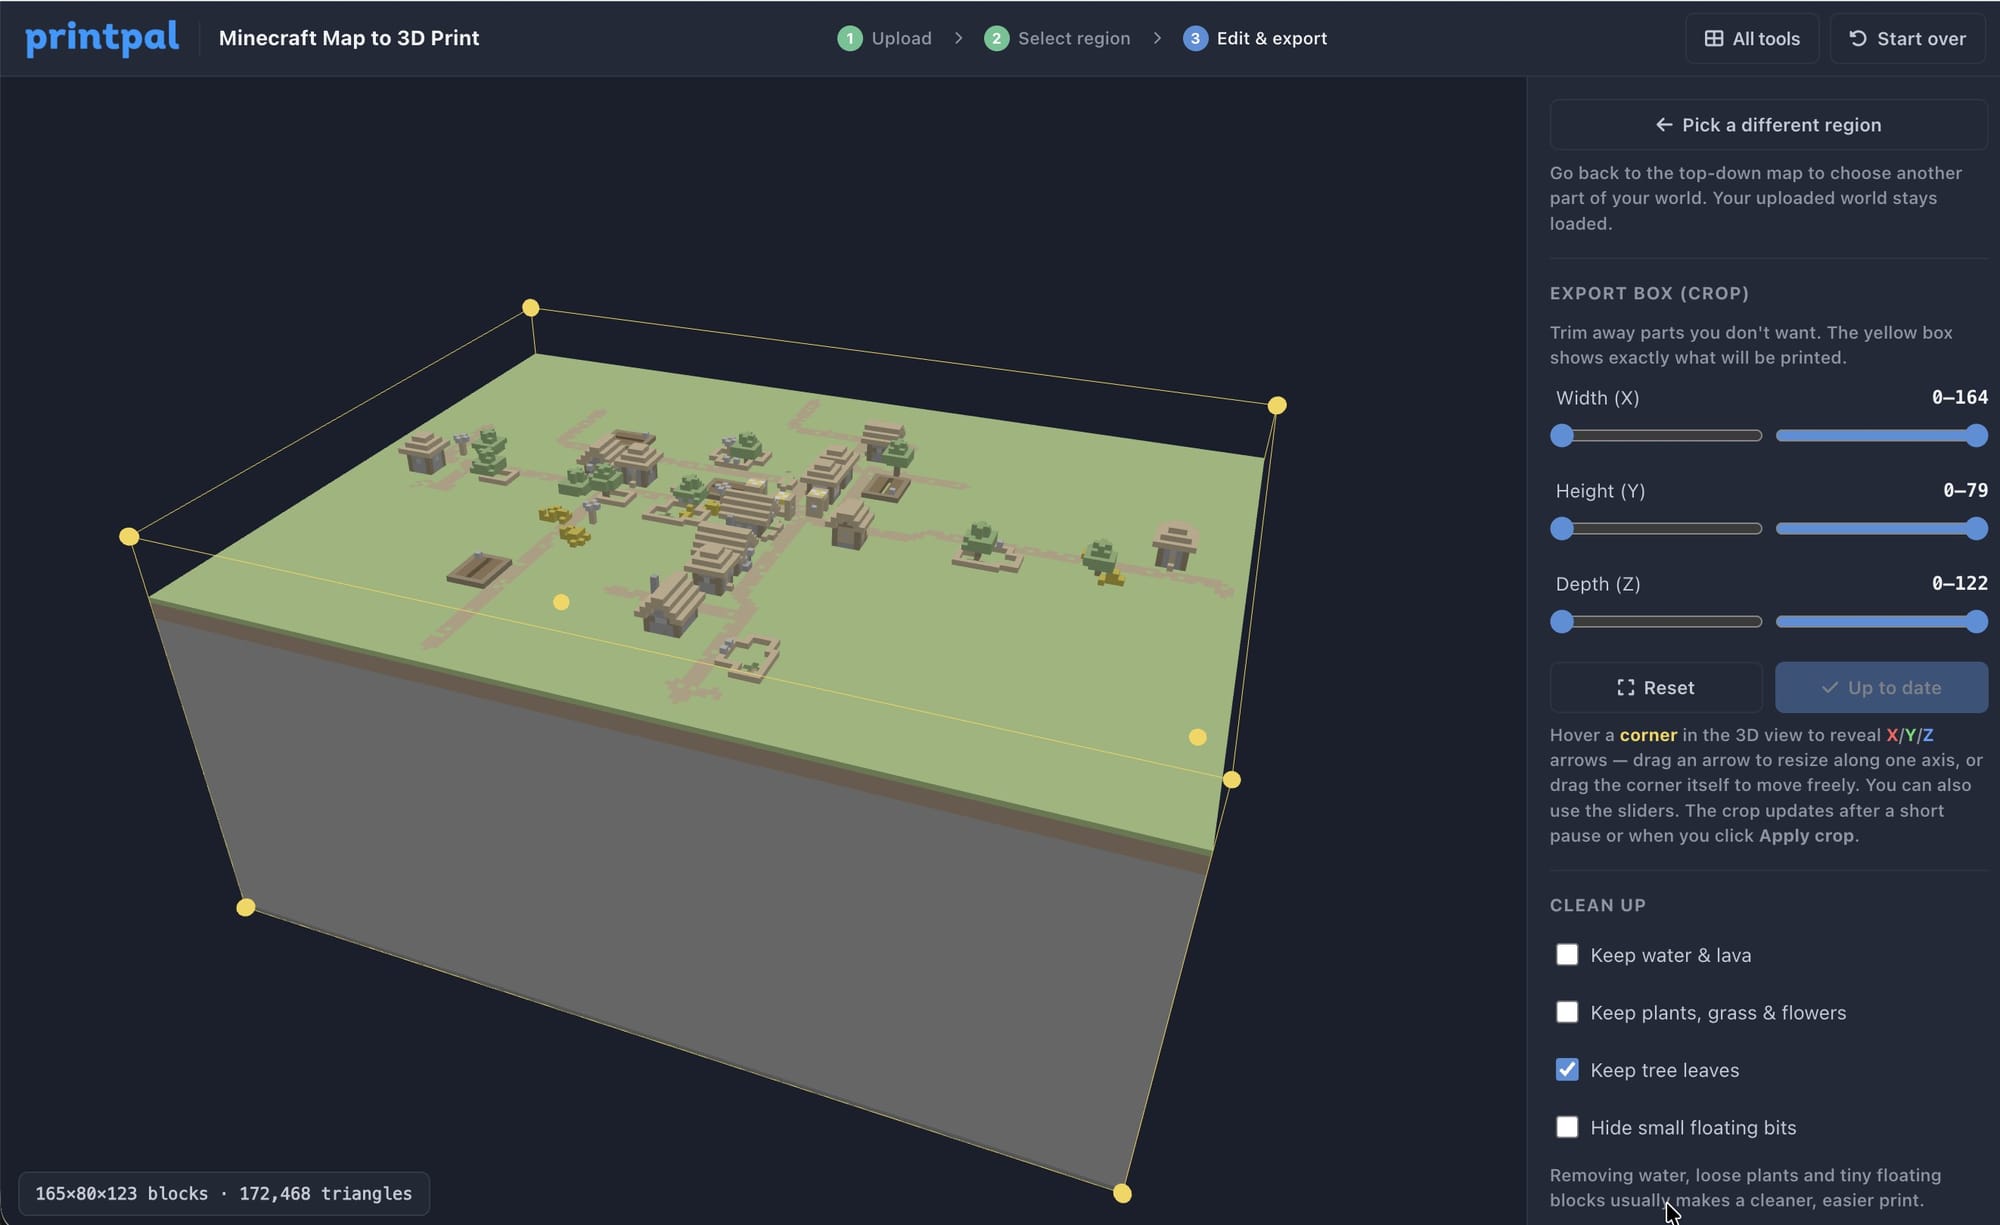
Use the Export box controls to trim away anything you do not want to print. Drag the X, Y, and Z sliders, or grab a corner of the yellow box right in the 3D view and pull it. The preview updates live, and the crop applies after a short pause or when you click Apply crop. This is how you cut off the empty sky above your build or slice away the deep underground stone.
The Clean up toggles handle the messy bits:
- Remove water and lava so you do not print a solid blue block over your pond.
- Remove loose plants, grass, and flowers that would print as fragile spikes.
- Keep or drop tree leaves depending on the look you want.
- Hide small floating bits to clean up stray blocks.
Set your final print size with the Largest side slider. The tool scales the whole model so its longest side matches the millimeters you pick, and you can still rescale later in your slicer.
Step 4: Set Up Colors for AMS Printing
If you want a full color print, this is the step that makes it shine. Choose how many filament slots you have under Colors and AMS slots. Pick four for a single AMS unit, or keep all colors if you plan to hand paint or just want the raw data.
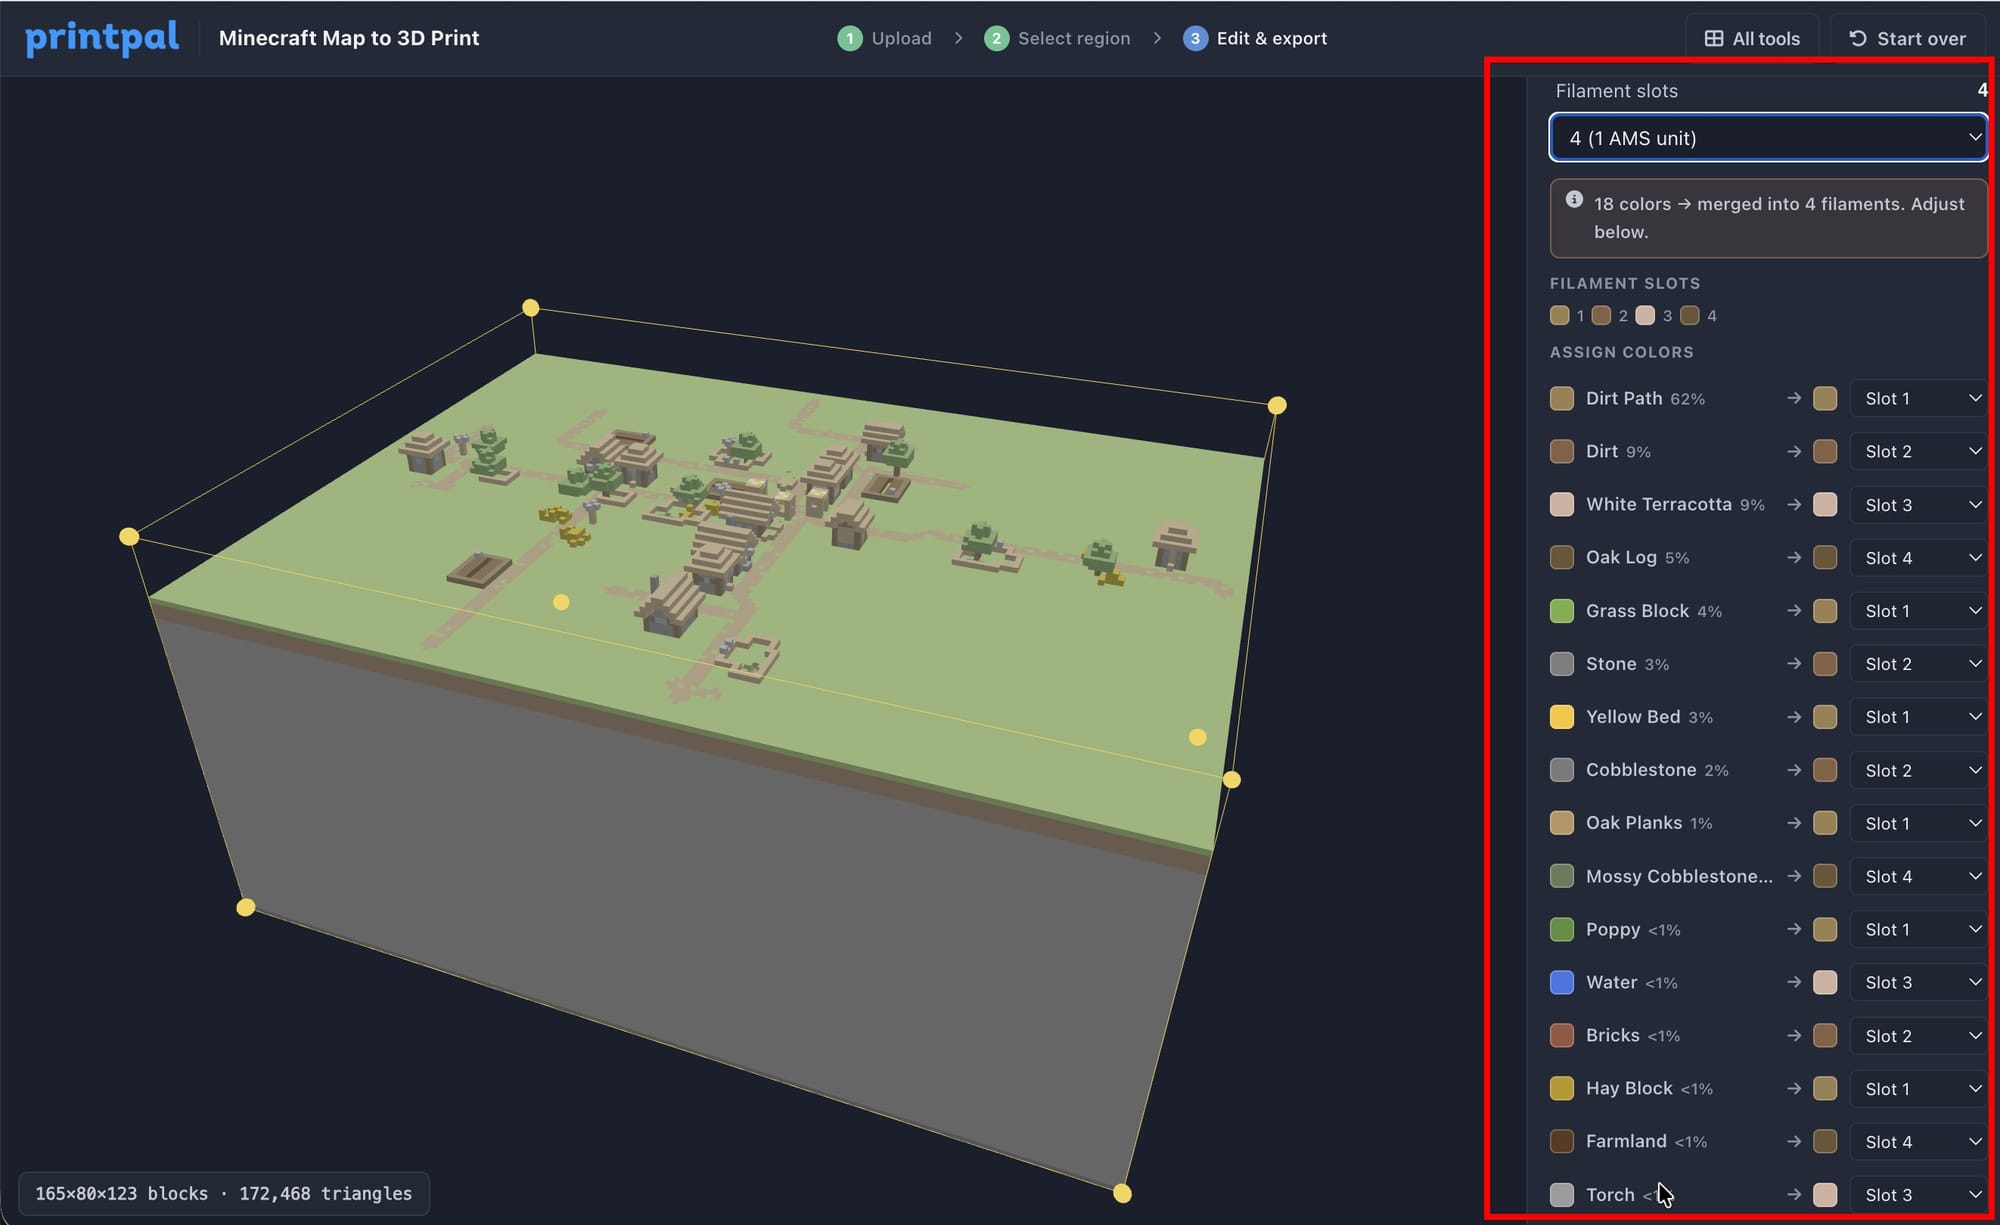
When your build has more colors than you have slots, the tool merges similar colors into the closest slot automatically. It weighs the colors on and above the surface more heavily, so the stuff buried underground does not throw off the mapping. You can override any assignment in the list, and each color shows exactly which filament it will print with.
Step 5: Export and Print
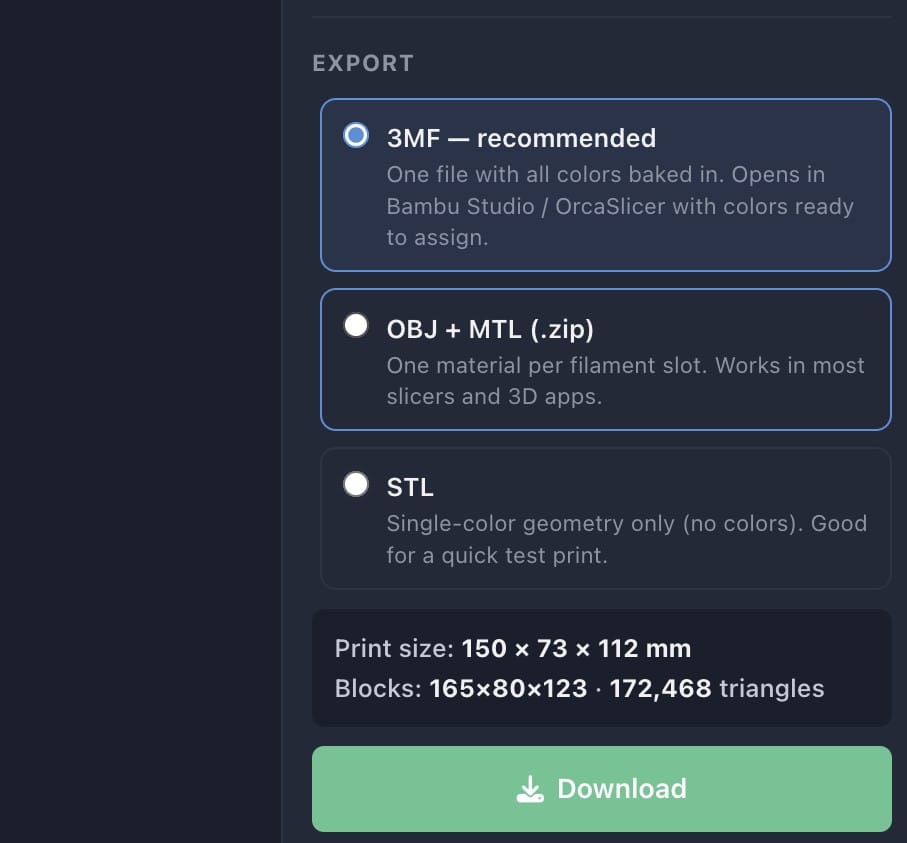
Pick your format and download.
- 3MF is the recommended choice. One file with all the colors baked in, ready to open in Bambu Studio or OrcaSlicer with each color set to assign to a filament.
- OBJ with MTL gives you one material per filament slot and works in most slicers and 3D apps.
- STL is single color geometry only, good for a quick test print.
Open the file in your slicer, assign each color group to a filament, and slice. Here are settings that work well for blocky voxel models on any FDM printer.
| Setting | Value |
|---|---|
| Material | PLA |
| Layer height | 0.20 mm |
| Infill | 10 to 15 percent |
| Walls | 2 to 3 perimeters |
| Supports | Usually not needed if you crop a flat base |
| Orientation | Flat on the bed, base down |
Tips for a Clean Print
- Crop a flat bottom. Slicing off the uneven underground with the Y sliders gives you a level base that sticks to the bed and needs no supports.
- Start smaller than you think. A 120 to 150 mm model prints faster and still shows the detail. Scale up once you like the result.
- Fewer colors print easier. Reducing to four filaments keeps swaps manageable and still looks great.
- Drop the water and plants for your first run. They add fragile geometry that is easy to knock off.
Frequently Asked Questions
Does my Minecraft save get uploaded anywhere? No. The entire tool runs in your browser. Your world files are read locally and never sent to a server.
Which Minecraft versions work? Java Edition 1.13 and newer, which use the Anvil region format. Bedrock and the .mcworld format are not supported yet.
Can I print in full color without an AMS? Yes. Export as 3MF or OBJ, and your slicer will still show the color groups. You can print one color at a time with manual filament swaps, or just use the model as a base for hand painting.
My build is huge. Will it still work? Keep each region selection to around 160 by 160 blocks for smooth editing. If your build is bigger, print it in sections and pick a different region for each pass without re uploading.
What is the difference between 3MF and OBJ here? 3MF packs everything into one tidy file and is the smoothest path into Bambu Studio and OrcaSlicer. OBJ ships with a separate materials file and is handy for other slicers and 3D apps.
Summary
| Goal | What to Do |
|---|---|
| Turn a Minecraft build into a color 3D print | Open the Minecraft Map to 3D Print tool |
| Design a map or diorama from scratch instead | Open the 3D Map Builder |
| Explore other free 3D design tools | Browse all tools |
Upload your world, pick a region, crop it, and export. In about five minutes that base you are proud of can be sitting on your desk in full color.
This tool is an independent utility and is not affiliated with, endorsed by, or sponsored by Mojang Studios or Microsoft. Minecraft is a trademark of Mojang Studios. The tool only reads your own local world files.