10 Bambu Studio Tips and Tricks for Beginners

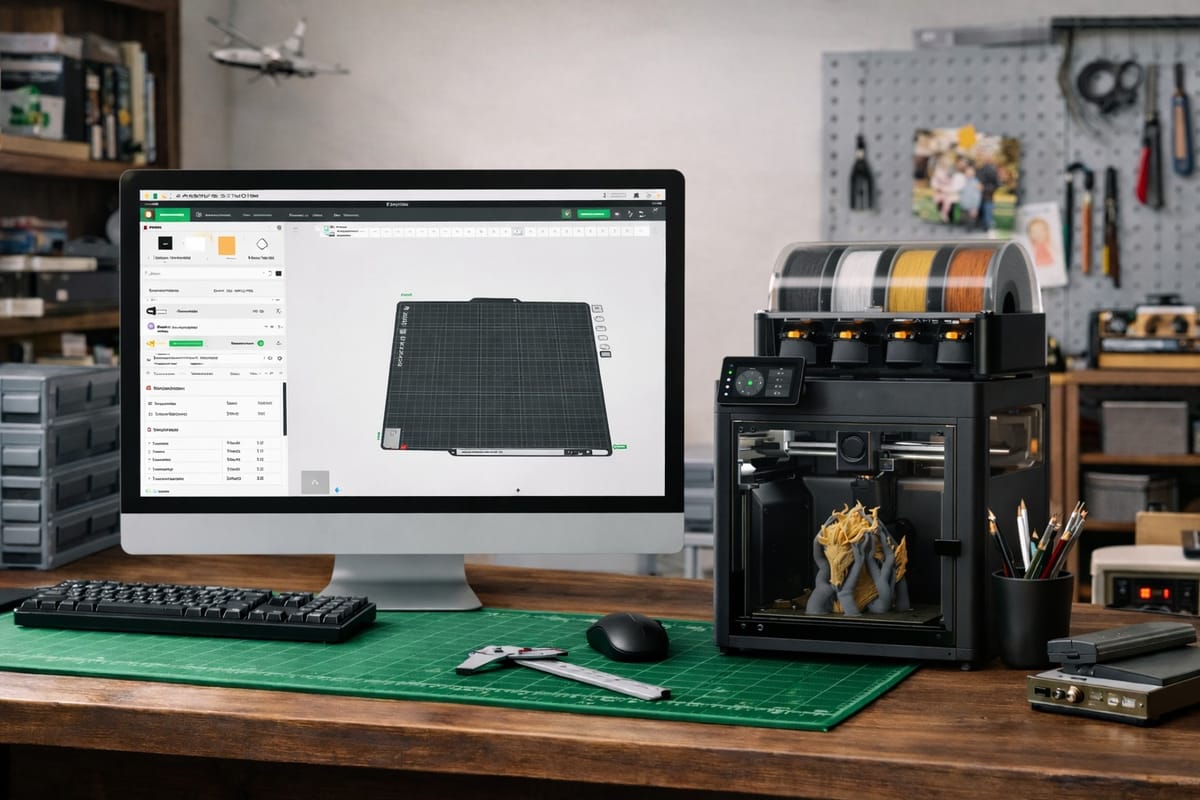
Bambu Studio is one of the easiest slicers to get good prints out of on day one, but the default settings hide a lot of power. These 10 tips cover the exact toggles and workflow habits that separate beginner prints from clean, professional-looking ones. They work on every Bambu Lab printer including the A1, A1 Mini, P1P, P1S, X1 Carbon, H2D, and X2D.
Quick note before we dive in: these tips assume you already have a 3D model ready to slice. If you do not know CAD or you are still looking for something to print, PrintPal has a growing set of free browser-based design generators and AI 3D model tools built for beginners. Text-to-3D, Image-to-3D, parametric name plates, keychains, and other quick projects download as print-ready STLs in under a minute, no software install required. Grab a model there, then come back and slice it with the settings below.
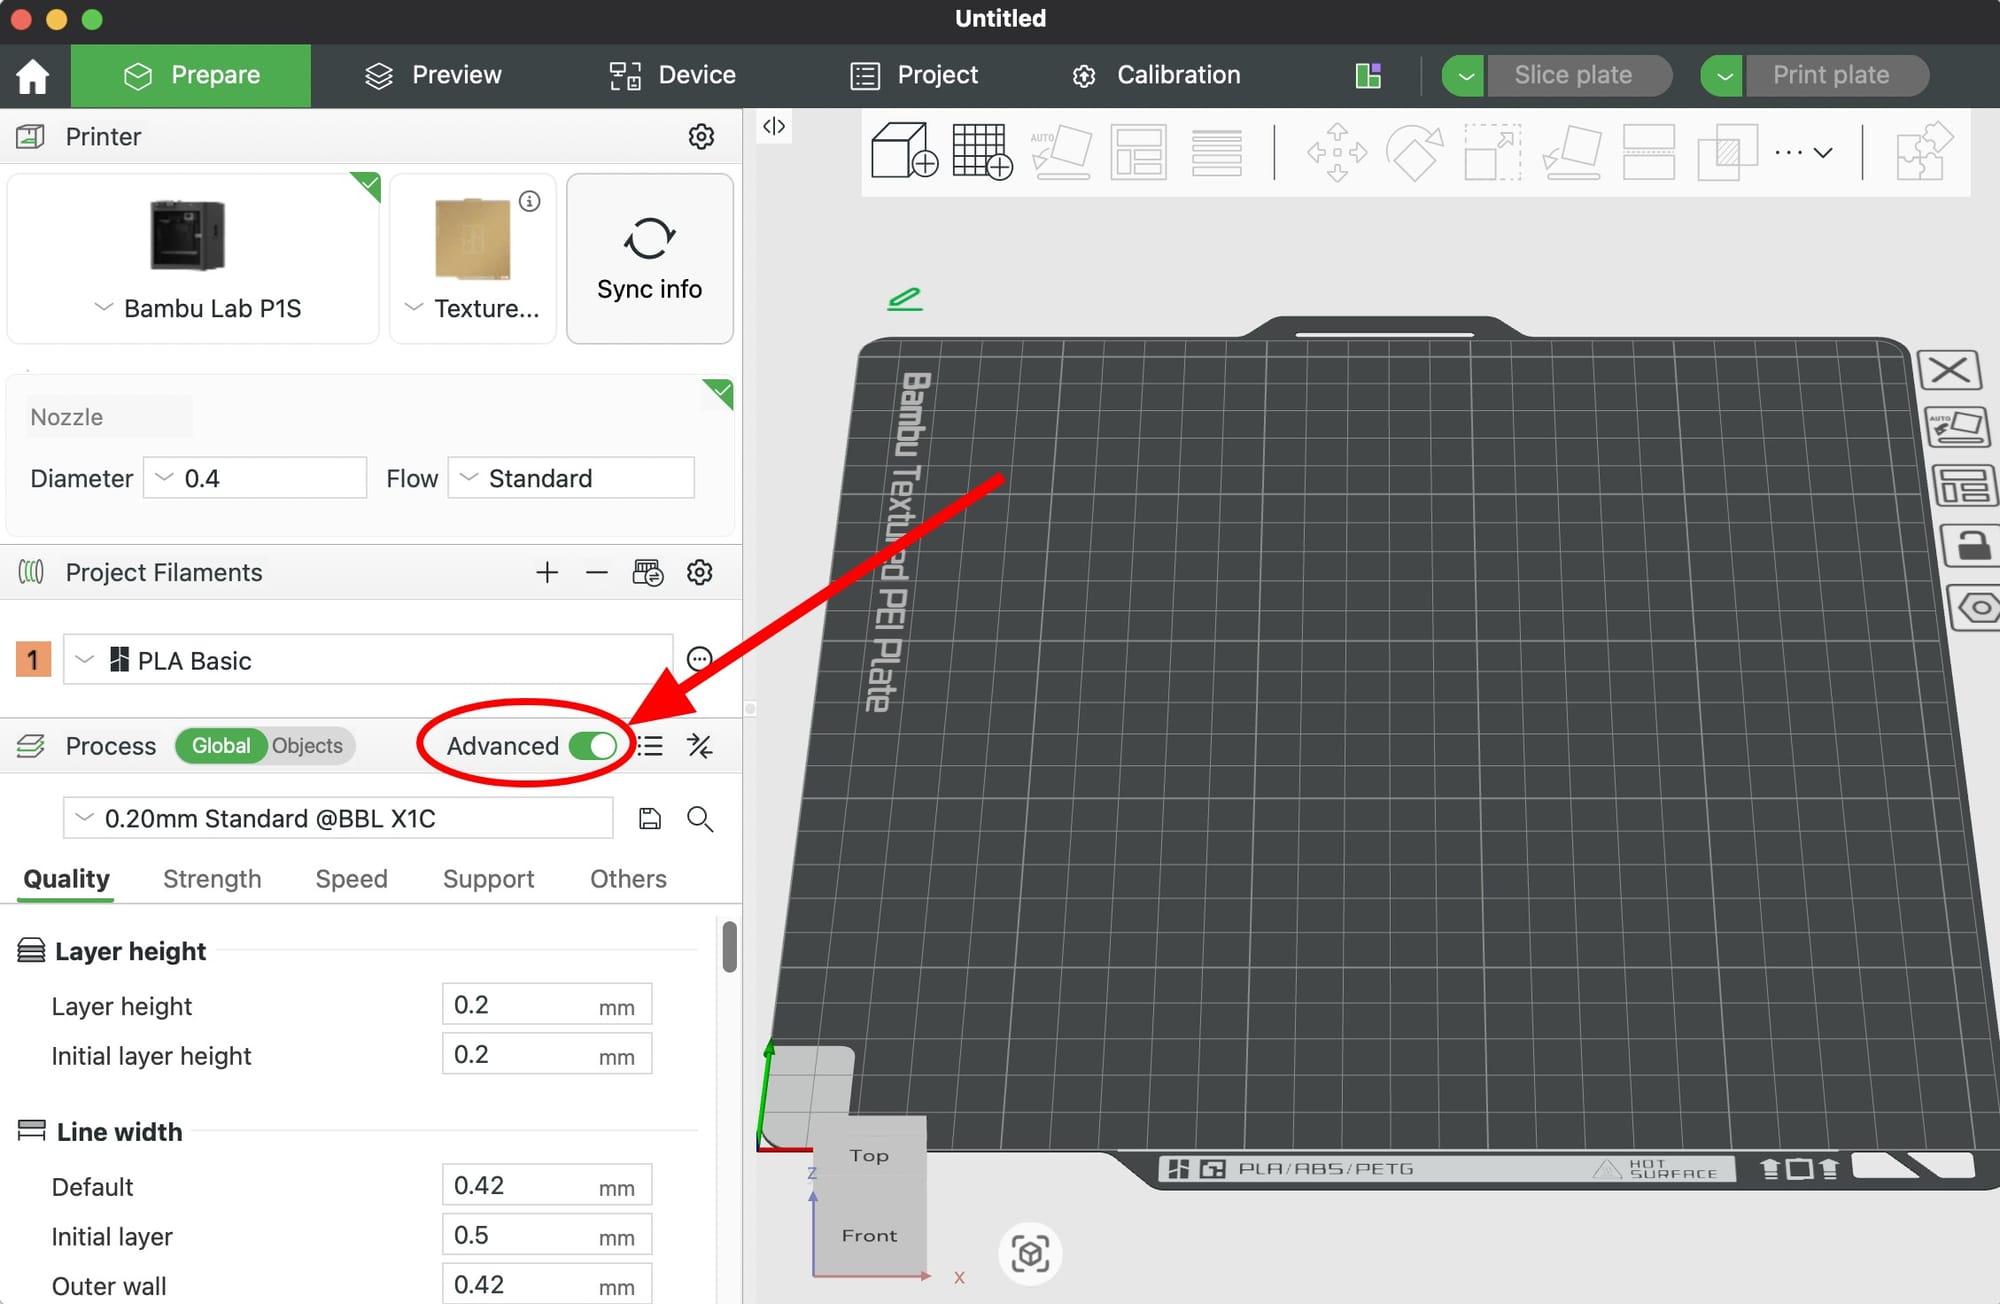
1. Turn On Advanced Mode First
By default, Bambu Studio hides most of its useful settings. Switch the mode selector in the top right from Simple to Advanced (or Developer if you really want everything). Nearly every tip below requires Advanced mode.
2. Stick With the Built-In Filament Profiles
Bambu Lab presets for PLA, PETG, PETG-HF, ABS, and TPU are already tuned for Bambu printers. Beginners waste hours tweaking temperatures they do not need to touch. Pick the Bambu preset that matches your filament, or the Generic PLA profile for third-party spools, and only adjust if you see a specific problem.
If you are using Bambu's own filament with RFID, the printer auto-loads the profile. Do not override it.
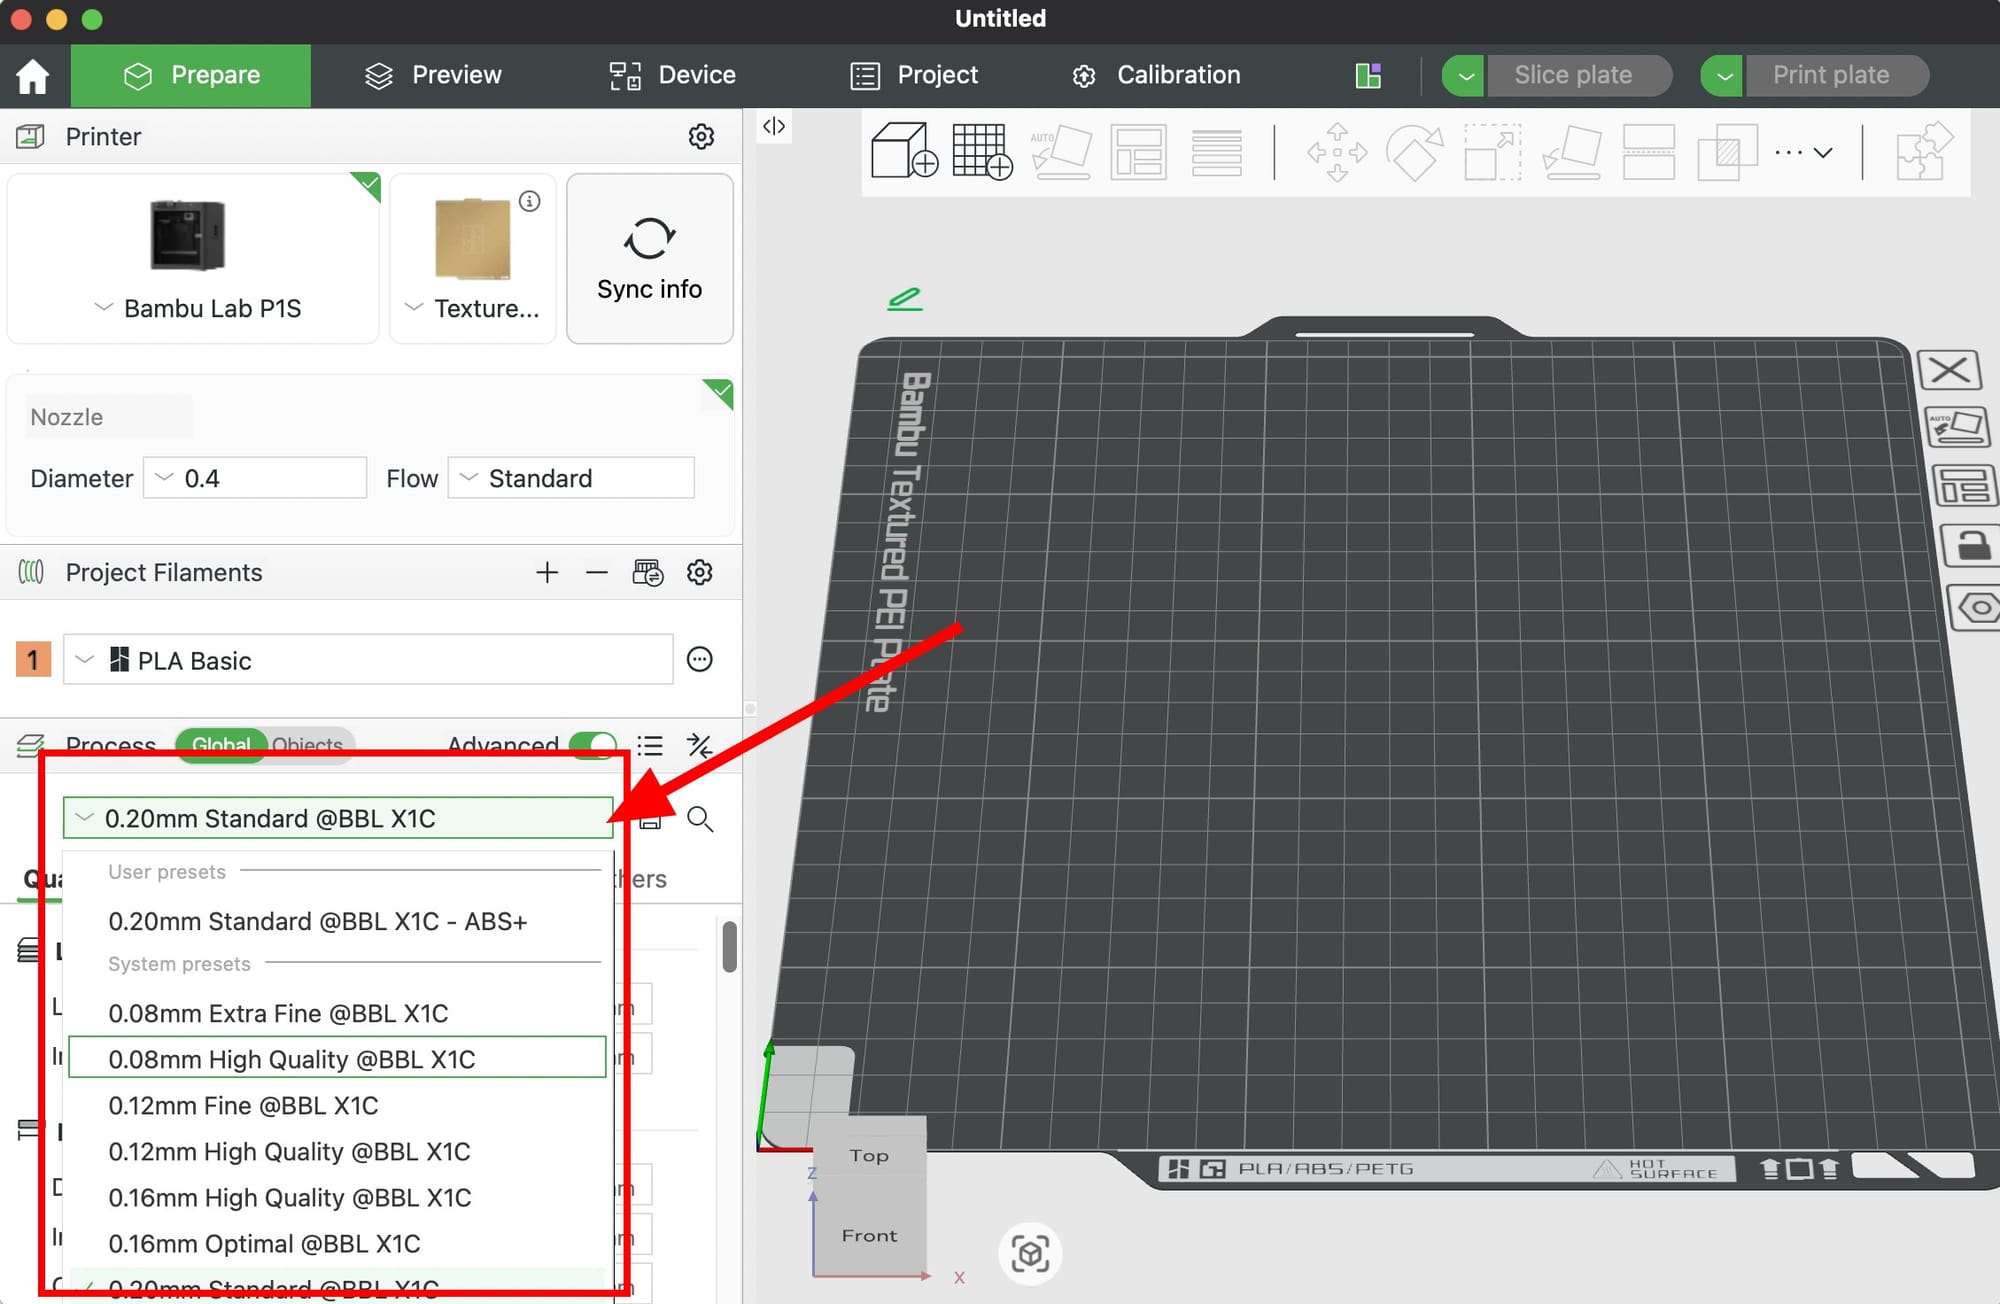
3. Use 0.20mm Layer Height as Your Default
The 0.20mm Standard process preset is the sweet spot for almost every print. Smaller layer heights like 0.12mm double your print time for detail you often cannot see. Larger heights like 0.28mm are fine for rough drafts but show obvious layer lines.
Rule of thumb:
- 0.20mm: default for everything
- 0.12mm or 0.16mm: miniatures, jewelry, display pieces
- 0.28mm: large functional parts where speed matters more than looks
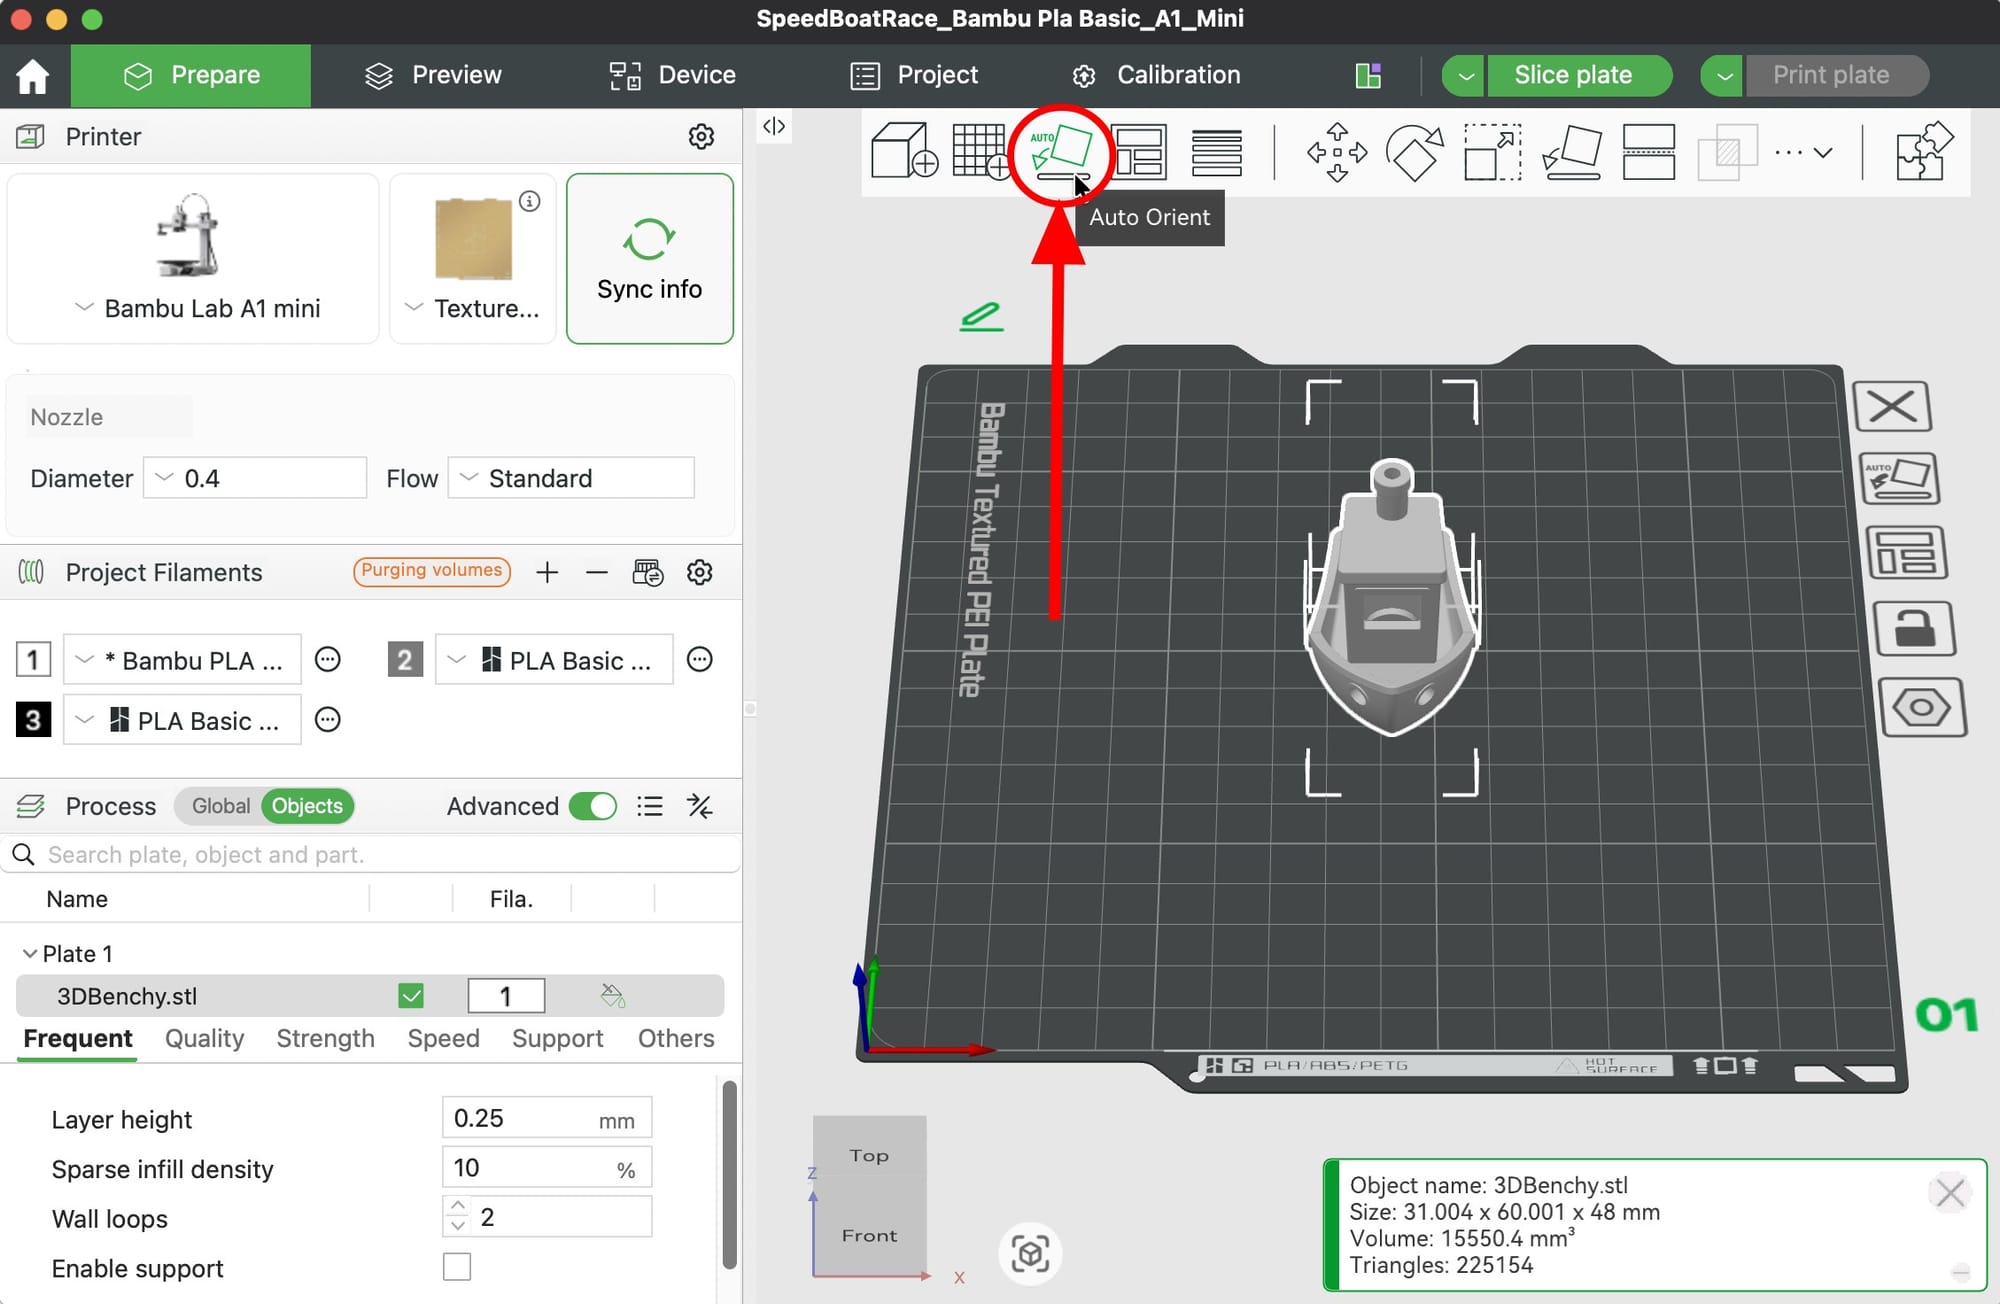
4. Always Hit Auto Orient Before Slicing
The Auto Orient tool in the left toolbar rotates your model to minimize supports and maximize bed contact. It takes one click and often cuts print time by 20 to 40 percent while reducing cleanup.
For flat-bottomed parts, use Lay on Face instead and click the face you want on the build plate.
5. Keep Infill at 15% Gyroid
The default 15% sparse infill is strong enough for 90% of prints. Swap the pattern to Gyroid in the Strength tab for the best strength-to-weight ratio. Only push infill higher than 25% for parts that take real mechanical load, like brackets, hooks, or tool holders.
Going above 40% rarely makes prints meaningfully stronger. The walls do most of the work.
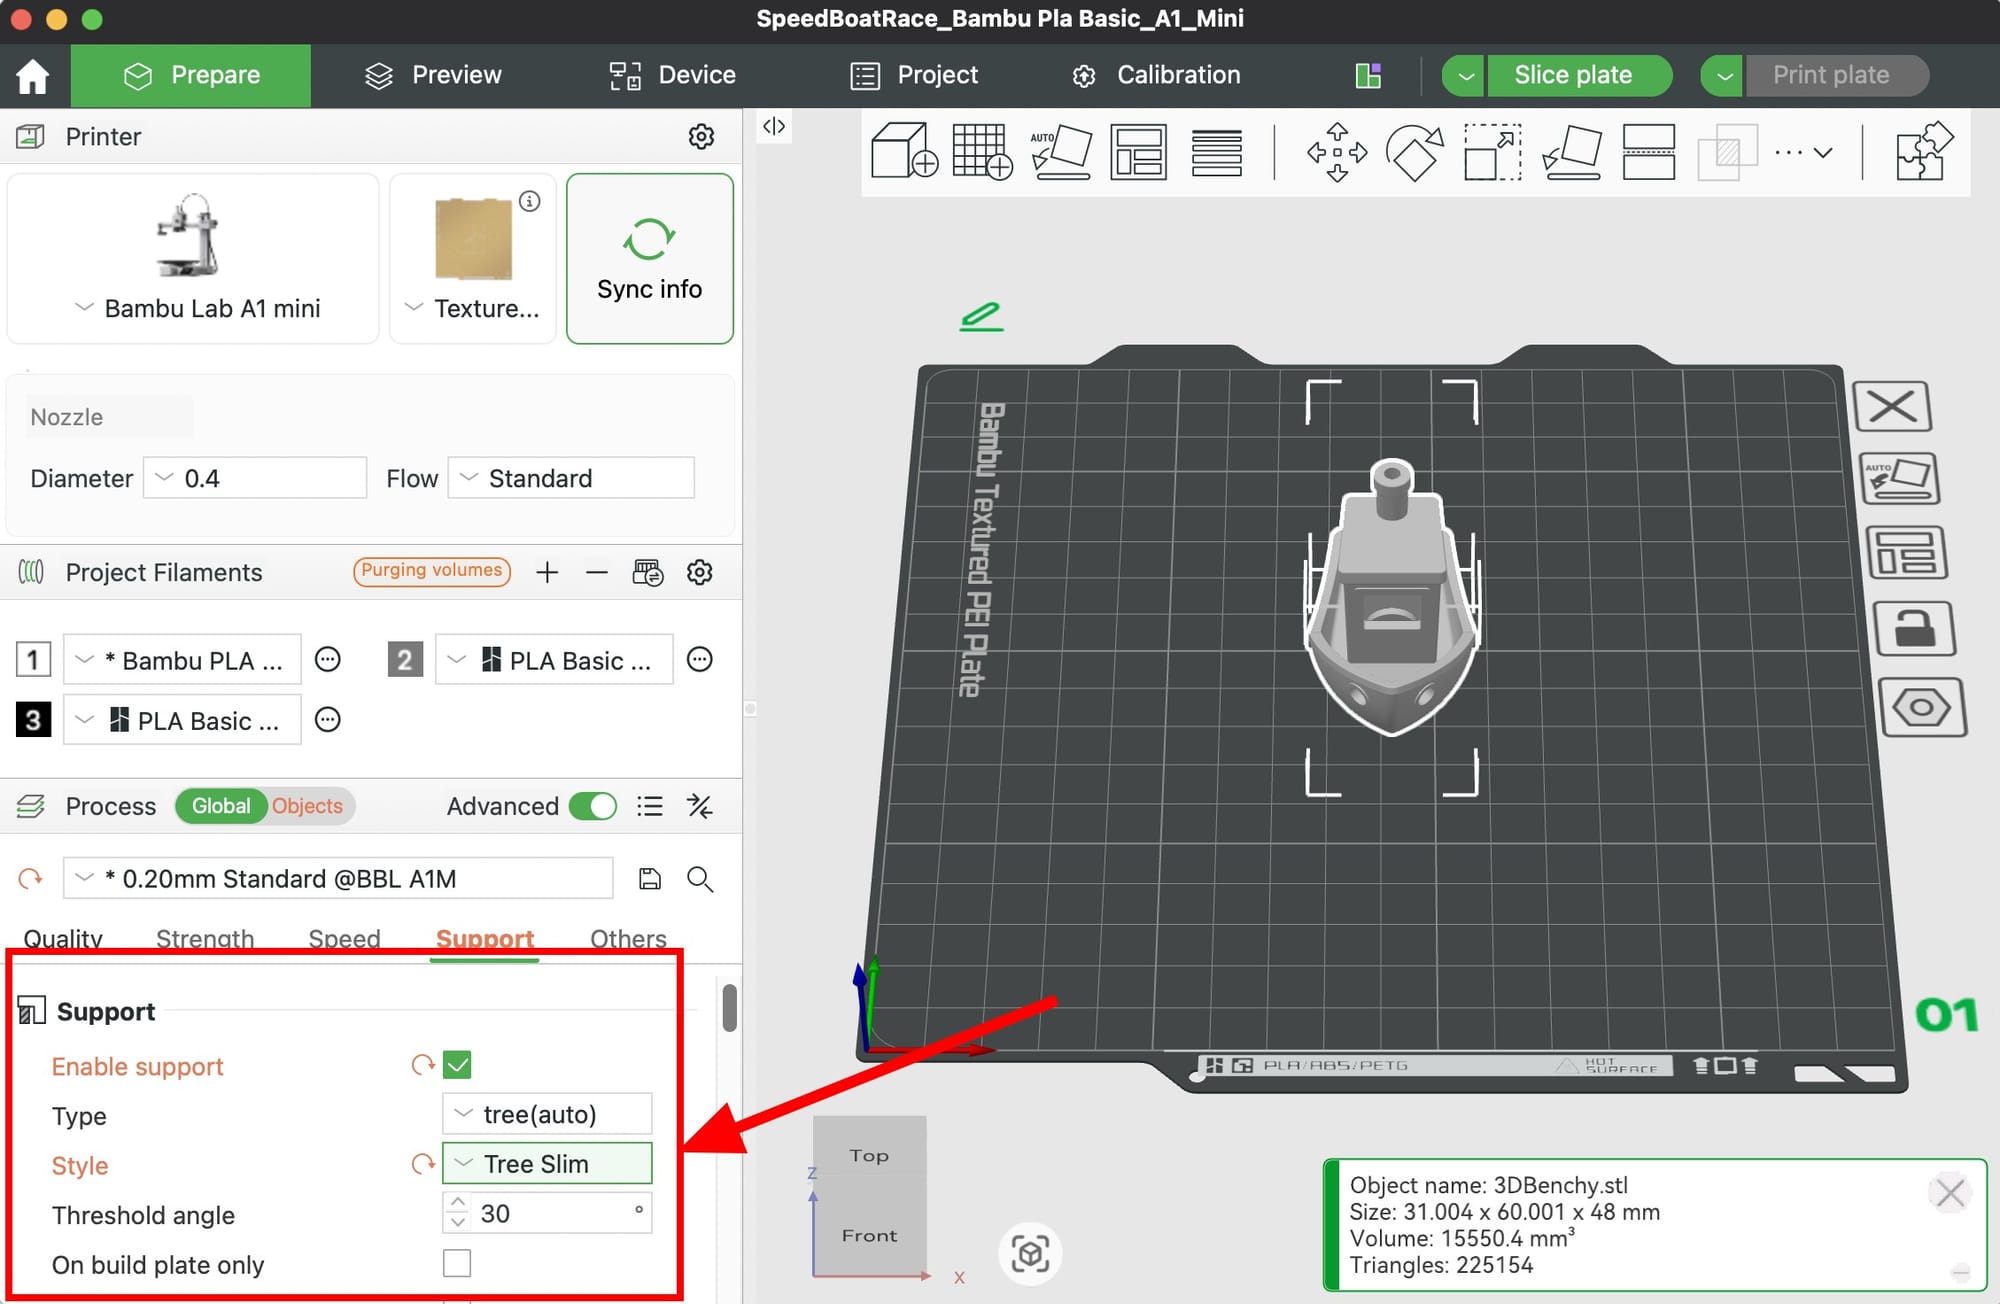
6. Use Tree (Slim) Supports to Save Filament and Cleanup Time
Normal supports waste filament and leave ugly scars. In the Support tab, set:
- Type: tree (auto)
- Style: Tree Slim
Tree Slim supports use up to 40% less filament than normal supports, snap off by hand, and leave almost no marks on the model. For heavy overhangs where you need extra reliability, switch to Hybrid Tree.
7. Add a Brim for Tall or Small-Base Prints
If your model has a small footprint, tall thin walls, or is prone to warping (ABS, PETG), turn on a brim. In the Others tab:
- Brim type: outer brim only
- Brim width: 5mm
- Brim-object gap: 0mm
For models that only warp at corners, use Brim Ears (also called "painted brim") to place brim only where needed. This saves cleanup time on the rest of the part.
8. Change Wall Order to Outer/Inner for Cleaner Surfaces
In the Quality tab under Advanced, find Order of walls and set it to Outer wall first, then inner walls. Printing the outer wall before the inner walls gives you crisper detail and smoother visible surfaces because there is no pressure bleed-through from the inner perimeters.
This is a free quality upgrade with almost no speed cost.

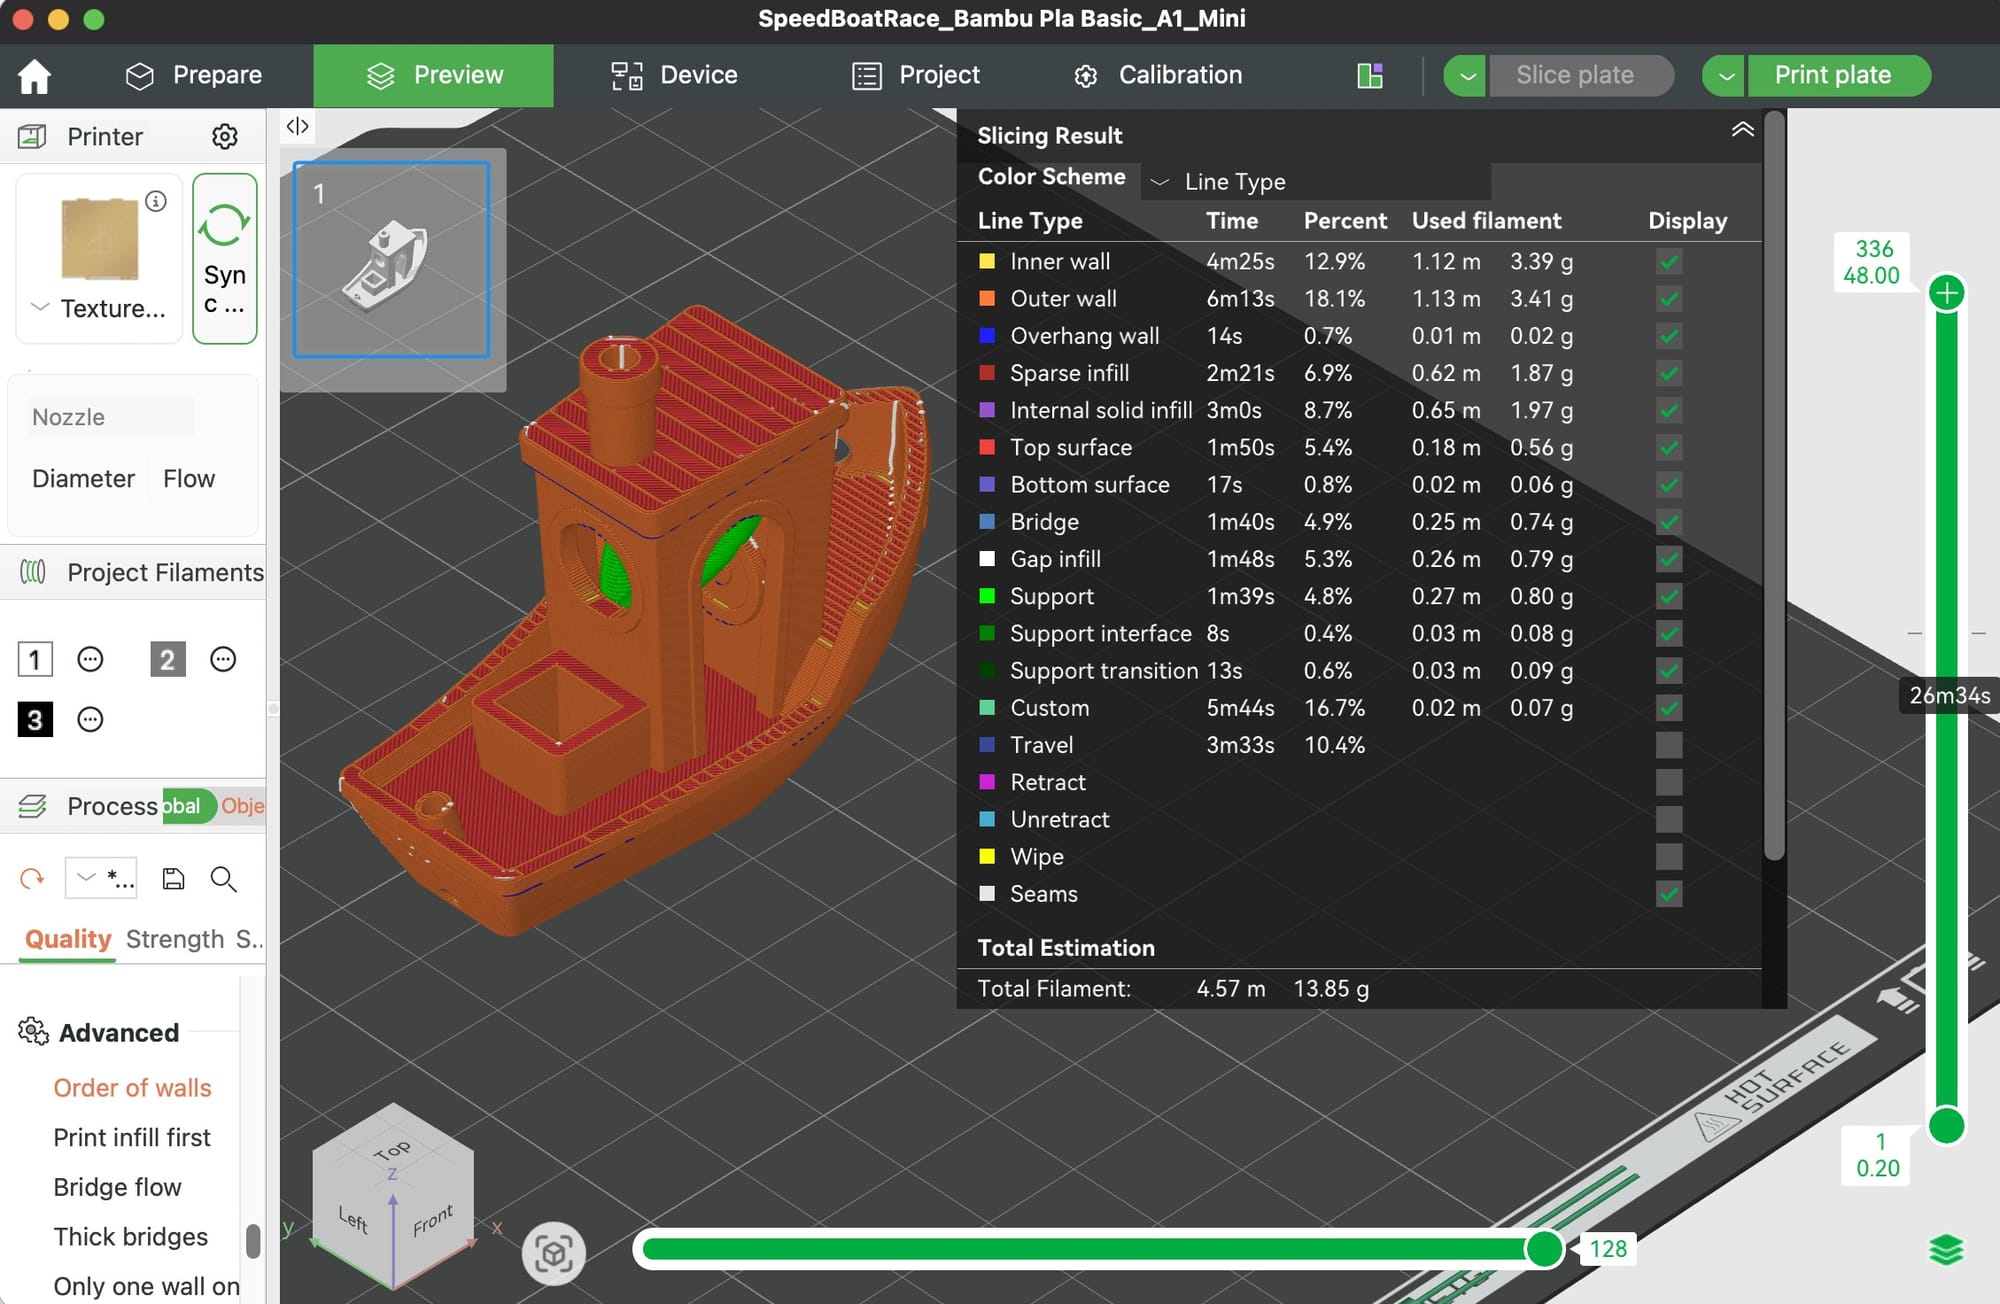
9. Always Check the Preview Before You Print
Before you click Print Plate, click Preview and scrub the layer slider from bottom to top. You are looking for:
- Floating layers that need supports
- Gaps between walls and infill
- A clean, continuous first layer with no skipped areas
- Seams (Z-scars) on a hidden side, not the front of your model
Use Seam Painting to force the seam onto a back edge if you see it on a visible face. Thirty seconds of preview checking saves hours of failed prints.
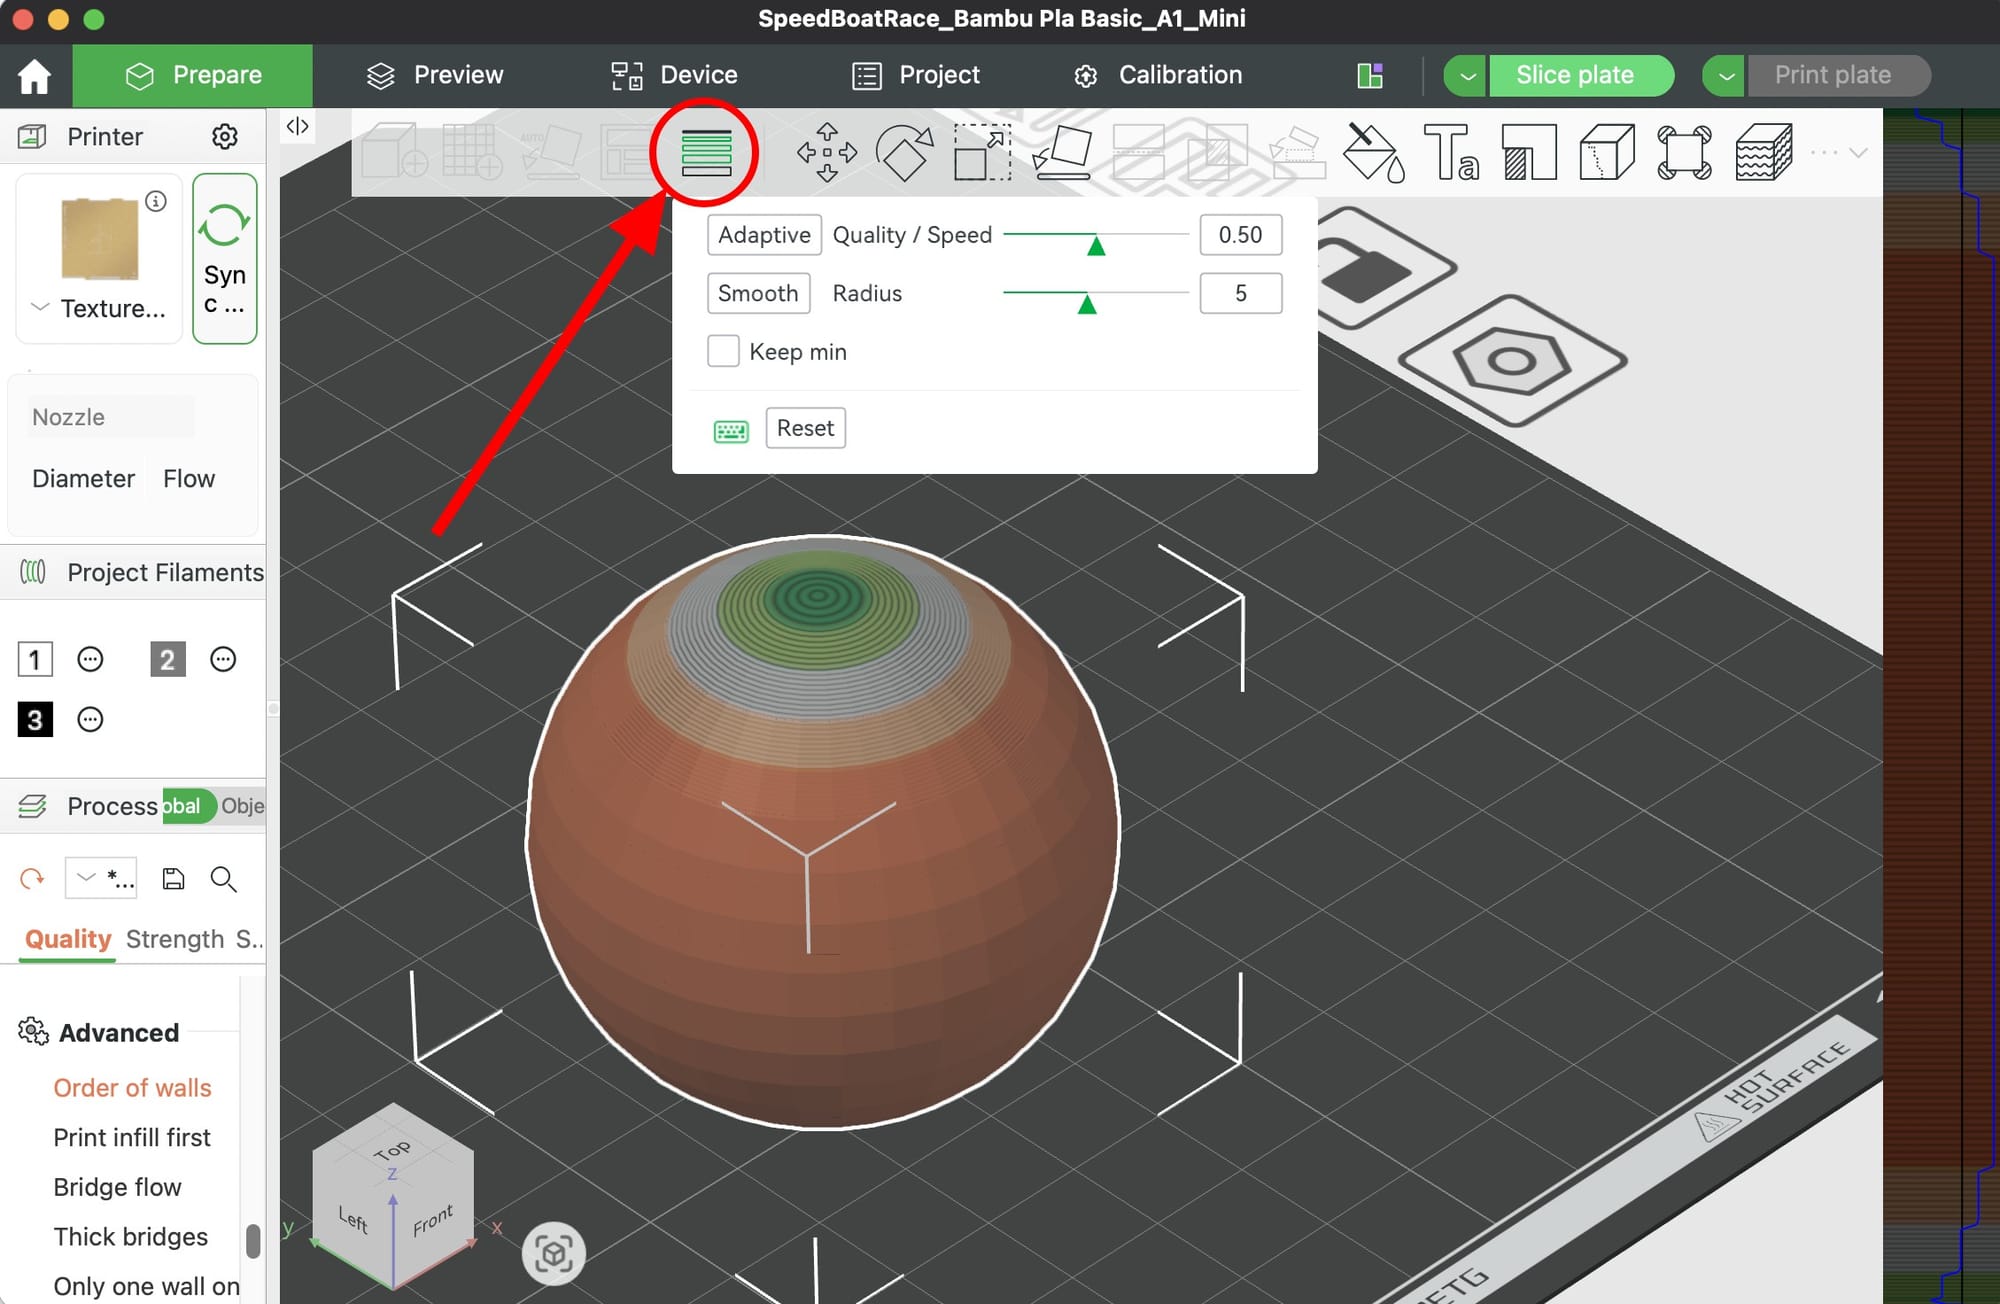
10. Enable Variable Layer Height for Curved Models
For models with both detailed curves and flat boring sections (busts, figurines, vases, organic shapes), turn on Variable Layer Height from the left toolbar. Bambu Studio automatically uses thin layers where the model has detail and thick layers where it does not.
You get the smoothness of a 0.12mm print with print times closer to 0.20mm. It is one of the best features in the slicer and almost nobody turns it on.
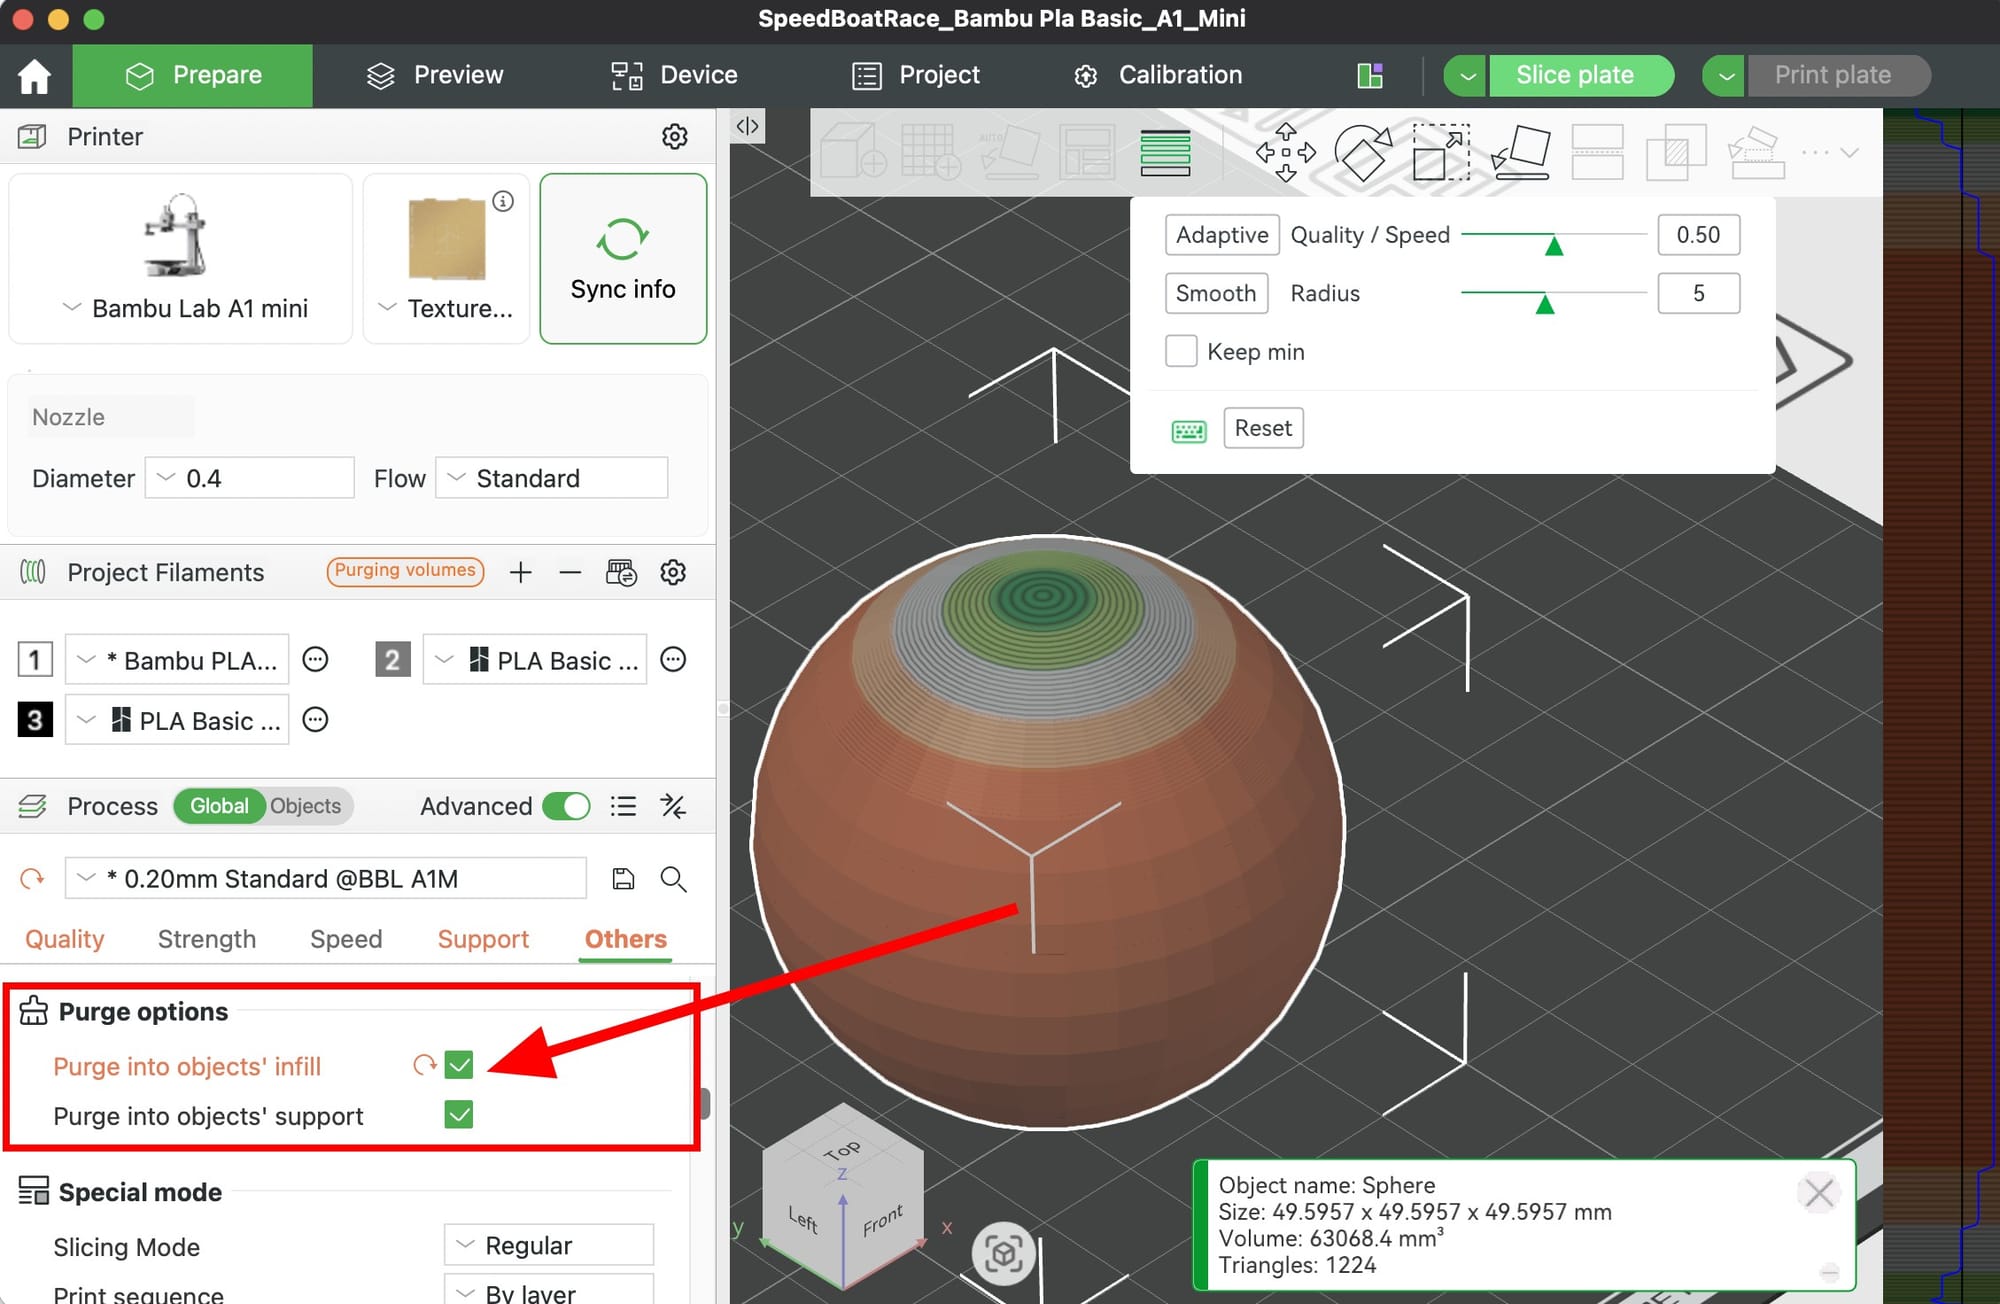
Bonus: Flush Into Infill for Multi-Color Prints
If you print with an AMS, multi-color prints waste a shocking amount of filament on the purge tower. In the Others tab, enable Flush into objects infill and Flush into objects support. Bambu Studio reuses the color-change purge as hidden infill instead of throwing it away. You can cut waste by 30 to 60 percent.
Final Thoughts
You do not need to memorize every setting in Bambu Studio to get great prints. Turn on Advanced mode, use Bambu's presets as your baseline, and apply the 10 tweaks above. Change one setting at a time so you actually learn what each one does.
Print a small calibration cube or a Benchy after big setting changes. Your prints will get cleaner, faster, and cheaper within a week.
Happy printing.