How to 3D Print Famous Terrains: Grand Canyon, Grand Tetons, Mount Everest and More

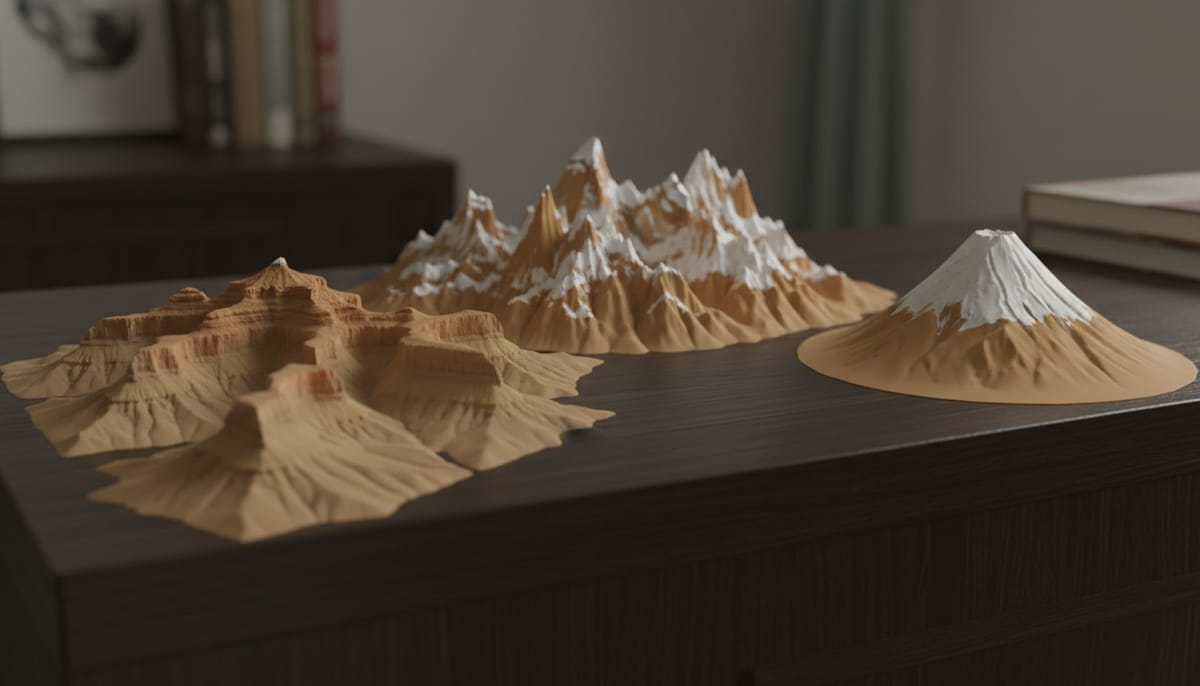
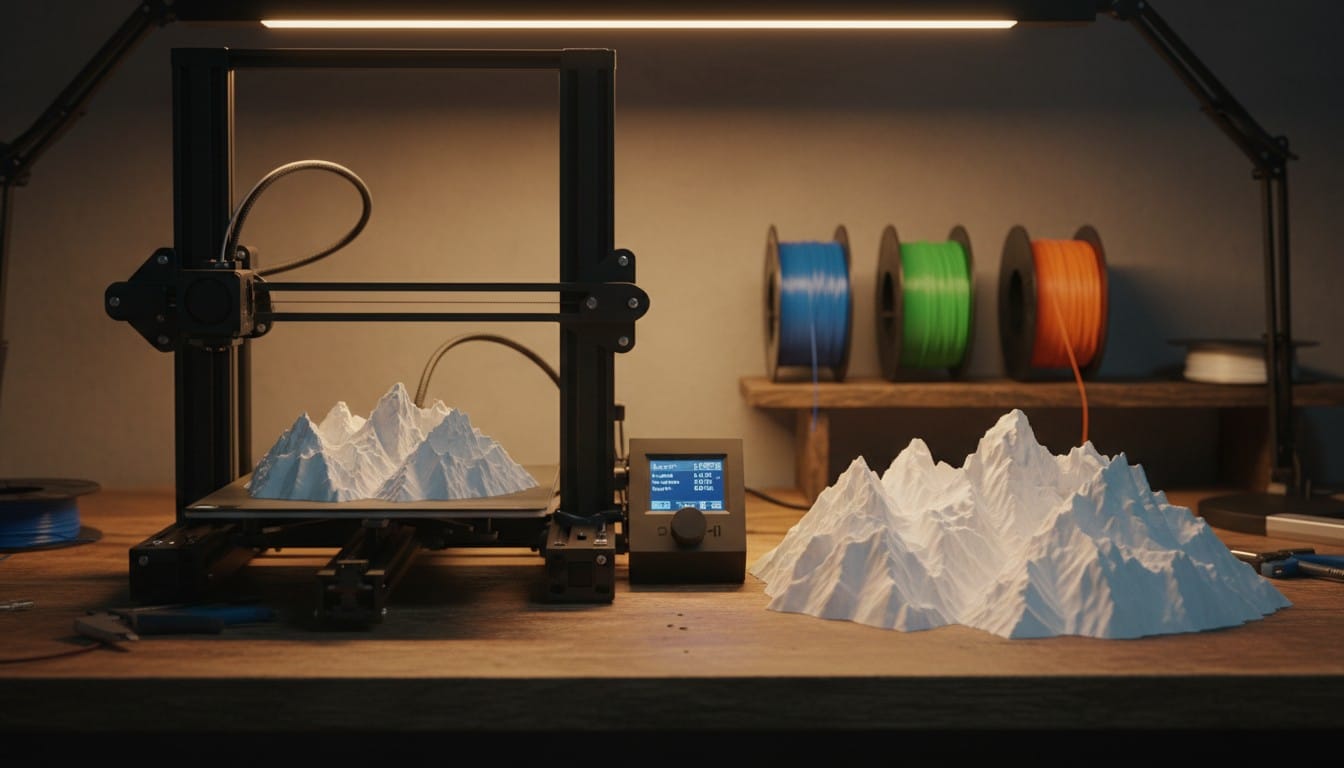
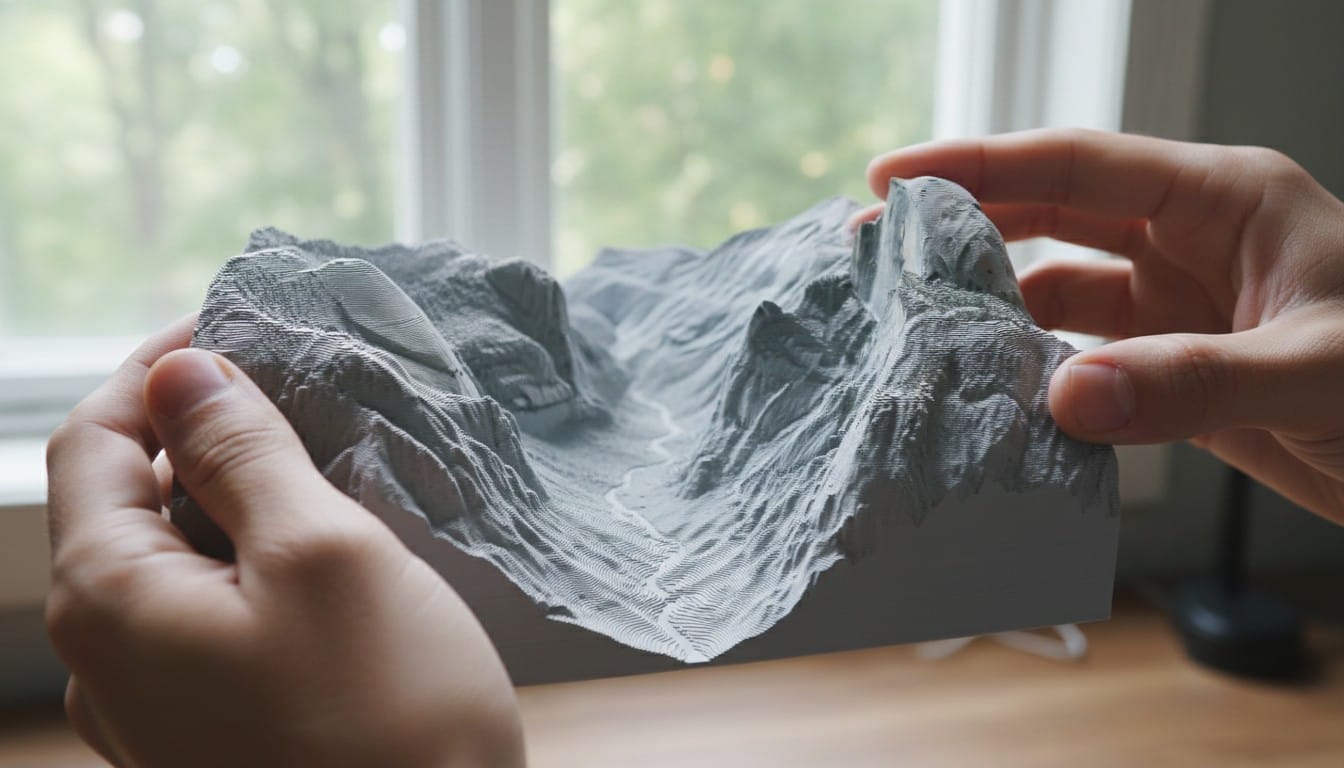
There is something powerful about holding a mountain range in the palm of your hand. 3D printed terrain models turn iconic landscapes into physical objects you can display, study, and share. Whether it is the layered canyon walls of the Grand Canyon, the jagged peaks of the Grand Tetons, or the volcanic cone of Mount Fuji, these models capture geography in a way that photos and flat maps never will.
This guide walks you through generating and 3D printing detailed terrain models of the world's most famous landscapes using PrintPal's 3D Map Maker.
Why 3D Print Terrain Models?
Display and decor. A 3D printed Grand Canyon on your desk is a conversation starter. Terrain models of places you have visited make meaningful keepsakes that are impossible to buy off the shelf.
Education. Geography teachers use physical terrain models to teach erosion, plate tectonics, watershed systems, and elevation. Students retain more when they can trace a river valley with their fingers instead of staring at a textbook diagram.
Hiking and trip planning. Visualize elevation gain, ridge lines, and trail routes before you go. A printed model of the terrain gives you spatial awareness that contour lines on a 2D map struggle to communicate.
Gift giving. A 3D printed model of someone's favorite national park, the mountain they summited, or the coastline where they got married is a deeply personal gift.
How to Generate a Terrain Model
Step 1: Open the 3D Map Maker
Go to PrintPal's 3D Map Maker and log in to your account.
Step 2: Enter the Location
Type the name of the terrain or landscape you want to generate. Be specific with your location name to get the best results.
Good location inputs:
- "Grand Canyon, Arizona"
- "Grand Teton National Park, Wyoming"
- "Mount Everest, Nepal"
- "Matterhorn, Switzerland"
- "Crater Lake, Oregon"
Avoid vague inputs like "big canyon" or "mountains." The AI produces better terrain when it can reference a specific real-world location.
Step 3: Set Generation Type to Landscape
This is the most important setting for terrain models. Select Landscape instead of City. The Landscape mode tells the AI to emphasize topography, elevation changes, ridgelines, valleys, rivers, and natural contours rather than buildings and roads.
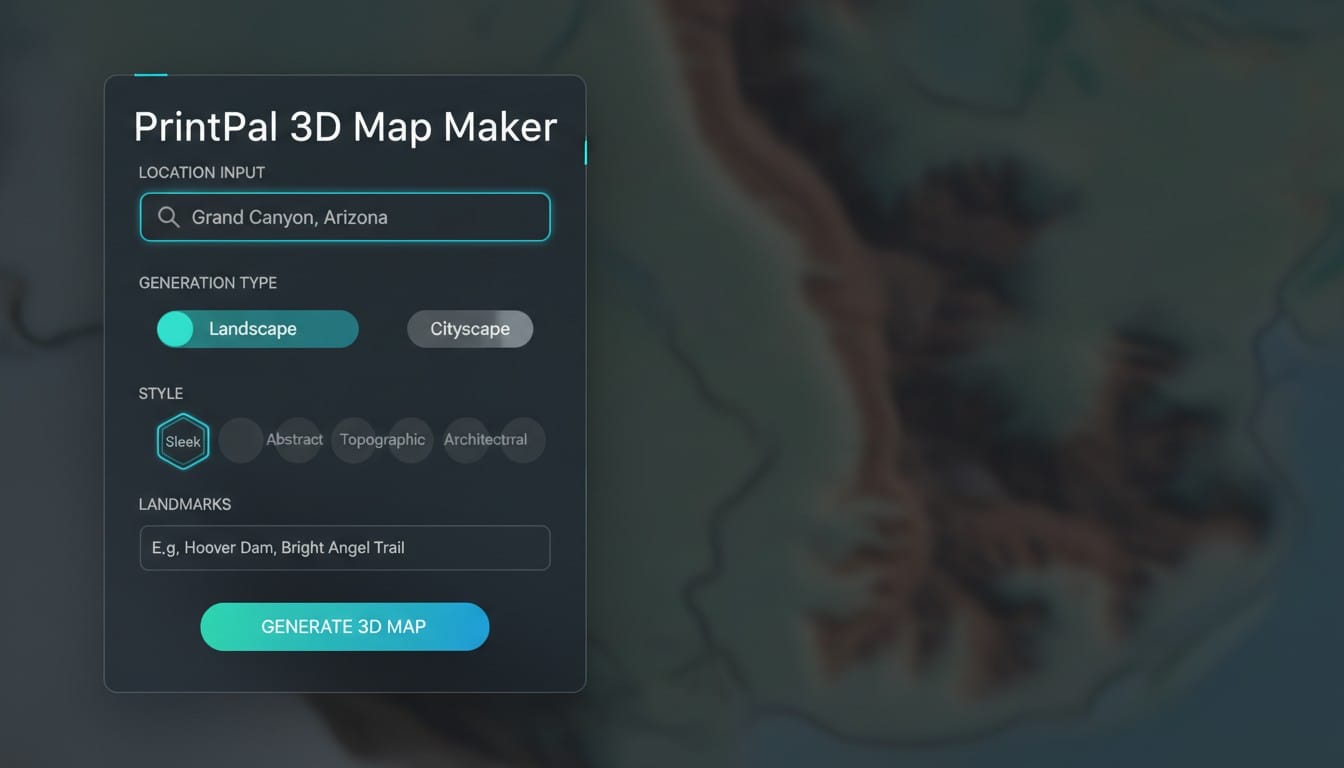
Step 4: Choose Your Style
Both styles work well for terrain, but they produce different results:
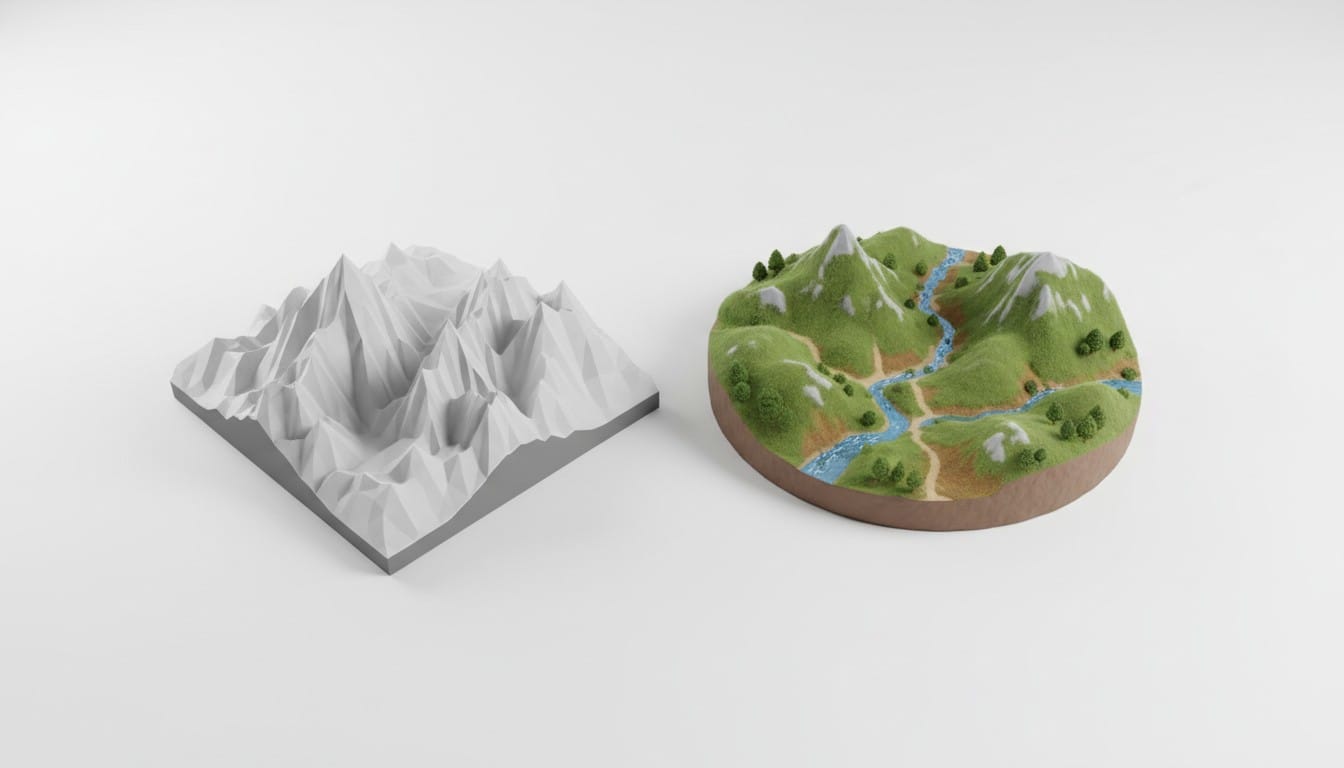
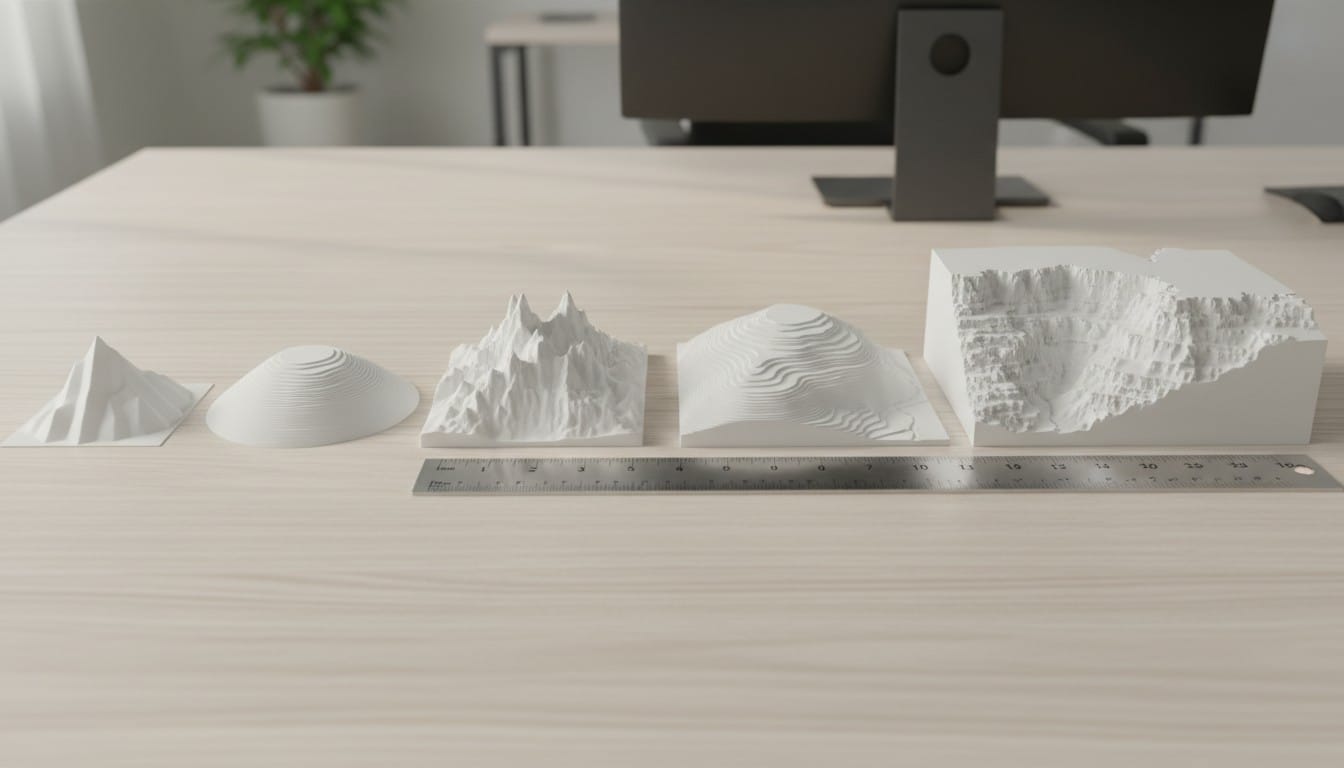
Sleek: Produces a clean, monochrome topographic model with sharp elevation layers and a maquette-like feel. Ridges and valleys are crisp and well-defined. Best when you want a scientific or architectural look, or when you plan to paint the model yourself after printing.
Miniature: Produces a softer, more colorful diorama with rounded terrain forms on a platform base. Green vegetation areas, blue water features, and warm earth tones are baked into the model appearance. Best for display pieces and gifts where you want the model to look polished straight off the printer.
Step 5: Add Landmark Names (Optional)
For terrain that includes notable peaks, formations, or features, type them in the landmarks field. This helps the AI emphasize the right features.
Examples:
- For Grand Canyon: "South Rim, Colorado River, Bright Angel Trail"
- For Grand Tetons: "Grand Teton peak, Jenny Lake, Snake River"
- For Yosemite: "Half Dome, El Capitan, Yosemite Falls"
Step 6: Generate and Download
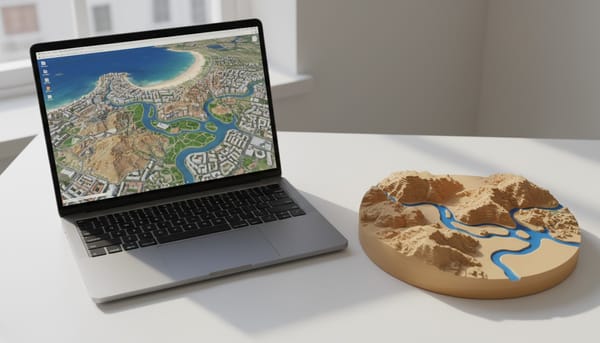
Click Generate 3D Map and wait for the process to complete. The AI first generates a stylized terrain image and then converts it into a high-detail 3D model. Once finished, inspect the model in the interactive 3D viewer, then download as STL for 3D printing.
Famous Terrains to Generate
Here are some of the best landscapes to try, along with recommended settings and what makes each one print well.
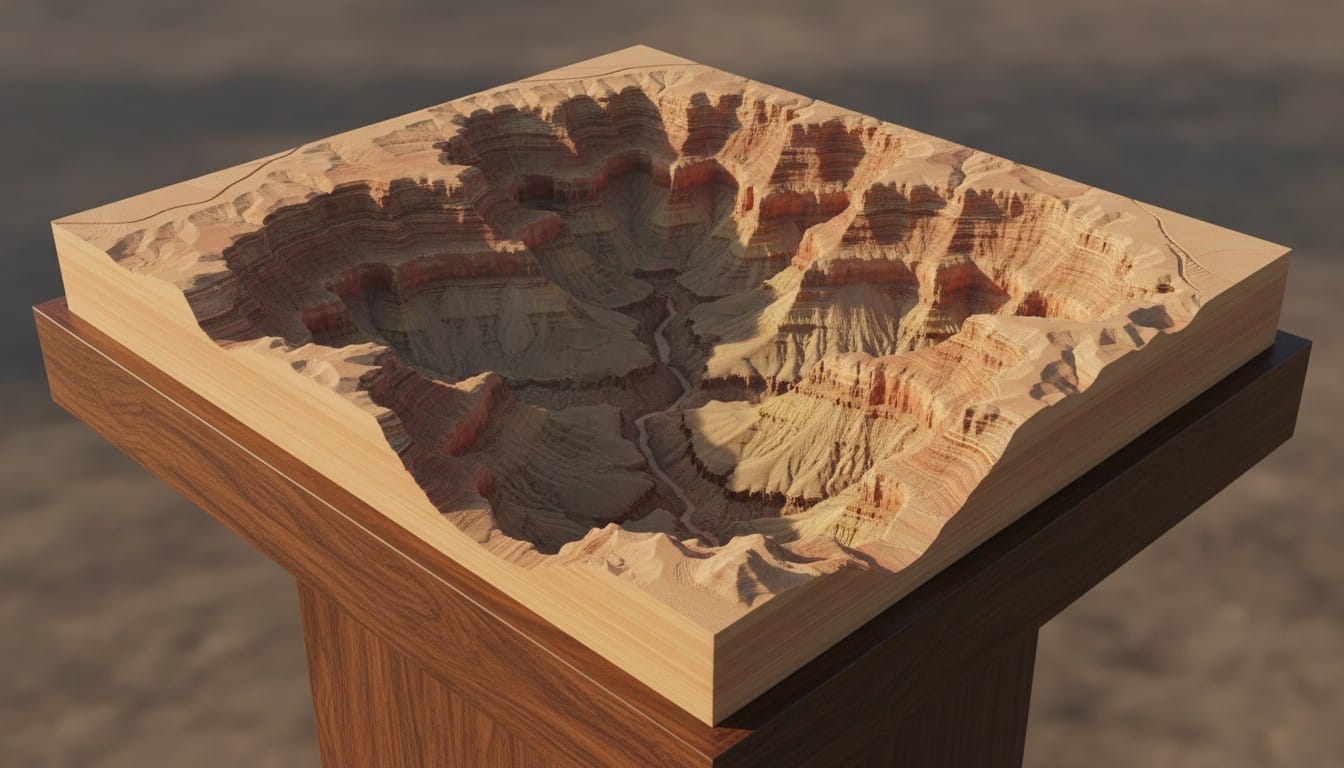
Grand Canyon, Arizona
The Grand Canyon is one of the best terrains for 3D printing because of its dramatic layered geology. The canyon walls create natural stepped contours that translate beautifully into a physical model.
Recommended settings:
- Location: "Grand Canyon, South Rim, Arizona"
- Type: Landscape
- Style: Sleek
- Landmarks: "Colorado River, Bright Angel Canyon, South Rim"
What to expect: Deep canyon channels cutting through layered plateau terrain. The Colorado River appears as a narrow groove at the canyon floor. The rim edges are sharp and well-defined.
Pro tip for image upload: Take a screenshot of the Grand Canyon from Google Earth at a slight angle to capture both the rim and the canyon depth. This produces more dramatic elevation in the 3D model than a flat top-down view.
Grand Teton National Park, Wyoming
The Tetons are defined by their abrupt, jagged peaks rising sharply from the flat valley floor of Jackson Hole. This extreme elevation contrast makes for a striking 3D print.
Recommended settings:
- Location: "Grand Teton National Park, Wyoming"
- Type: Landscape
- Style: Sleek
- Landmarks: "Grand Teton, Mount Moran, Jenny Lake, Snake River"
What to expect: Sharp peak silhouettes rising from a relatively flat base. Jenny Lake appears as a depression at the foot of the range. The Snake River winds through the valley floor.

Mount Everest and the Himalayas
The highest terrain on Earth produces incredible 3D prints because of the extreme elevation differences and complex ridge systems.
Recommended settings:
- Location: "Mount Everest, Khumbu region, Nepal"
- Type: Landscape
- Style: Sleek
- Landmarks: "Mount Everest summit, Lhotse, Nuptse, Khumbu Glacier"
What to expect: A complex web of ridges, glacial valleys, and peaks. The summit of Everest stands clearly above surrounding terrain. Glacier channels appear as smooth valleys between sharp ridges.
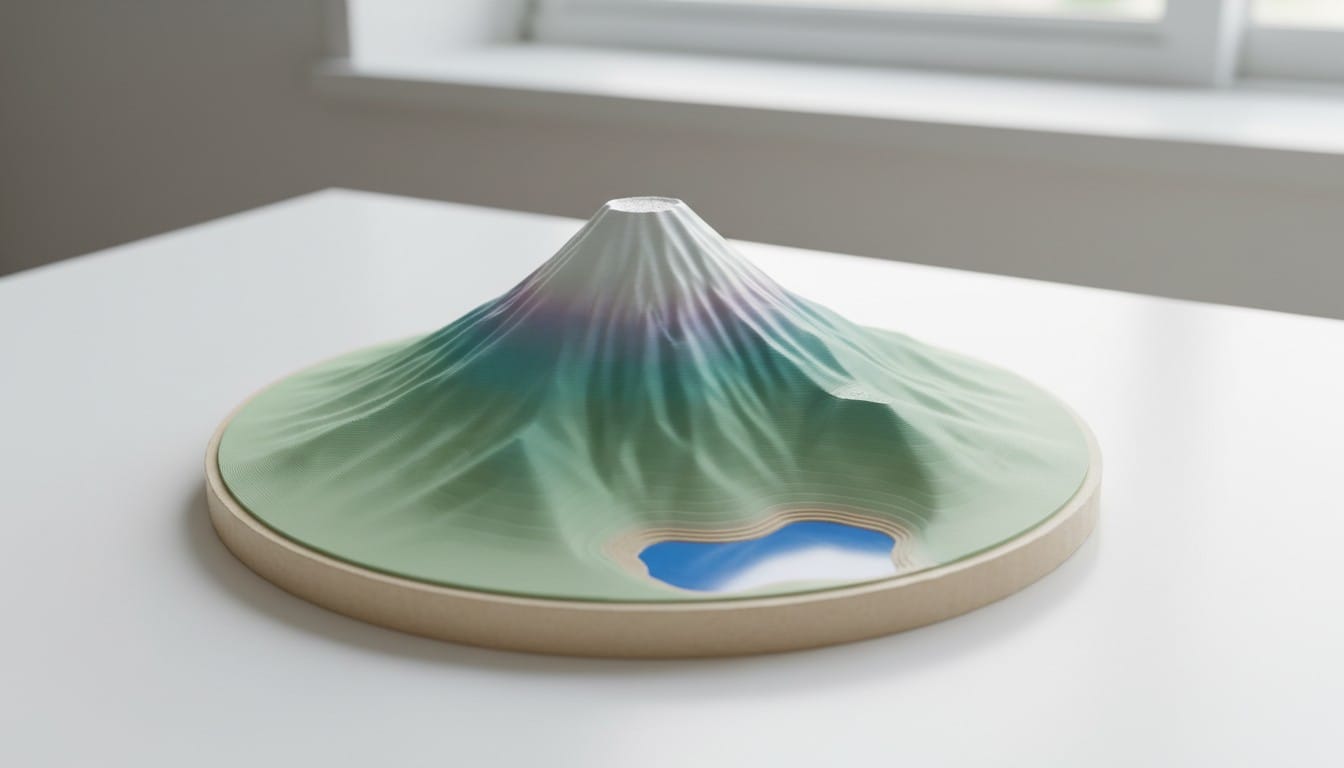
Mount Fuji, Japan
Mount Fuji's near-perfect volcanic cone shape makes it one of the cleanest terrain prints. The symmetrical profile is instantly recognizable.
Recommended settings:
- Location: "Mount Fuji, Japan"
- Type: Landscape
- Style: Miniature
- Landmarks: "Mount Fuji summit, Fuji Five Lakes"
What to expect: A clean conical peak rising from relatively flat surrounding terrain. The Miniature style adds a charming quality with soft colors. The lakes at the base appear as smooth depressions.
Matterhorn, Switzerland
The Matterhorn's distinctive pyramidal peak is iconic and translates perfectly to 3D printing. The four sharp faces of the summit produce a model that is recognizable from every angle.
Recommended settings:
- Location: "Matterhorn, Zermatt, Switzerland"
- Type: Landscape
- Style: Sleek
- Landmarks: "Matterhorn summit, Hornli Ridge, Zermatt village"
Crater Lake, Oregon
Crater Lake's caldera creates a natural bowl shape that is satisfying to print and display. The steep inner walls surrounding the deep blue lake make for a visually dramatic model.
Recommended settings:
- Location: "Crater Lake, Oregon"
- Type: Landscape
- Style: Miniature
- Landmarks: "Crater Lake, Wizard Island, Rim Village"
More Great Terrain Picks
Here are additional famous terrains that produce excellent 3D prints:
| Terrain | Location Input | Why It Prints Well |
|---|---|---|
| Denali | "Denali, Alaska" | Massive isolated peak with glacial ridges |
| Monument Valley | "Monument Valley, Utah" | Flat desert floor with dramatic vertical buttes |
| Niagara Falls | "Niagara Falls, Ontario" | Horseshoe-shaped cliff edge and river gorge |
| Santorini | "Santorini caldera, Greece" | Volcanic caldera with steep coastal cliffs |
| Table Mountain | "Table Mountain, Cape Town" | Flat-topped summit with sheer cliff faces |
| Zhangjiajie | "Zhangjiajie, China" | Tall narrow sandstone pillars rising from forest |
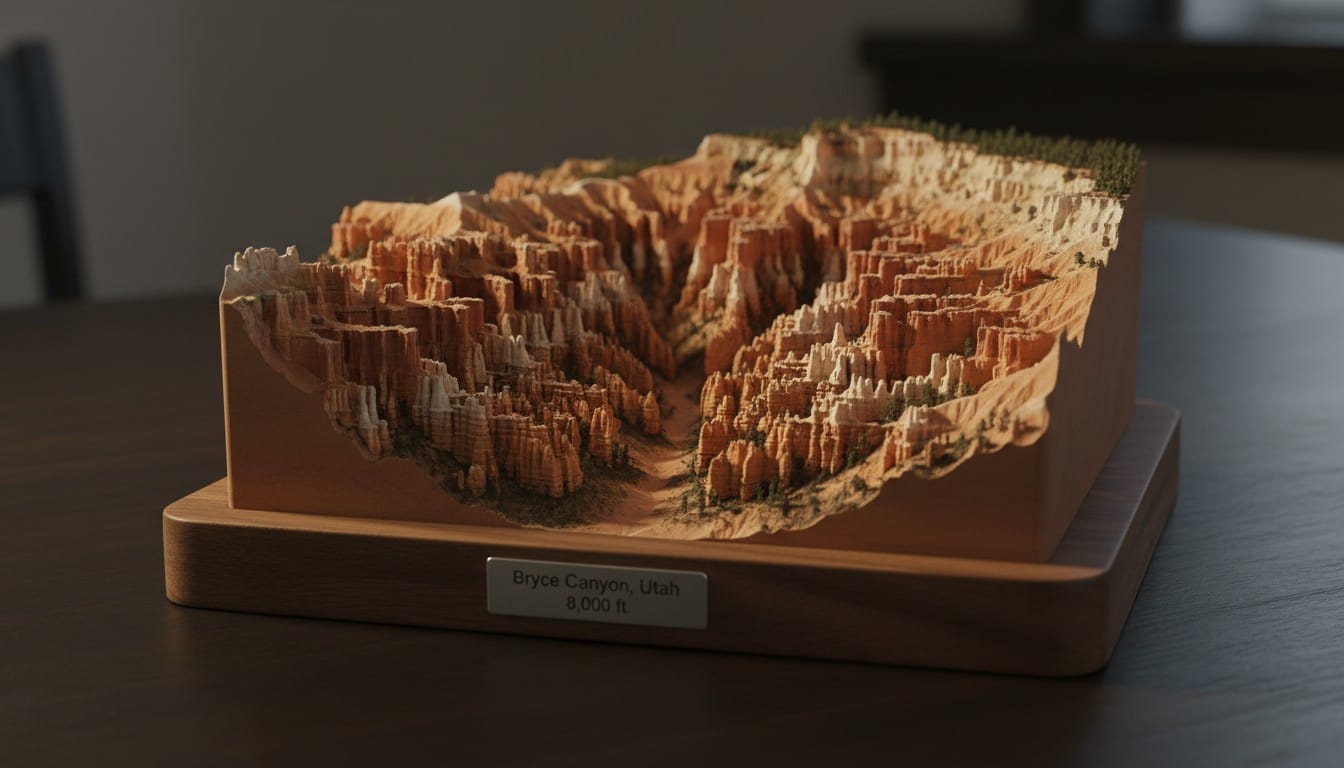
| Bryce Canyon | "Bryce Canyon, Utah" | Dense hoodoo formations and amphitheater shape |
| Torres del Paine | "Torres del Paine, Chile" | Dramatic granite towers and glacial lakes |
| Dolomites | "Tre Cime di Lavaredo, Italy" | Jagged vertical rock towers and alpine valleys |
| Ha Long Bay | "Ha Long Bay, Vietnam" | Hundreds of limestone karst islands in water |
Using Image Uploads for Better Terrain
For terrain models, uploading a reference image often produces more accurate results than text-only generation, especially for specific viewpoints.
Best Sources for Terrain Images
Google Earth is the best source. Switch to 3D mode, navigate to your terrain, and rotate to an angle that shows the elevation profile clearly. Take a screenshot and upload it directly to the 3D Map Maker.
Satellite view from Google Maps or Apple Maps works well for capturing the overall shape of canyons, lakes, and coastlines from directly above.
Topographic maps with elevation shading can also be uploaded. The AI interprets the elevation coloring and translates it into 3D geometry.

Tips for Terrain Screenshots
- Angle your view at roughly 30-45 degrees above the horizon to capture both the elevation profile and the ground layout
- Include the full feature in frame. For a canyon, show both rims. For a mountain, show from base to summit
- Avoid cloud cover in the satellite image. Clouds confuse the AI and produce flat areas in the model
- Higher zoom on a specific peak or canyon section produces more detailed terrain in that area
3D Printing Tips for Terrain Models
Layer Height Matters
Terrain models benefit from fine layer heights more than most prints. Each layer of filament represents an elevation step, so finer layers produce smoother slopes and more natural-looking contours.
- 0.12 mm layer height: Good balance of detail and speed for most terrain prints
- 0.08 mm layer height: Noticeably smoother slopes and ridgelines
- 0.04 mm layer height (resin): Maximum terrain fidelity for small-scale models
Orientation
Print terrain models flat on the build plate with the base down. The natural flat base from the 3D Map Maker provides perfect bed adhesion and eliminates the need for supports in almost all cases.
Scaling Recommendations
- Small display (8-10 cm): Good for desk or shelf collections. Individual peaks are visible but fine details merge together
- Medium display (15-20 cm): The sweet spot for most terrain. Canyon layers, ridgelines, and valleys are all clearly readable
- Large display (25-35 cm): Full impact. Every contour is visible. River channels, glacier paths, and secondary ridges are all distinct
Material Choices
PLA is the standard choice for terrain. It prints cleanly, holds fine detail, and comes in earth-tone colors like sandstone, desert tan, forest green, and stone gray that suit terrain models without any painting.
Wood-fill PLA produces a natural, organic look that works especially well for canyon and mountain terrain. The slight wood grain texture adds realism.
Resin captures the finest terrain details. If you want to see individual ridge textures and micro-contours, resin printing at 0.03-0.05 mm layer height is the way to go.
Post-Processing for Terrain
Dry brushing is the single best technique for terrain models. Apply a light coat of white or cream acrylic paint to a dry brush, wipe off the excess, and lightly drag it across the terrain surface. The paint catches the raised edges of ridges and contours, dramatically enhancing the visual depth.
Wash technique adds depth to canyons and valleys. Thin dark brown or black acrylic paint with water (roughly 10:1), apply it over the model, and wipe off the raised surfaces. The thin paint settles into crevices and channels, creating natural-looking shadows.
Base mounting elevates the presentation. Glue the terrain model to a piece of stained wood, a black acrylic block, or a stone tile. Add a small engraved or printed nameplate with the terrain name and elevation.
Building a Terrain Collection
One of the most rewarding aspects of 3D printed terrain is building a collection over time. Here are some themed collection ideas:
US National Parks: Grand Canyon, Yosemite, Grand Tetons, Crater Lake, Denali, Zion, Glacier, Mount Rainier. Print them all at the same scale and display on a shelf.
Seven Summits: Everest, Aconcagua, Denali, Kilimanjaro, Elbrus, Vinson, Puncak Jaya (or Kosciuszko). The ultimate mountaineering display.
Volcanoes of the World: Fuji, Vesuvius, Kilauea, Pinatubo, Santorini, Krakatoa. Each caldera and cone shape is distinct.
Places I Have Been: Print a terrain model for every major landscape you have visited. Far more meaningful than a fridge magnet collection.

Get Started
Pick a famous terrain, head to the 3D Map Maker, select Landscape mode, and generate your first terrain model. The whole process takes about five minutes from input to downloadable STL file. From there, it is just a matter of hitting print and watching a mountain take shape on your build plate.