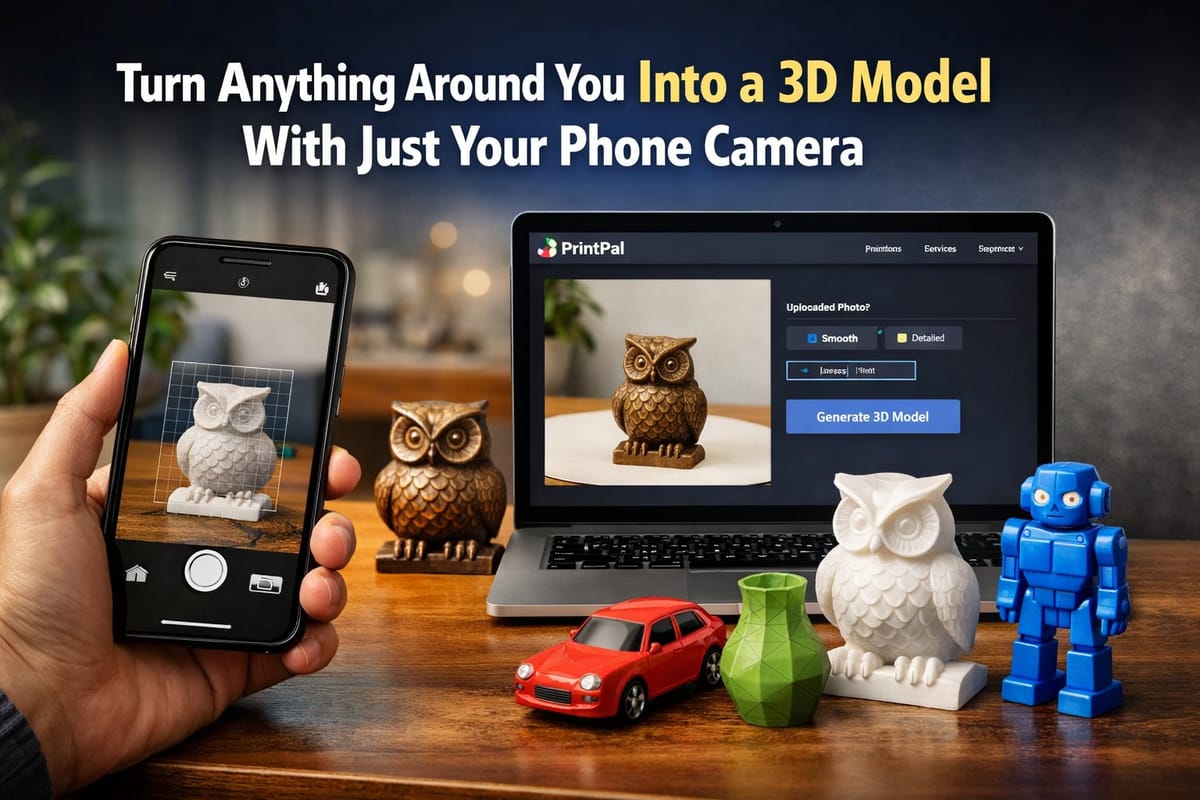
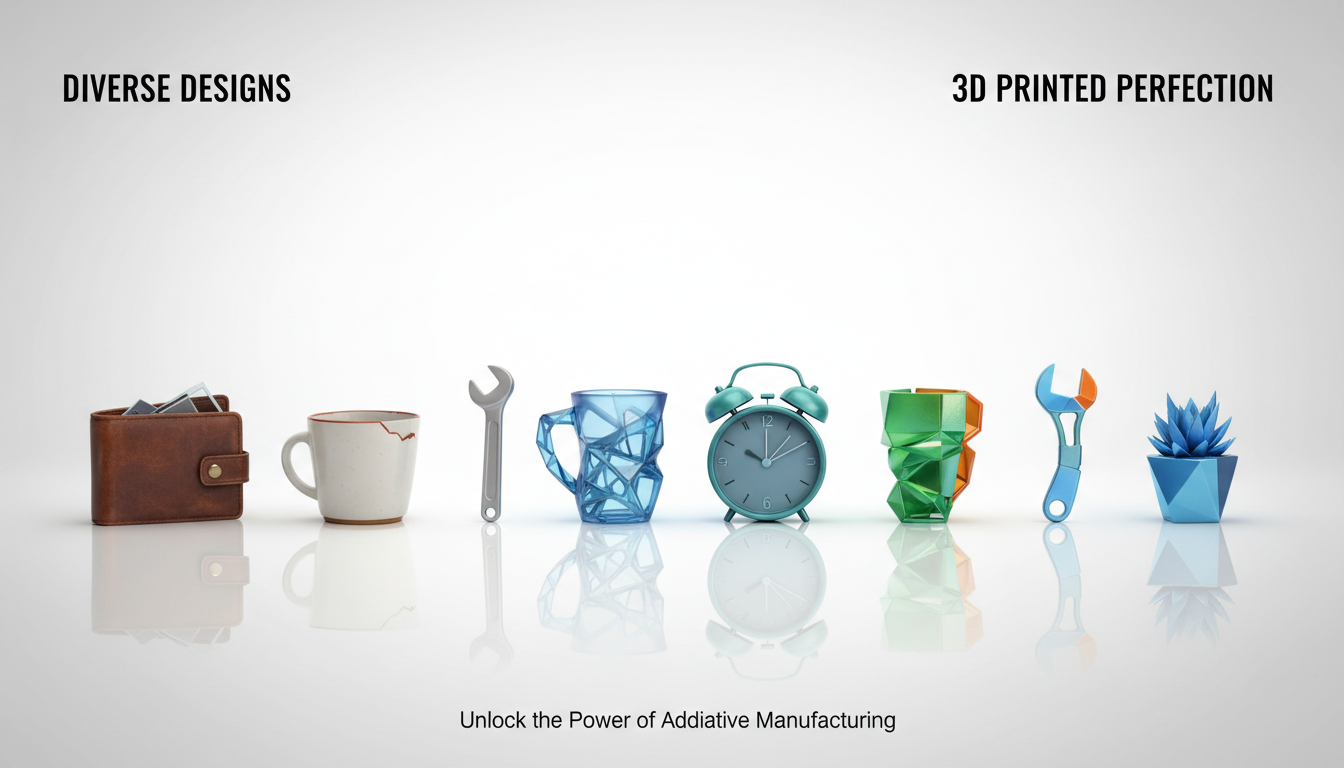
Turn Anything Around You Into a 3D Model With Just Your Phone Camera

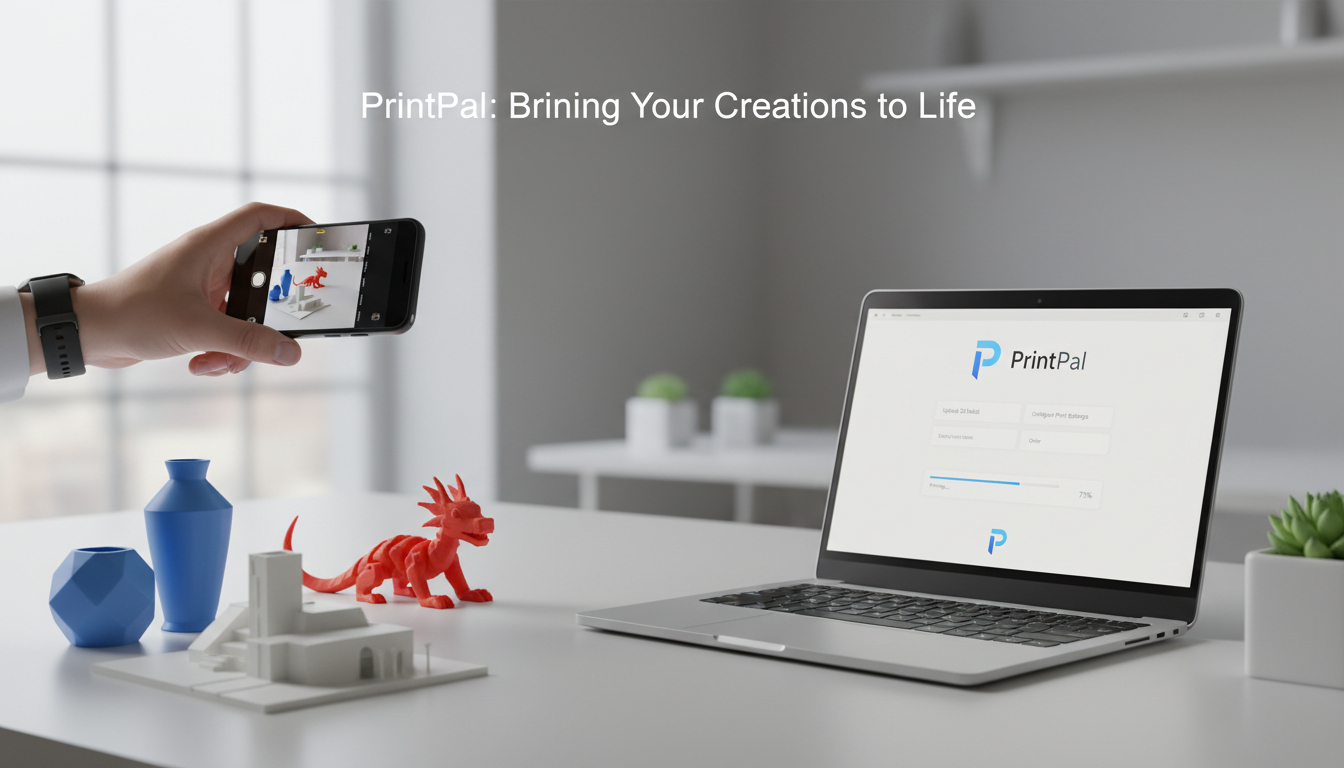
Look around you right now. That unique coffee mug, your favorite toy, the decorative item on your shelf, or even your pet's favorite chew toy. What if you could transform any of these real objects into a digital 3D model in minutes using nothing but your smartphone? With PrintPal's AI-powered generator, you can photograph anything in the real world and turn it into a custom 3D model ready for printing, sharing, or archiving. This guide walks you through the complete process, from snapping a photo to holding a physical copy in your hands.
Why Digitize Real Objects Into 3D Models
The ability to get a 3D model of anything you see opens up possibilities that were unimaginable just a few years ago. Whether you want to preserve memories, create backups of precious items, customize existing objects, or share physical things with people far away, real thing to 3D conversion bridges the physical and digital worlds.
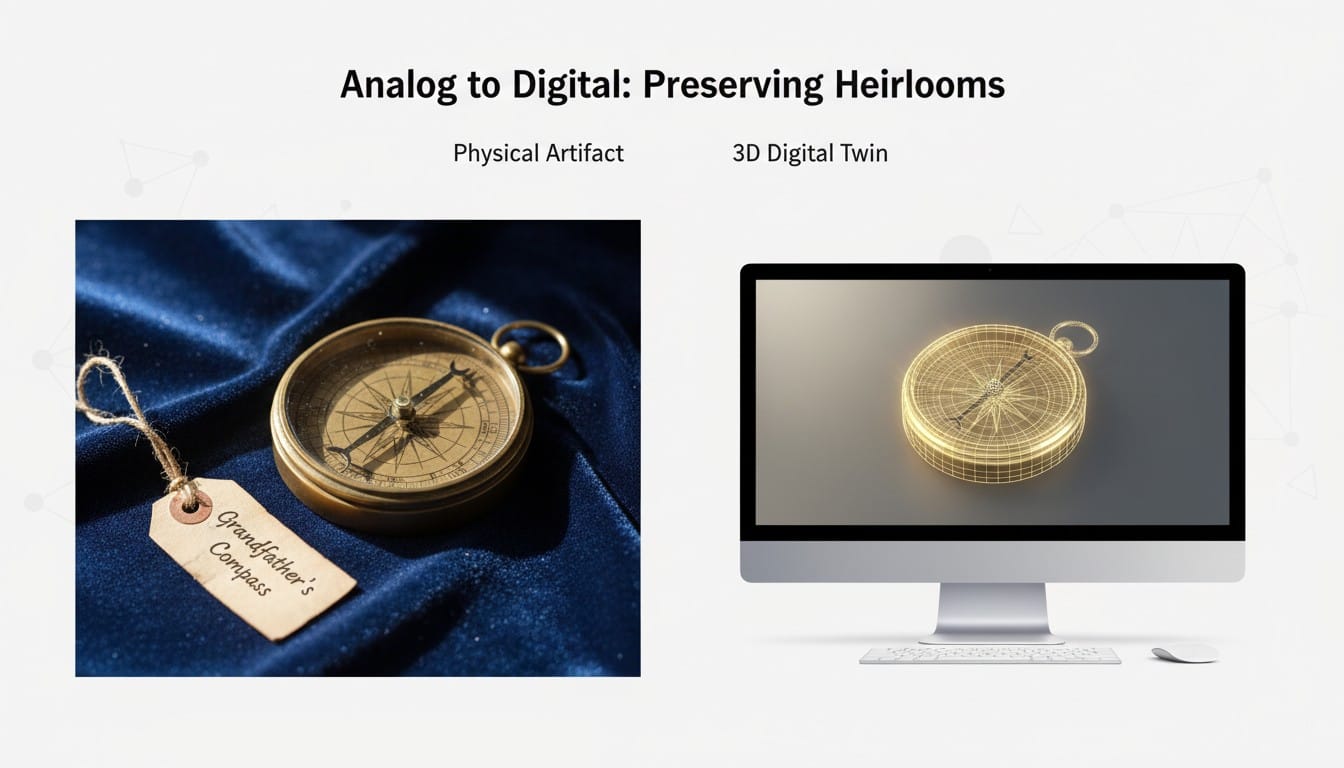
Preserve Irreplaceable Items: Family heirlooms, children's artwork, handmade gifts, and sentimental objects can be lost, broken, or damaged. Creating 3D models preserves them digitally forever while allowing you to print replacements if needed.
Create Backups of Essential Items: Lost a game piece? Broke a small plastic part? Photographing items before they break means you can regenerate them later. This works especially well for simple household items, organizers, and children's toy components.
Customize and Modify Real Objects: Start with something that exists but make it your own. Photograph an object, generate the 3D model, and modify it to fit your specific needs. Make it bigger, smaller, or combine it with other designs.

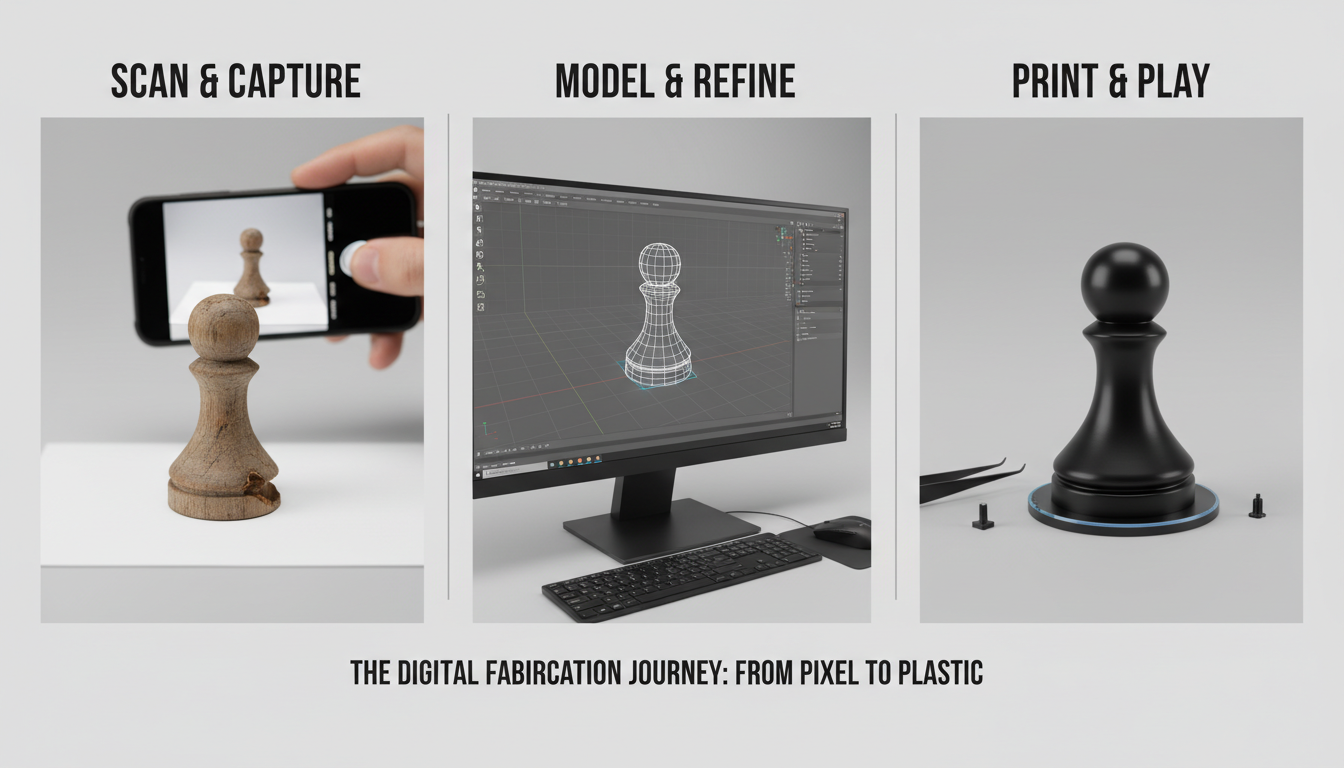
The Complete Workflow: Photo to 3D Model to Physical Print
The process of turning real things into 3D models breaks down into simple steps anyone can follow with just a smartphone and internet access.
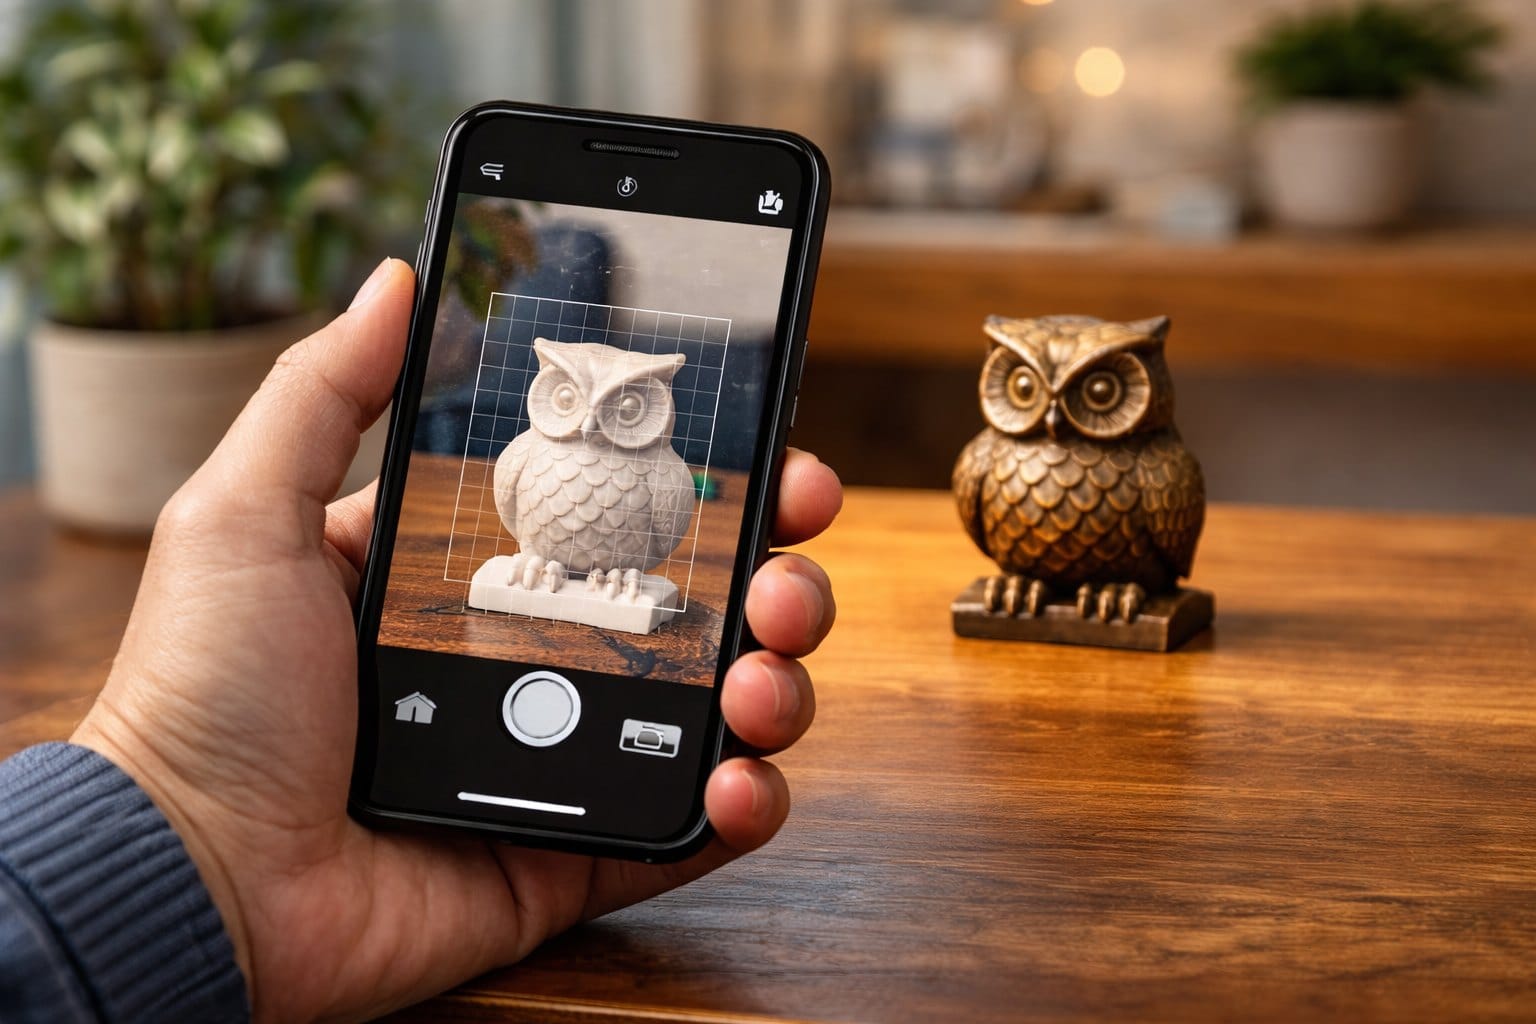
Step 1: Photograph Your Object
The quality of your photo directly impacts your 3D model results. Good news: you do not need professional equipment, just attention to a few key factors.
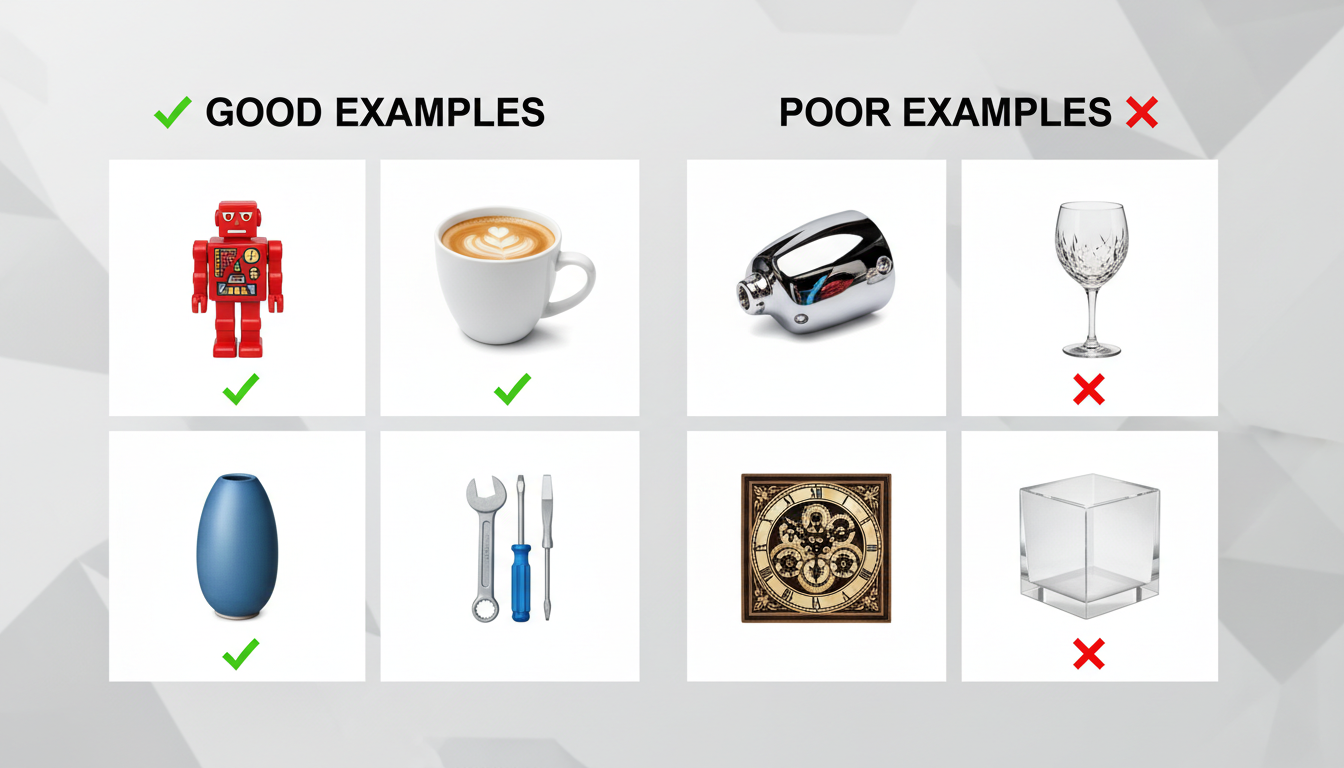
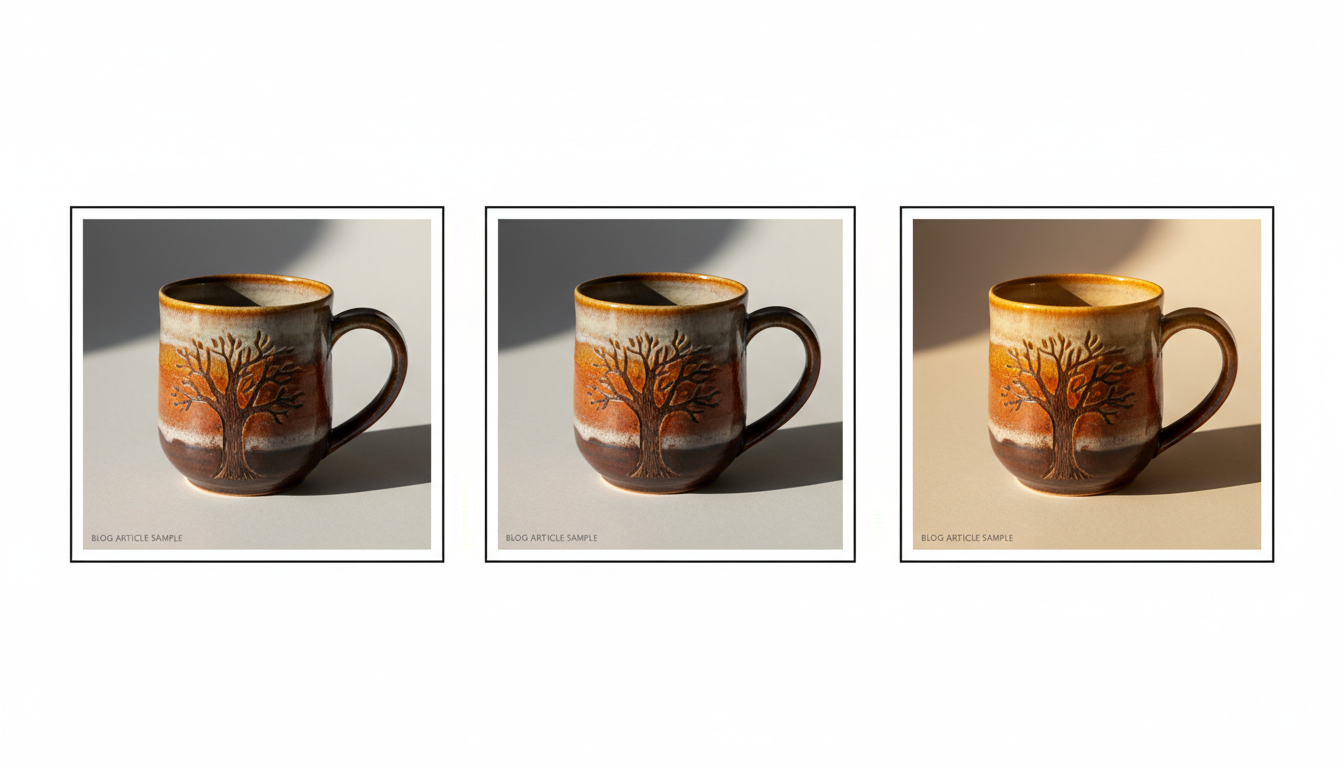
Choose Your Subject Wisely: Start with objects that have clear, defined shapes. Small decorative items, toys, simple tools, and household objects work best. Avoid very shiny, transparent, or extremely complex objects for your first attempts.
Set Up Proper Lighting: Natural daylight works best. Place your object near a window or outside in shade. Avoid direct harsh sunlight that creates strong shadows. The goal is even, diffused light that shows all the object's details clearly.
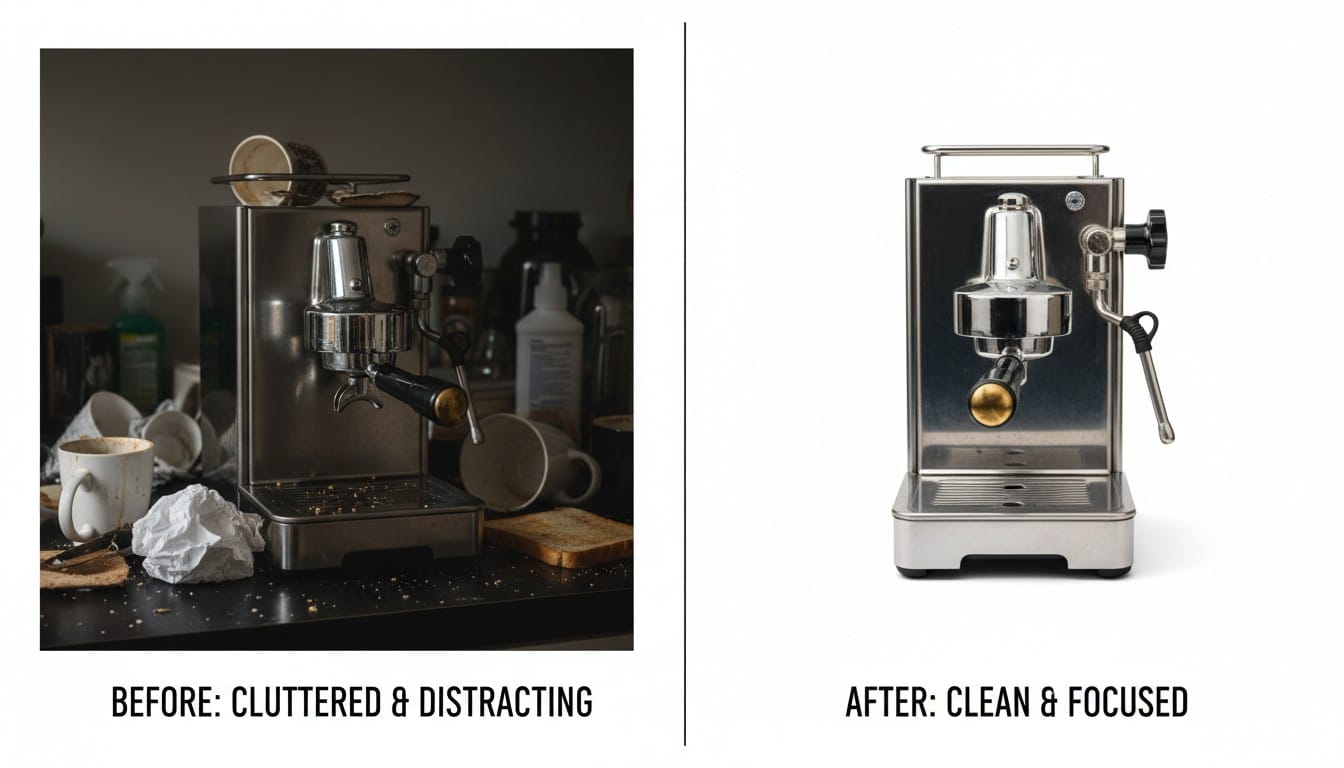
Background Matters: Place your object on a plain, contrasting background. A white sheet of paper or solid-colored tablecloth works perfectly. The cleaner your background, the easier it is for AI to focus on your object.
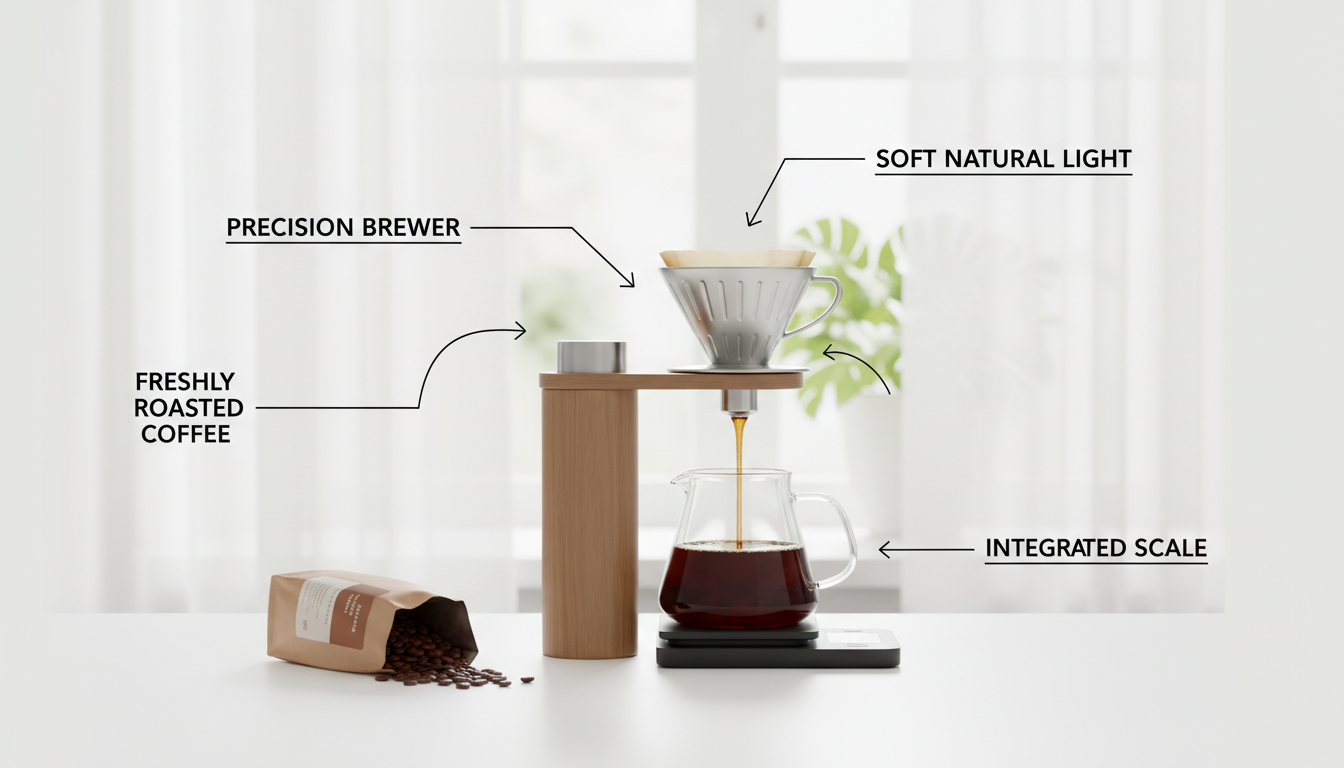
Capture the Perfect Angle: Photograph your object from straight on, with the entire item centered in frame. Get close enough that the object fills most of the image but include a small margin around the edges. Keep your phone steady and ensure the photo is sharp and focused.
Step 2: Quick Photo Enhancement (Optional but Recommended)
Before uploading your photo, spend thirty seconds improving it for better results.
Crop Tightly: Use your phone's photo editor to crop closely around your object, removing unnecessary background space. This helps the AI identify exactly what you want to convert.
Adjust Brightness and Contrast: If your photo looks dark or washed out, use the automatic enhancement tools in your phone's gallery. Slightly increasing contrast helps define edges and details.
Remove Background (Super Simple): Many phones now have built-in background removal tools. Tap the subject, select "cut out," and your phone automatically removes the background. This single step dramatically improves 3D generation quality.
Step 3: Upload to PrintPal and Generate Your 3D Model
With your prepared photo ready, the AI does the complex work of transforming a 2D image into a 3D model.
Upload Your Image: Visit PrintPal's 3D generator and upload your photo. The interface is straightforward: click upload, select your image, and you are ready to generate.
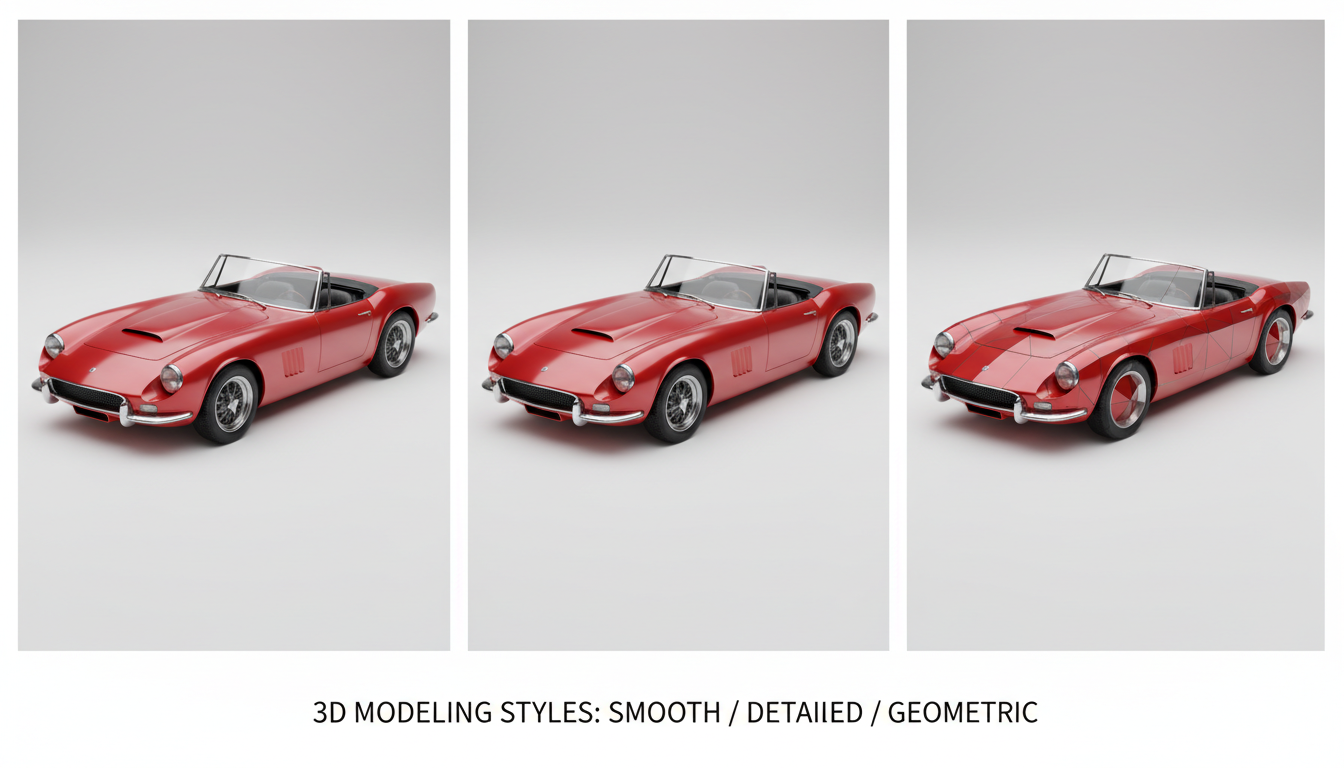
Choose Generation Settings: PrintPal offers style options to optimize your output. "Smooth" works well for organic items and figures. "Detailed" preserves intricate features on mechanical objects. Start with the default and experiment from there.
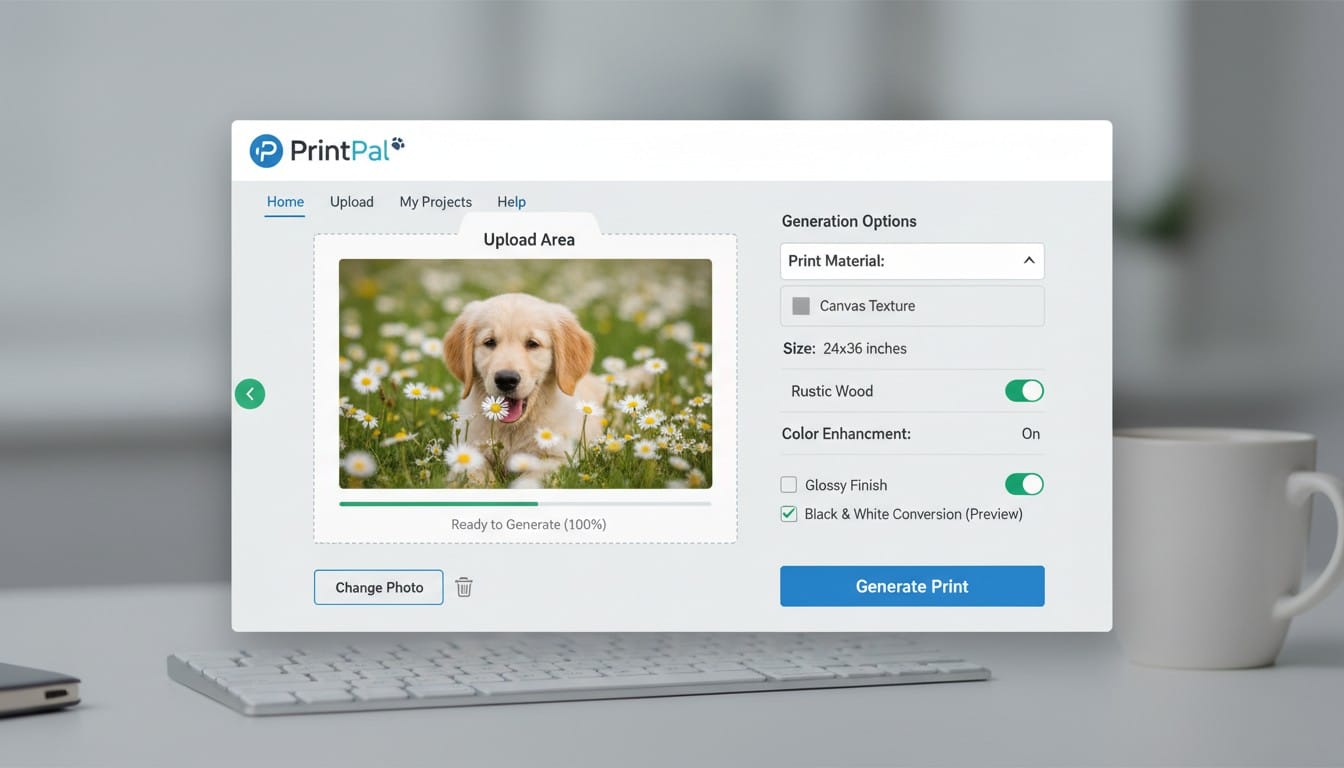
Generate and Preview: Click generate and wait 1-3 minutes while AI analyzes your image and creates 3D geometry. You will receive a preview of your model that you can rotate and inspect from all angles.
Download Your Model: Once satisfied with the preview, download your STL file. This universal 3D printing format works with any 3D printer or printing service.
Step 4: Get Your Physical Print
You have multiple options for transforming your digital 3D model into a real physical object.
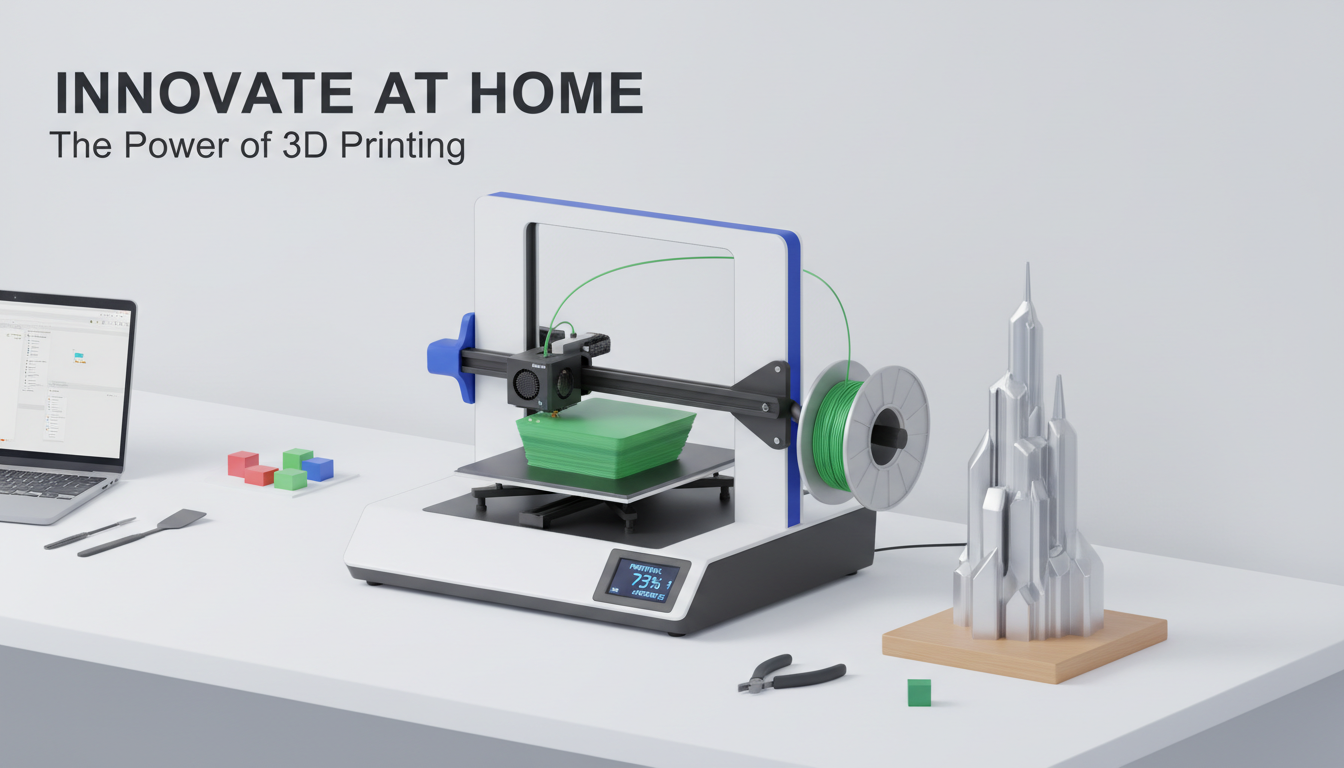
Option 1: Print It Yourself: If you own a 3D printer, simply load your downloaded STL file into your slicing software, prepare it for printing, and start the print. Most objects from photos print easily with standard settings.
Option 2: Use PrintPal's Fulfillment Service: Do not have a 3D printer? No problem. PrintPal offers professional 3D printing fulfillment. Select your preferred material and color, choose your size, and have the finished item shipped directly to your door. This option provides professional quality without equipment investment.
Option 3: Local Print Services: Many libraries, makerspaces, and local shops offer 3D printing services. Download your file and bring it to a nearby location for affordable printing.
Real-World Examples: From Photo to Print
Seeing practical applications helps you envision possibilities for objects around you.
Example 1: Replacing a Lost Game Piece
Your board game is missing a crucial piece. Borrow a piece from a friend's copy, photograph it clearly, and generate a 3D model. Print a replacement and your game is complete again. This works for chess pieces, dice, tokens, and countless other game components.
Example 2: Archiving Children's Clay Creations
Your child creates a clay sculpture at school. It will eventually crumble or get damaged. Photograph it from the front, generate a 3D model, and preserve their artwork digitally. Print copies for grandparents or create a permanent version in durable plastic.
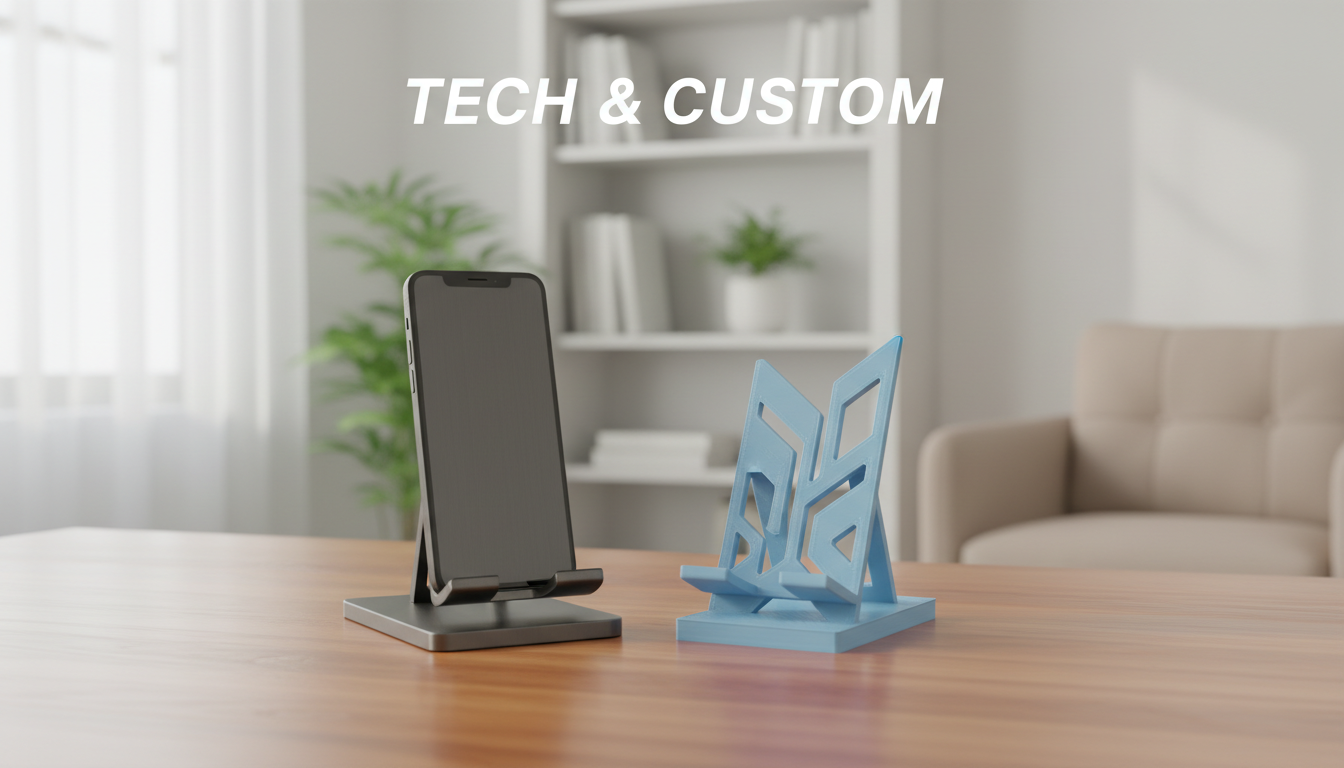
Example 3: Creating Custom Phone Stands
See a phone stand design you like in someone's home. Take a quick photo (with permission), generate the model, and print your own version. Adjust the size to fit your specific phone model perfectly.
Example 4: Documenting Collectibles
Collect vintage toys or figurines? Photograph your entire collection to create a digital archive. If items are ever lost, stolen, or damaged, you have 3D models to recreate them. This also allows sharing your collection with fellow enthusiasts without shipping fragile originals.
Tips for Best Results
Mastering real thing to 3D conversion improves with practice. These tips accelerate your learning curve.
Start Simple: Your first attempts should be basic objects with clear shapes. Success with simple items builds confidence for tackling complex subjects later.
Multiple Photos Help: If your first photo does not generate a perfect model, try photographing from a slightly different angle or with adjusted lighting. Each photo gives different information to the AI.
Clean Objects First: Dust, smudges, and dirt in photos translate to imperfections in 3D models. Wipe down objects before photographing for cleaner results.
Size Reference: Place a coin or ruler in the frame if you need accurate sizing. This helps when scaling your printed model to exact dimensions.
Experiment With Styles: The same photo can generate different models depending on style settings. Try multiple options to see which output best matches your vision.
Beyond Basic Digitization: Creative Applications
Once comfortable with basic photo-to-3D conversion, explore creative possibilities.
Custom Modifications: Generate a 3D model from a real object, then modify it digitally. Add your name, change proportions, or combine multiple objects into new designs. Free tools like Tinkercad make basic modifications accessible to beginners.
Scale Experimentation: Print the same model at wildly different sizes. That small figurine becomes desk decor when enlarged. Large items shrink to keychain size.
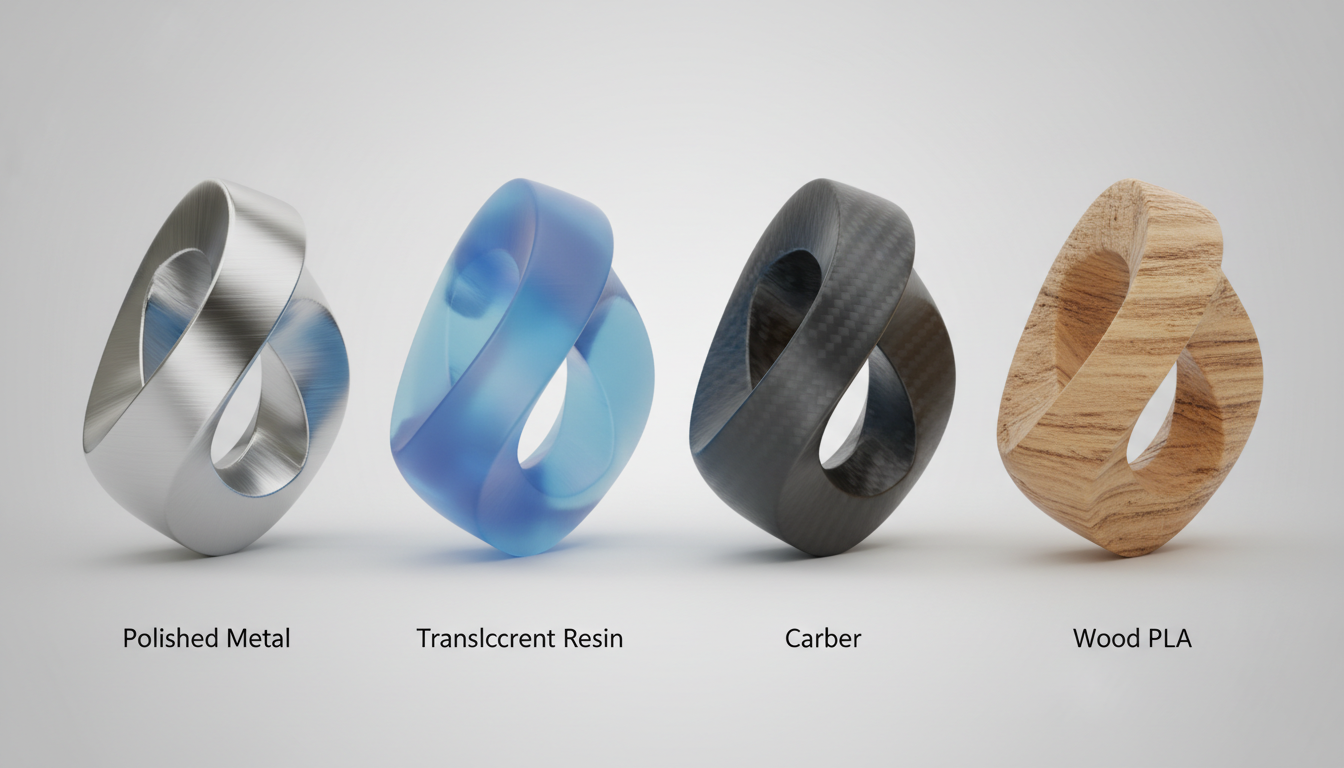
Material Exploration: Print your model in different materials to completely transform its character. A simple design becomes elegant in metallic filament or playful in bright translucent colors.
Repair Part Generation: Photograph broken parts before discarding them. Generate models and print replacements, extending the life of household items, appliances, and equipment.
Common Questions About Real Object Digitization
How accurate are models from single photos? Accuracy depends on photo quality and object complexity. Simple objects achieve 80-90% accuracy, sufficient for most purposes. Complex items may need minor adjustments.
Can I photograph people? While possible, human subjects are challenging due to skin tones, complex contours, and movement. Statues or figurines of people work much better than live subjects.
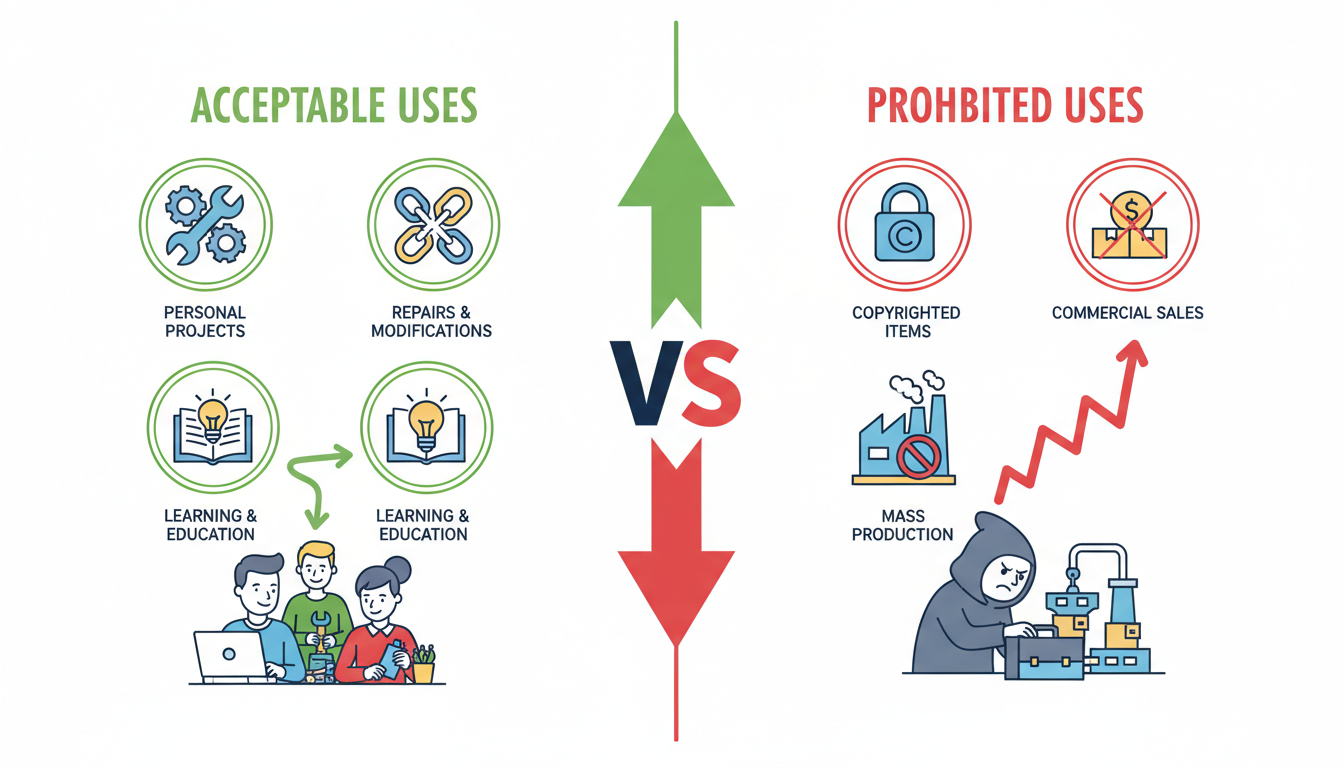
What about copyrighted objects? Photographing items for personal use is generally acceptable. Selling or distributing models of copyrighted characters, trademarked products, or protected designs violates intellectual property rights.
Do I need special camera equipment? No. Modern smartphones capture more than enough detail for 3D model generation. Even mid-range phones from recent years work excellently.
Start Turning Your World Into 3D Models Today
The physical objects surrounding you represent potential digital creations waiting to be captured. That unique item you love, the broken part you need to replace, the gift you want to share with distant friends, or the childhood toy you want to preserve can all become 3D models with just a quick photo.
The technology democratizes 3D modeling, removing barriers that previously required expensive equipment and specialized skills. Your smartphone camera and an AI-powered platform provide everything needed to digitize the physical world around you.
Start small with a simple object nearby. Take a clear photo, upload it, generate your first model, and experience the magic of seeing a flat image transform into a three-dimensional digital file. Whether you print it yourself, use a fulfillment service, or simply archive it digitally, you have created something new from something real.
Ready to Digitize Your World?
Transform anything around you into a custom 3D model in minutes. Visit PrintPal's AI-powered generator to upload your photos and watch as real objects become digital 3D models. No 3D modeling experience required. Get your model generated for free, then choose to download the file for personal printing or use PrintPal's professional fulfillment service to have finished prints delivered to your home. Start capturing your physical world digitally today and discover endless creative possibilities.