Tips for Uploading a 3D Model on PrintPal

Uploading a 3D model to PrintPal is more than just adding a file. It’s about telling the story behind your creation and helping others bring it to life. A well-structured and detailed upload not only helps your model get discovered but also makes it easier for others to print successfully. Below are some tips and best practices for each field on the Upload Model page.
1. Files

What It Is: You can upload 1–50 STL or 3MF files of your design.
Tips:
- If your model has multiple parts (e.g., different components or color sections), include each part as a separate file for clarity.
- Keep file names descriptive (e.g., “Handle_V1.stl” instead of “part1.stl”). This helps users quickly identify which piece is which.
2. Title
What It Is: A clear name for your design.
Tips:
- Choose a concise yet descriptive title (e.g., “Modular Desk Organizer” instead of “Organizer”).
- Include key terms that users might search for, like “RPG Miniature: Elf Ranger” or “Functional Phone Stand.”
3. Description

What It Is: A space to elaborate on the concept, design inspiration, assembly instructions, and printing guidelines. You can include text, images, and videos.
Tips:
- Break your description into sections: Overview, Recommended Print Settings, Assembly Instructions, and Design Inspiration.
- Include pictures or screenshots from your CAD software, or even short videos demonstrating how parts fit together.
- The more detail you provide, the fewer questions users will have, and the more successful their prints will be.
4. Category

What It Is: The classification of your model (e.g., Art & Fashion, Toys & Games, Home & Living, etc.).
Tips:
- Select the category that best matches your design so it appears in the relevant searches and curated feeds.
- If you’re torn between two categories, choose the one you think your audience would most likely explore.
5. Tags

What It Is: Up to 10 keywords that best describe your model.
Tips:
- Use specific keywords related to your model (e.g., “tabletop,” “cosplay,” “organizer,” “kitchen,” “office,” “phone stand”).
- Avoid irrelevant or overly general tags. Accurate tags help the right audience find your model.
6. License
What It Is: Determines how others can use or remix your model. Typically, a Creative Commons license.
Tips:
- Choose a license that reflects the level of freedom you’re comfortable granting, such as CC-BY (requires attribution) or CC-BY-NC (non-commercial).
- Make sure your license choice aligns with any legal requirements or personal preferences regarding commercial use, modifications, and sharing.
7. Main Image

What It Is: The primary image displayed alongside your model in previews and listings. This should be an image of the actual model after it has been 3d printed.
Tips:
- Use a high-resolution, well-lit photo or render. The main image is your design’s “first impression.”
- Capture the model from an angle that highlights its most interesting or useful features.
- Keep backgrounds clutter-free or use a consistent backdrop to maintain a professional look.
8. Main GIF / Animated WebP
What It Is: A short animation or rotating preview that plays when your model is viewed in someone’s feed or when hovered over in the Explore page.
Why It’s Important: Animated previews significantly increase engagement — people can see your design from multiple angles without clicking through additional images.
Tips:
- Create a simple 360° rotation of your model so viewers can see all its details.
- Keep the file size manageable so it loads quickly.
- High-quality animations attract more attention, likes, and shares.
- Use a free online tool like Ezgif to easily convert your videos to GIFs
Pro Tip: A clear, smooth GIF or animated WebP often makes the difference between someone scrolling past your design or clicking to learn more. This is one of the most powerful ways to showcase your model at a glance!
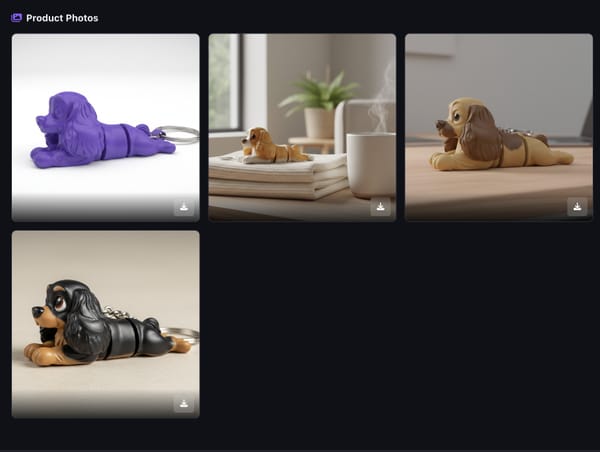
9. Additional Images
What It Is: You can include up to 6 more images.
Tips:
- Show the model from various angles, in different lighting, or with close-up shots of intricate details.
- Include images of the final 3D print in real-world use or context to inspire others.
- If your design is modular or has moving parts, show those features in these additional images.
10. Tagged Items (Recommended Filaments)
What It Is: A place to tag filaments or materials you recommend for printing your model.
Tips:
- Specify brand, type (PLA, ABS, PETG, resin), and color if relevant.
- Mention any special properties (e.g., “Heat-resistant filament recommended if you plan to use this part near high temperatures.”).
- This helps users replicate successful prints and reduces guesswork.
Why High-Quality Visuals (Especially Animated) Matter
A well-presented model is more likely to succeed on PrintPal. Clear images and compelling animations can:
- Draw More Views & Engagement: Attractive visuals stand out in the feed.
- Convey Model Complexity: A static image can’t always show hidden features — animations help show every angle.
- Build Trust: High-quality photos and renders show that you’re serious about your work and care about the user’s experience.
- Encourage Feedback: When people can clearly see your design, they’re more likely to comment, ask questions, and share ideas.
Final Thoughts
Uploading a 3D model to PrintPal is an opportunity to showcase your creativity and help others bring your design to life. By optimizing each input field — especially the visuals and descriptive details — you’ll increase your chances of standing out on the platform. Good luck with your next upload, and we can’t wait to see your creations in action!
Happy Uploading and Happy Printing!
Have questions or need more advice? Check out our community discord or reach out to support. We’re here to help you make the most of your PrintPal experience.