The Complete Guide to Image to 3D Model Generation for 3D Printing

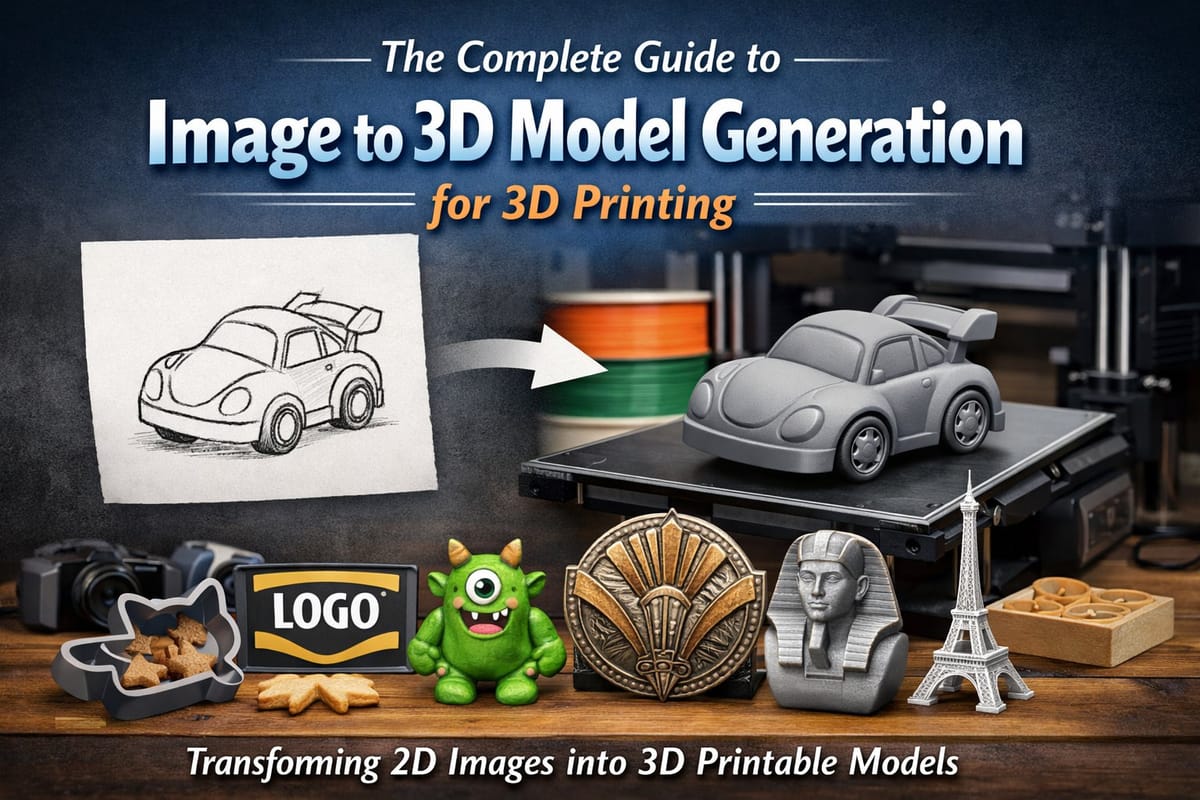
The ability to convert a simple image into a 3D printable model has revolutionized how makers, designers, and hobbyists approach 3D printing. Whether you have a sketch, a photograph, or a digital illustration, image to 3D technology makes it possible to transform flat 2D visuals into fully dimensional models ready for printing. Tools like PrintPal have made this technology accessible to everyone, democratizing 3D model creation without requiring expensive software or years of CAD training. This guide will walk you through everything you need to know about generating 3D models from images, including the tools, techniques, and best practices that will help you create high-quality printable files.
Why Image to 3D Conversion Matters for 3D Printing
Traditional 3D modeling requires specialized CAD software and significant technical expertise. Learning programs like Blender, Fusion 360, or SolidWorks can take months or even years to master. Image to CAD technology eliminates this barrier by allowing anyone to generate a 3D model from a simple photograph or drawing.
This technology is particularly valuable for:
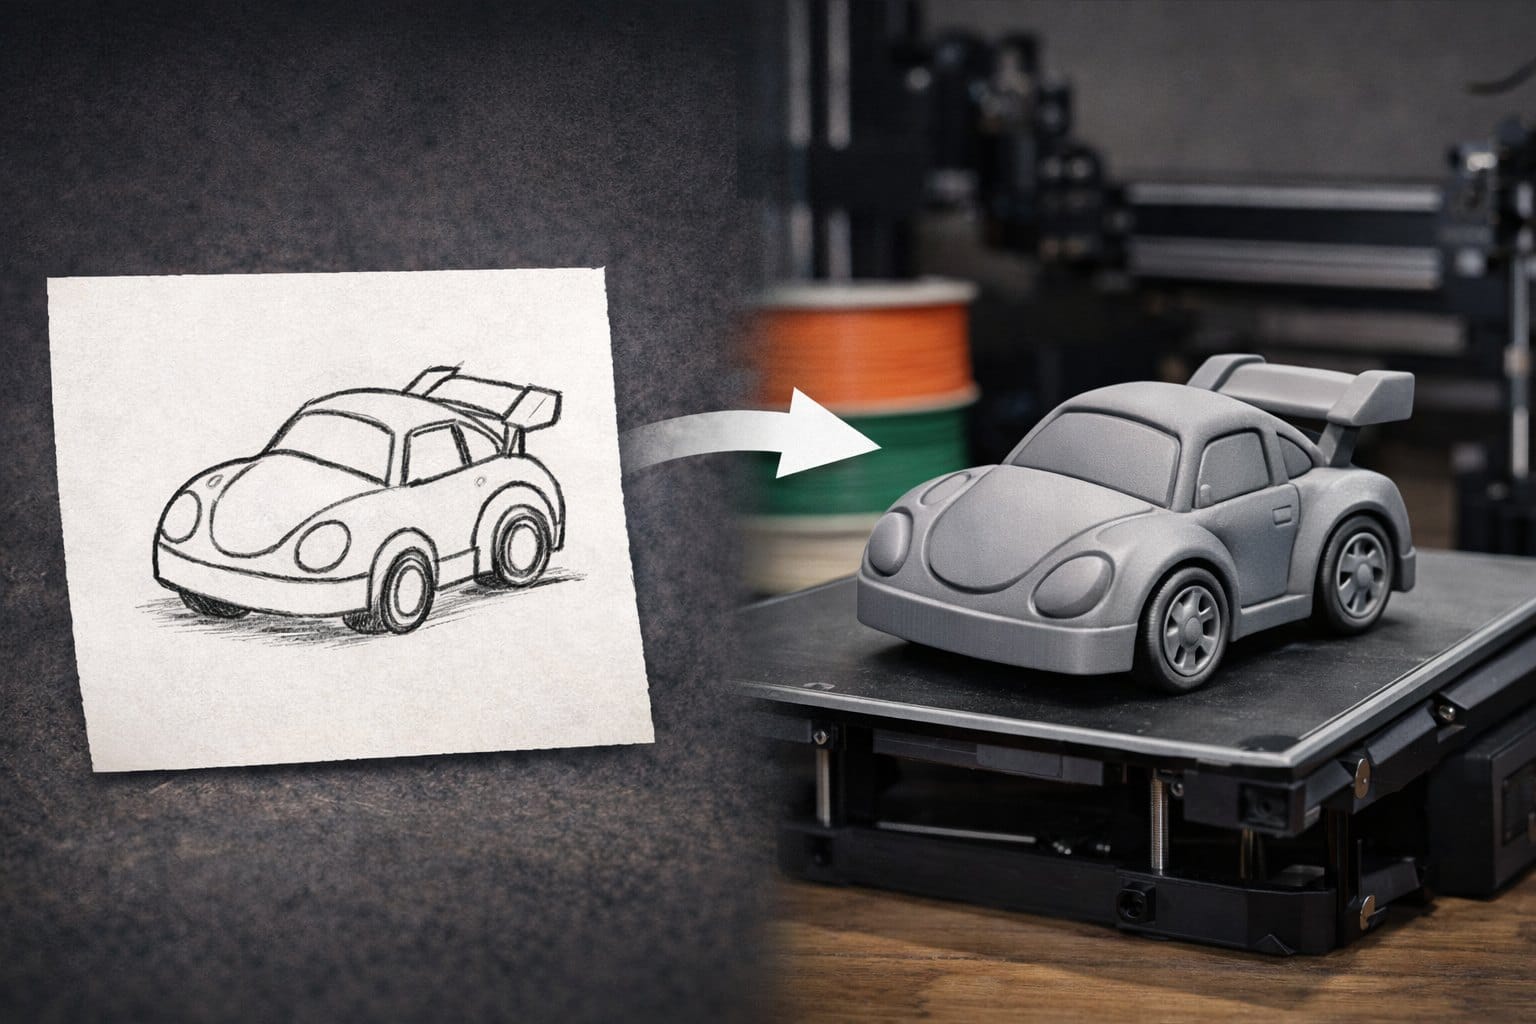
Rapid Prototyping: Designers can quickly convert concept sketches into physical prototypes without spending hours in CAD software. What once took days can now be accomplished in minutes, accelerating the product development cycle.
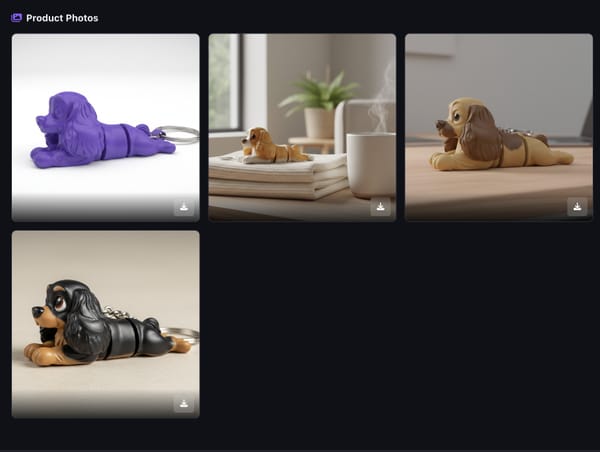
Custom Manufacturing: Small businesses and makers can offer personalized products by converting customer photos into unique 3D printed items. From custom figurines to personalized jewelry, the possibilities are endless.
Preservation and Restoration: Museums and historians use image to 3D conversion to recreate artifacts, architectural elements, and historical objects that may be damaged or inaccessible.
Educational Applications: Teachers and students can transform drawings and diagrams into tangible learning aids, making abstract concepts more concrete and engaging.
The democratization of 3D model generation means that anyone with an idea and an image can participate in the maker movement. Free STL file generation from images opens up creative possibilities that were previously limited to those with advanced technical skills.
How Image to 3D Technology Works
Understanding the process behind image to CAD conversion helps you achieve better results and troubleshoot issues when they arise. Modern image to 3D systems use advanced artificial intelligence and computer vision algorithms to interpret 2D images and construct three-dimensional geometry.
The AI-Powered Conversion Process
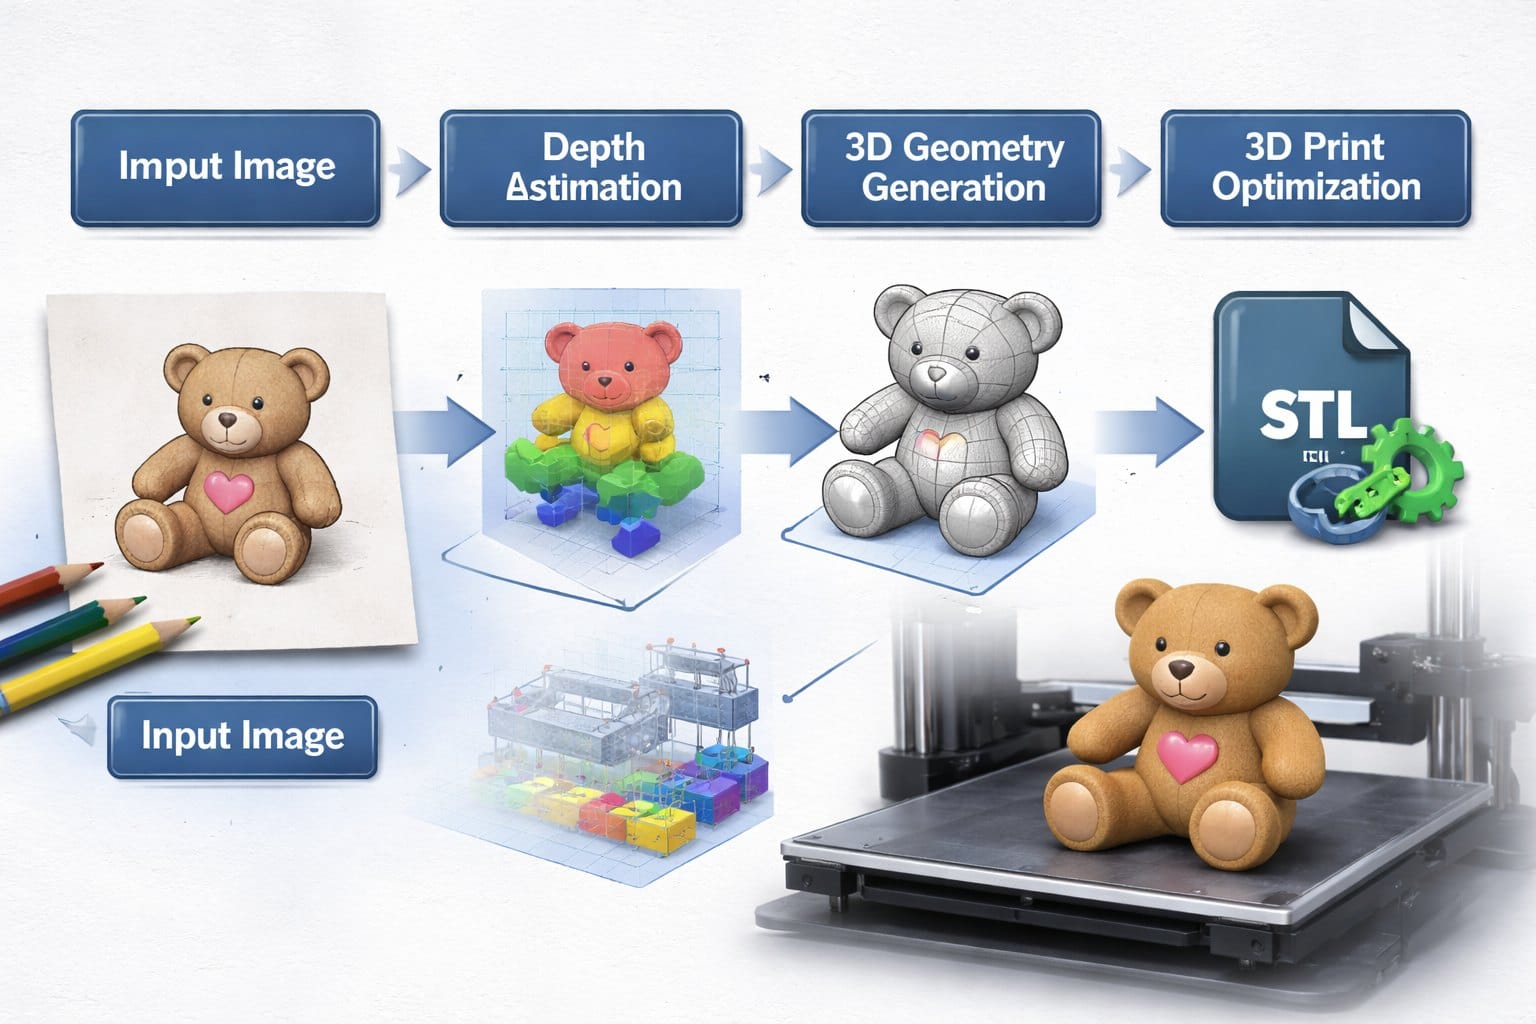
When you upload an image for 3D model generation, several sophisticated steps occur behind the scenes:
Image Analysis and Object Detection: The AI system first analyzes your image to identify the main subject, distinguishing it from the background. It detects edges, contours, and visual features that define the object’s shape and structure.
Depth Estimation: Using machine learning models trained on millions of images, the system infers depth information from visual cues like shadows, perspective, and known object properties. This is the critical step that transforms a flat image into volumetric data.
3D Geometry Generation: The system constructs a mesh of vertices, edges, and faces that represent the 3D model. This mesh defines the surface geometry that will become your printable model.
Optimization for 3D Printing: The generated model is processed to ensure it’s manifold (watertight), has proper thickness for structural integrity, and is oriented correctly for printing. This step is crucial for creating a successful 3D print model.
Input Image Requirements for Best Results
The quality of your output depends heavily on your input image. Here are the key factors that influence successful 3D model generation:
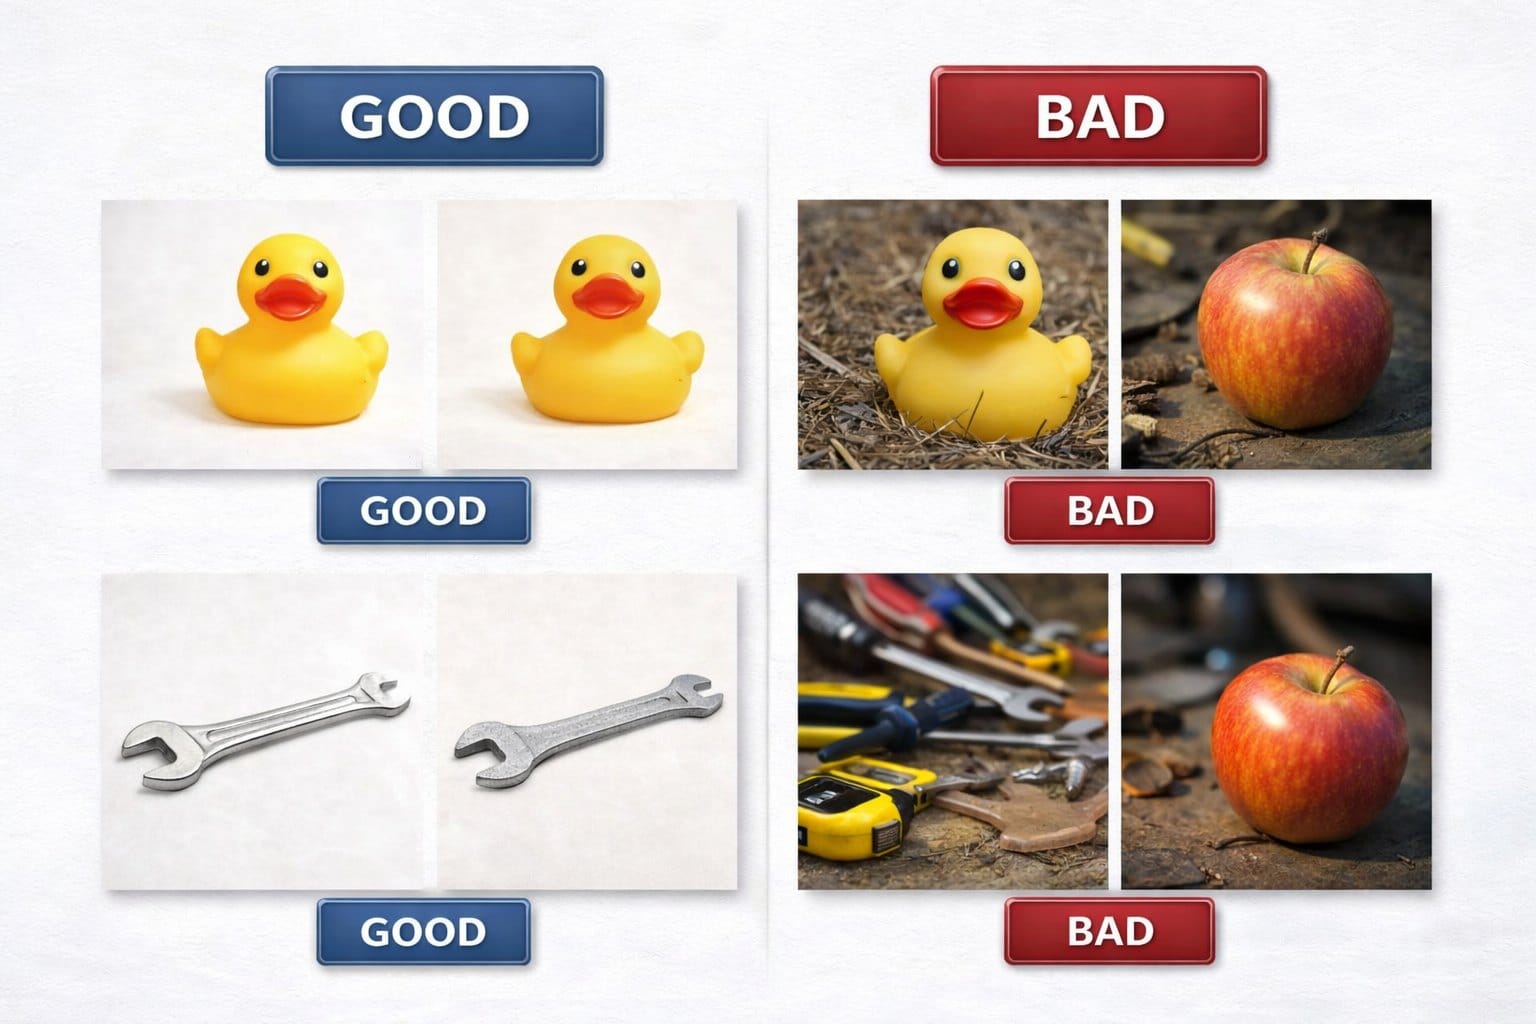
Clear Subject Isolation: Images with a single, well-defined subject work best. A clean white or transparent background helps the AI accurately identify the object you want to convert. Cluttered backgrounds can confuse the system and result in unwanted geometry.
Good Lighting and Contrast: Well-lit images with strong contrast between the subject and background produce more accurate depth estimation. Avoid images with harsh shadows or overexposed areas that obscure important details.
Appropriate Resolution: While you do not need professional photography equipment, images should be at least 512x512 pixels for acceptable results. Higher resolution images (1024x1024 or larger) generally produce more detailed models.
Front-Facing Perspective: Images taken straight-on work better than angled shots. The AI can better interpret the geometry when the subject faces the camera directly, though modern systems like PrintPal can handle various angles.
Single Object Focus: For the most predictable results, ensure your image contains one primary object. Multiple objects in a single image may be combined into a single model or may cause confusion in the generation process.
Different Approaches to Image to 3D Generation
There are several methods for converting images into 3D models, each suited to different use cases:
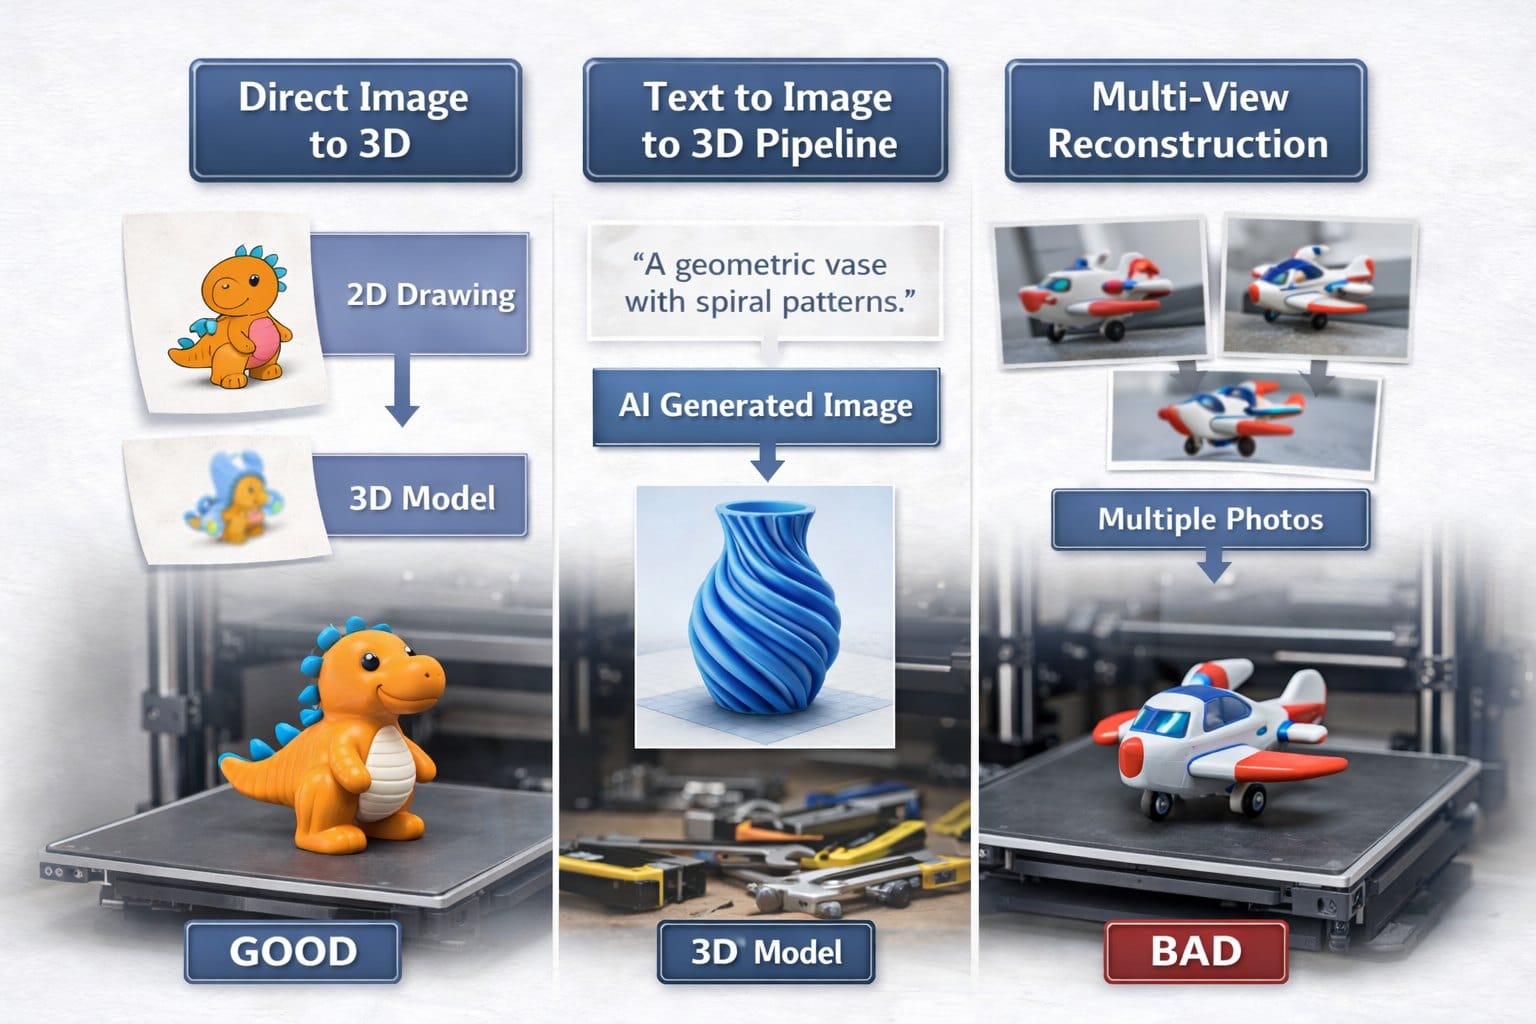
Direct Image to 3D Conversion: Upload a photo or drawing and let the AI generate a 3D model directly. This approach works well for objects with clear shapes like toys, decorative items, or simple mechanical parts. PrintPal offers free 3D model generation using this method, making it accessible to everyone.
Text to Image to 3D Pipeline: Describe what you want in words, have AI generate an optimized image, then convert that image to 3D. This is ideal when you have a concept but no existing image. You can prompt the system with descriptions like “a geometric vase with spiral patterns” and receive a printable model.
Style Recipe Application: Some advanced platforms allow you to apply style recipes or presets that transform your image before 3D conversion. These recipes can make objects more printable by adding thickness, smoothing surfaces, or stylizing the geometry for aesthetic effect.
Multi-View Reconstruction: For maximum accuracy, some systems can combine multiple photos of an object taken from different angles. This photogrammetry-inspired approach creates more complete and accurate 3D representations, though it requires more input preparation.
Best Practices for Generating Print-Ready 3D Models
Creating a 3D model from an image is just the first step. To ensure your model is actually printable and produces a successful physical object, follow these best practices.
Optimizing Your Input for Better Outputs
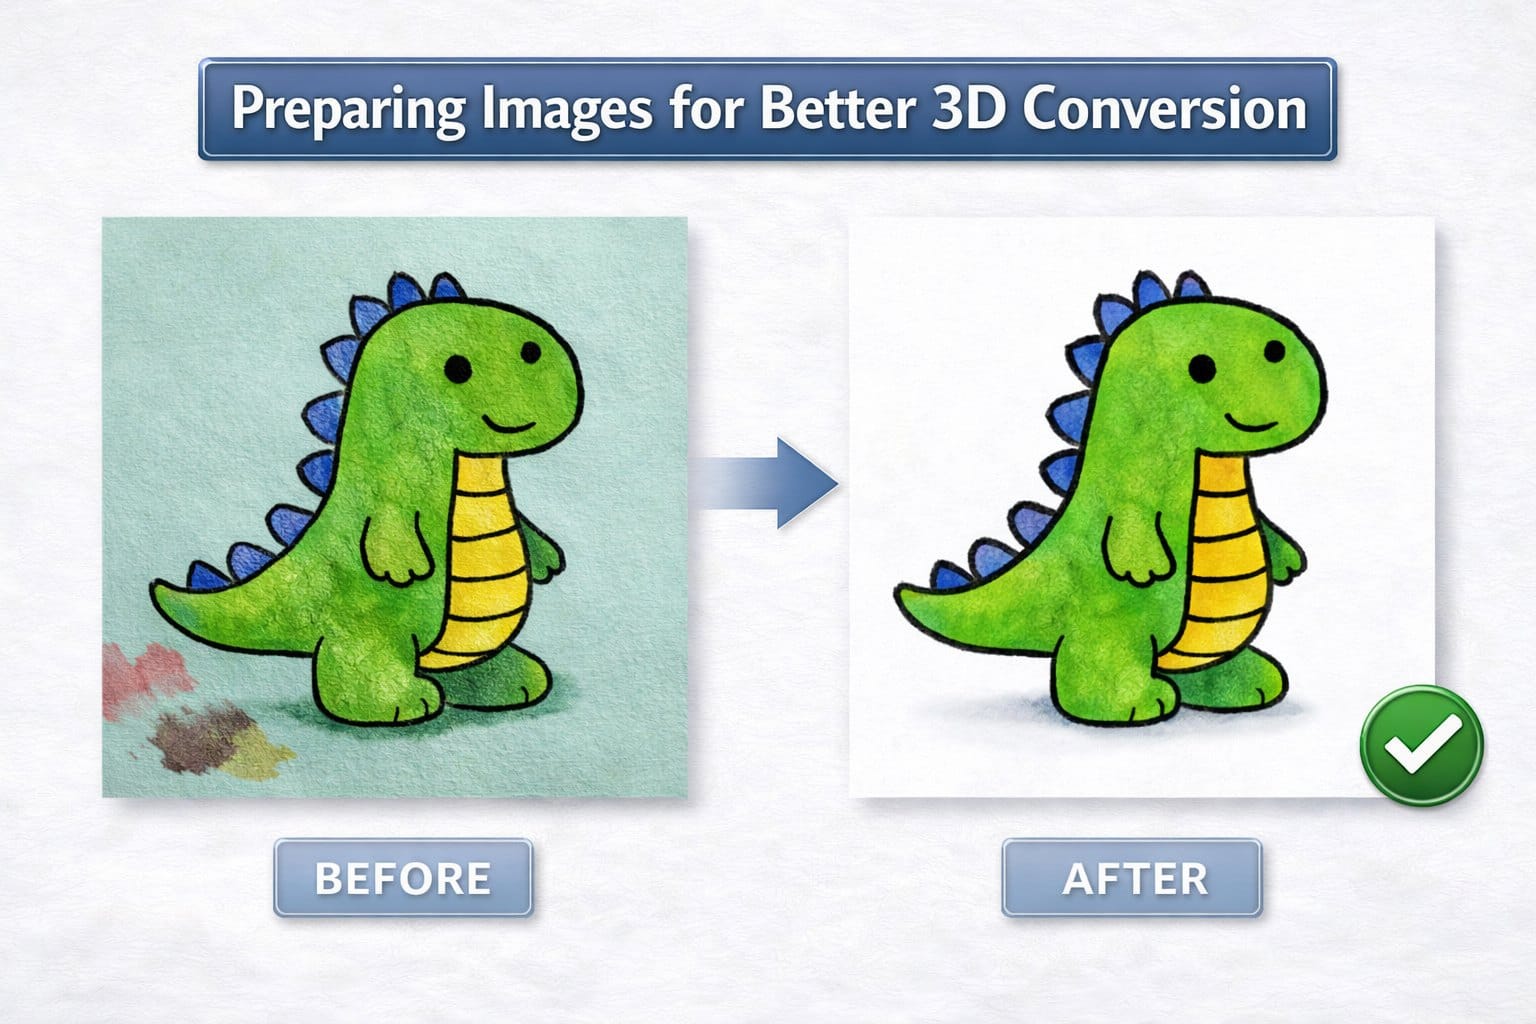
Prepare Your Images: Before uploading, use basic image editing to improve your results. Crop tightly around your subject, increase contrast if needed, and remove distracting background elements. Free tools like GIMP, Photoshop, or even smartphone photo editors can help prepare your images.
Use Style Recipes Strategically: Platforms like PrintPal offer recipe presets that apply specific transformations to your image before 3D generation. A “smooth” recipe might be ideal for organic shapes, while a “geometric” recipe works better for architectural elements. Experiment with different recipes to see which produces the best results for your specific subject.
Consider the End Use: Think about how you will print and use the final model. A decorative figurine requires different considerations than a functional bracket. Generate your model with the intended size and printing material in mind.
Start Simple: If you are new to image to CAD conversion, begin with simple objects like basic shapes, logos, or silhouettes. As you gain experience with how the system interprets different image types, you can tackle more complex subjects.
Post-Generation Model Evaluation
Once you have generated your 3D model, always inspect it before printing:
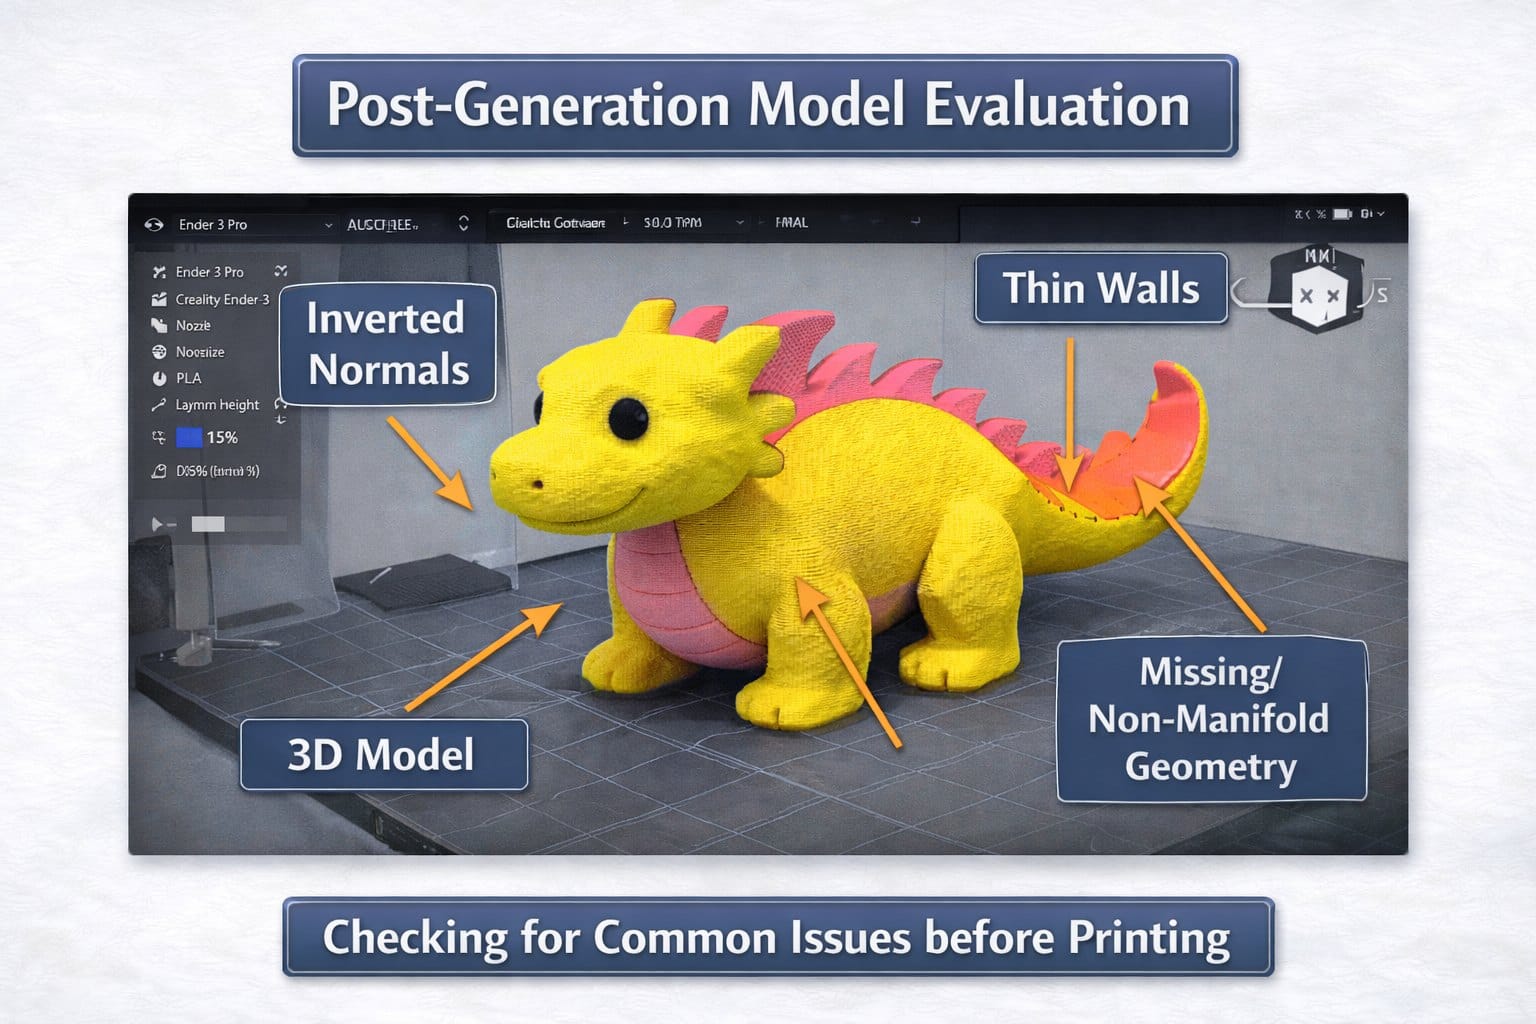
Check Model Integrity: Open your STL file in a viewer like MeshLab or your slicer software. Look for holes, inverted normals, or disconnected geometry. Most free STL files generated from images need at least minor cleanup.
Verify Dimensions: The generated model may not be at the correct scale. Use your slicer software to resize the model to your desired dimensions. Remember that smaller models require less material but may lose fine details, while larger models take longer to print but show more detail.
Assess Wall Thickness: Many image to 3D systems create surfaces that are too thin to print reliably. Check that all walls are at least 1-2mm thick for PLA and slightly thicker for more flexible materials. You may need to use repair tools to thicken thin sections.
Add Supports if Needed: Depending on the model’s geometry, you may need to add support structures in your slicer. Overhangs greater than 45 degrees typically require supports to print successfully.
Test Print at Small Scale: For complex or important models, print a small test version first. This lets you identify issues with minimal material and time investment.
Common Issues and Solutions
Hollow or Shell Models: If your generated model is just a thin shell, it may not print properly. Use mesh repair tools to fill the interior or add thickness to the walls.
Excessive Detail: Too much fine detail can make models difficult to print and fragile. Consider smoothing or simplifying the mesh if you encounter this issue.
Poor Base Adhesion: Models generated from images may have irregular bottom surfaces. Flatten the base or add a custom base plate to improve bed adhesion during printing.
Non-Manifold Geometry: This technical term means the model has errors that prevent it from being a solid object. Most slicer software and online repair tools can automatically fix these issues.
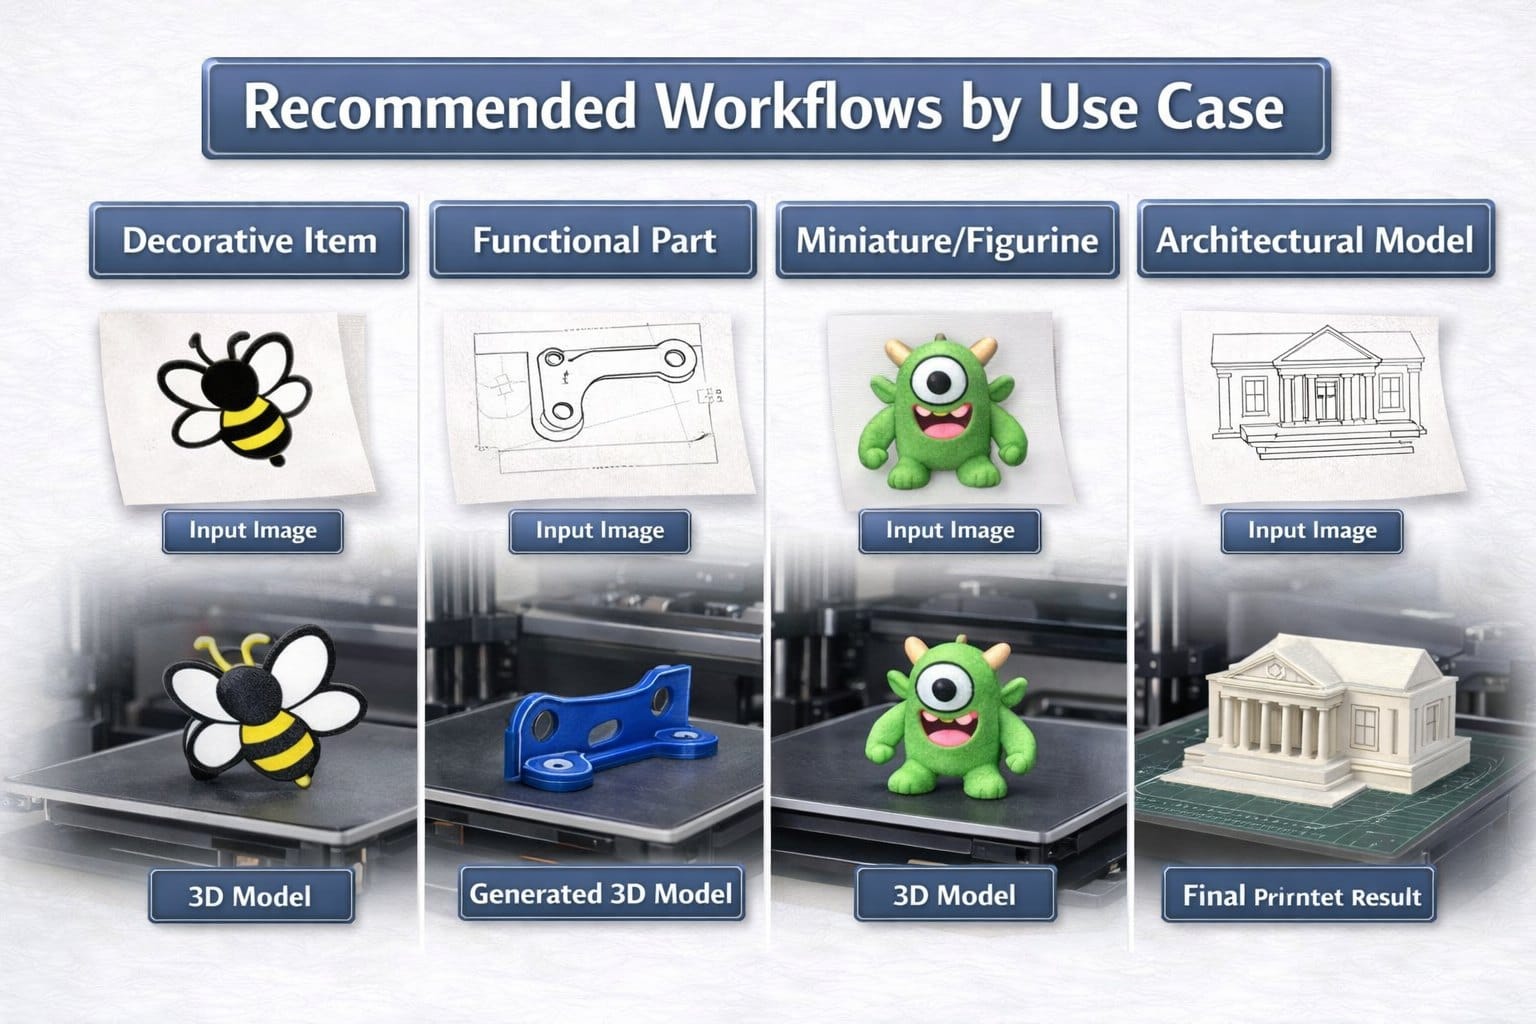
Recommended Workflows by Use Case
For Decorative Items: Use high-resolution images with good lighting. Apply aesthetic style recipes if available. Print with detailed settings at 0.1mm to 0.15mm layer height.
For Functional Parts: Start with clear, technical drawings or photos. Focus on geometric accuracy over aesthetic detail. Verify dimensions carefully and test mechanical fit with small prints first.
For Miniatures and Figurines: Use images with clear silhouettes. Consider splitting complex models into multiple parts for easier printing and assembly. Resin printing may be preferable for fine details.
For Architectural Models: Use orthographic or front-facing reference images. Apply recipes that emphasize clean geometry. Consider scaling carefully to maintain structural integrity at small sizes.
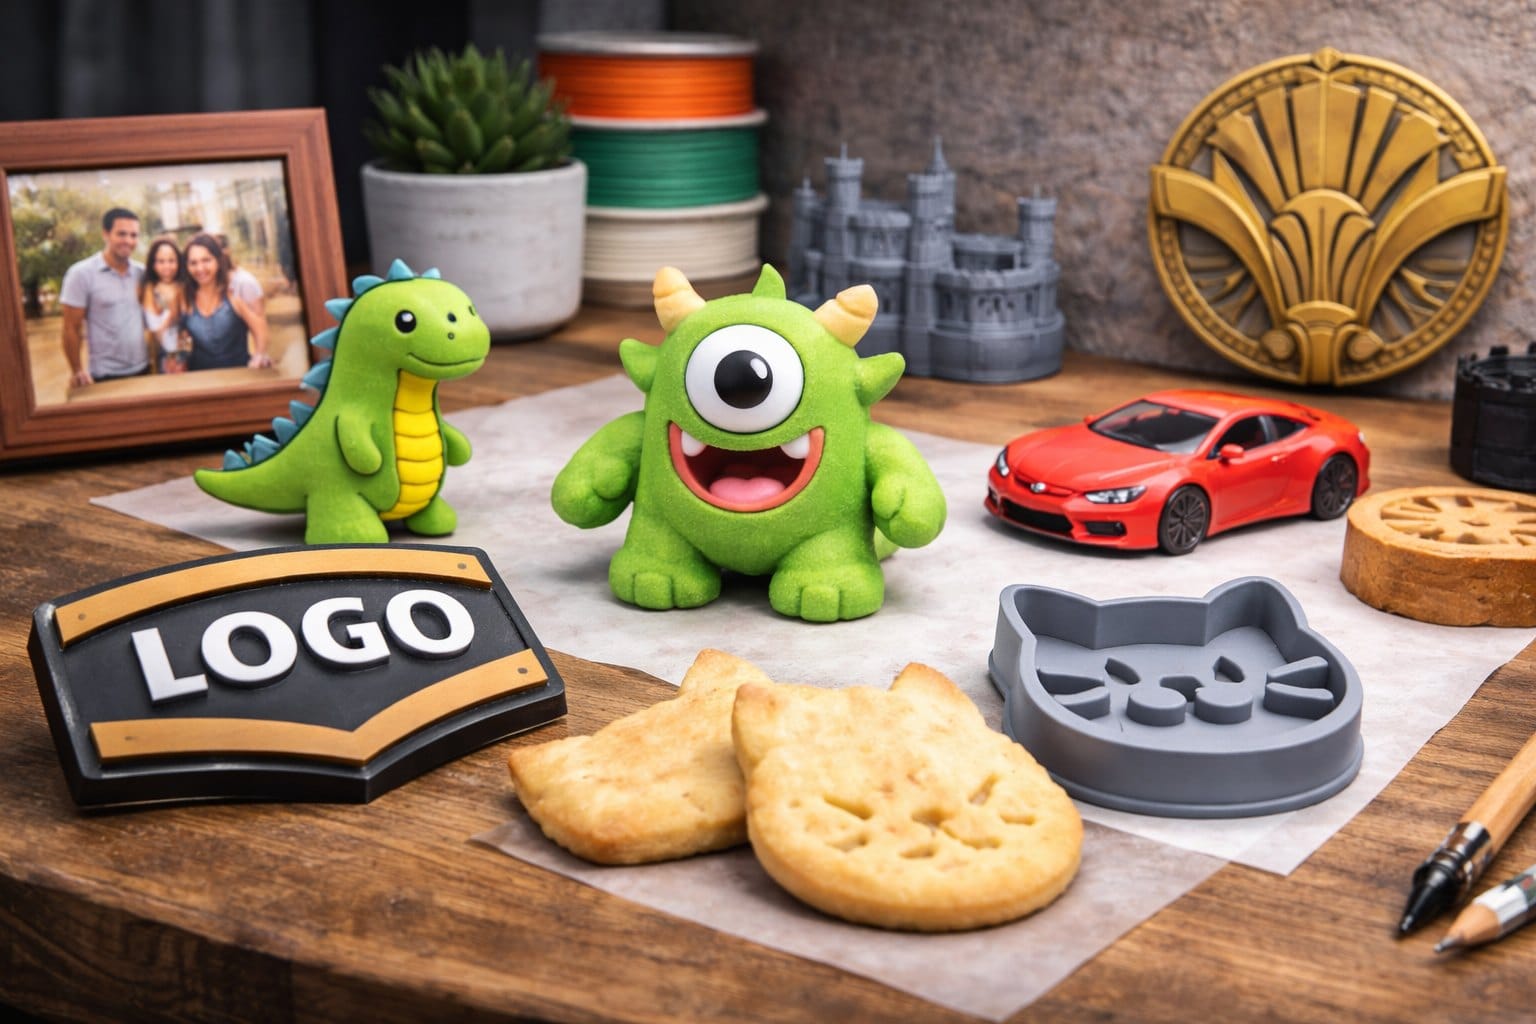
Practical Examples: From Image to Printed Model
Seeing the process in action helps clarify the steps and possibilities. Here are detailed examples of image to 3D print model workflows.
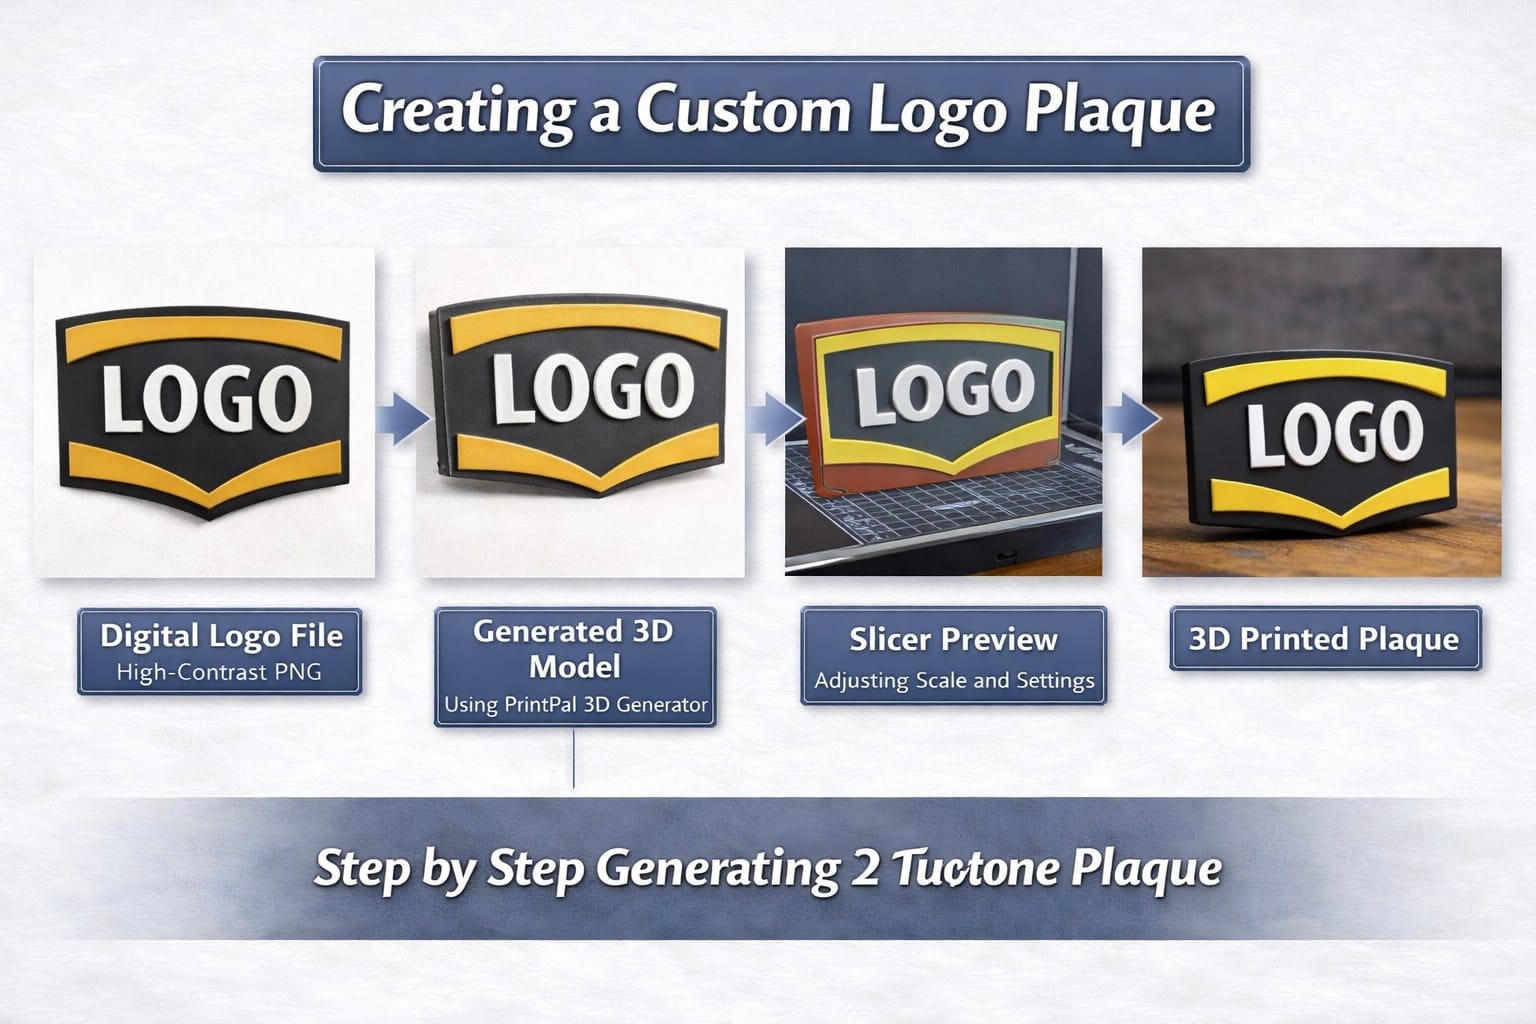
Example 1: Creating a Custom Logo Plaque
Starting Point: A company logo saved as a high-contrast PNG file with a transparent background.
Process: Upload the logo image to PrintPal’s free 3D model generator. The AI interprets the logo’s shapes and creates a relief model with the logo design protruding from a flat base. The system automatically adds appropriate thickness for printability.
Refinement: Download the generated STL file and open it in your slicer. Scale the model to your desired size (perhaps 100mm wide for a desktop display). The base is already flat, making it ideal for printing without supports.
Printing: Slice with 0.2mm layer height and 20% infill. Use two or more colors by pausing the print at layer transitions, allowing you to create a multi-colored plaque with a contrasting logo.
Result: A professional-looking branded plaque created in under 30 minutes from concept to print start, with no CAD modeling required.
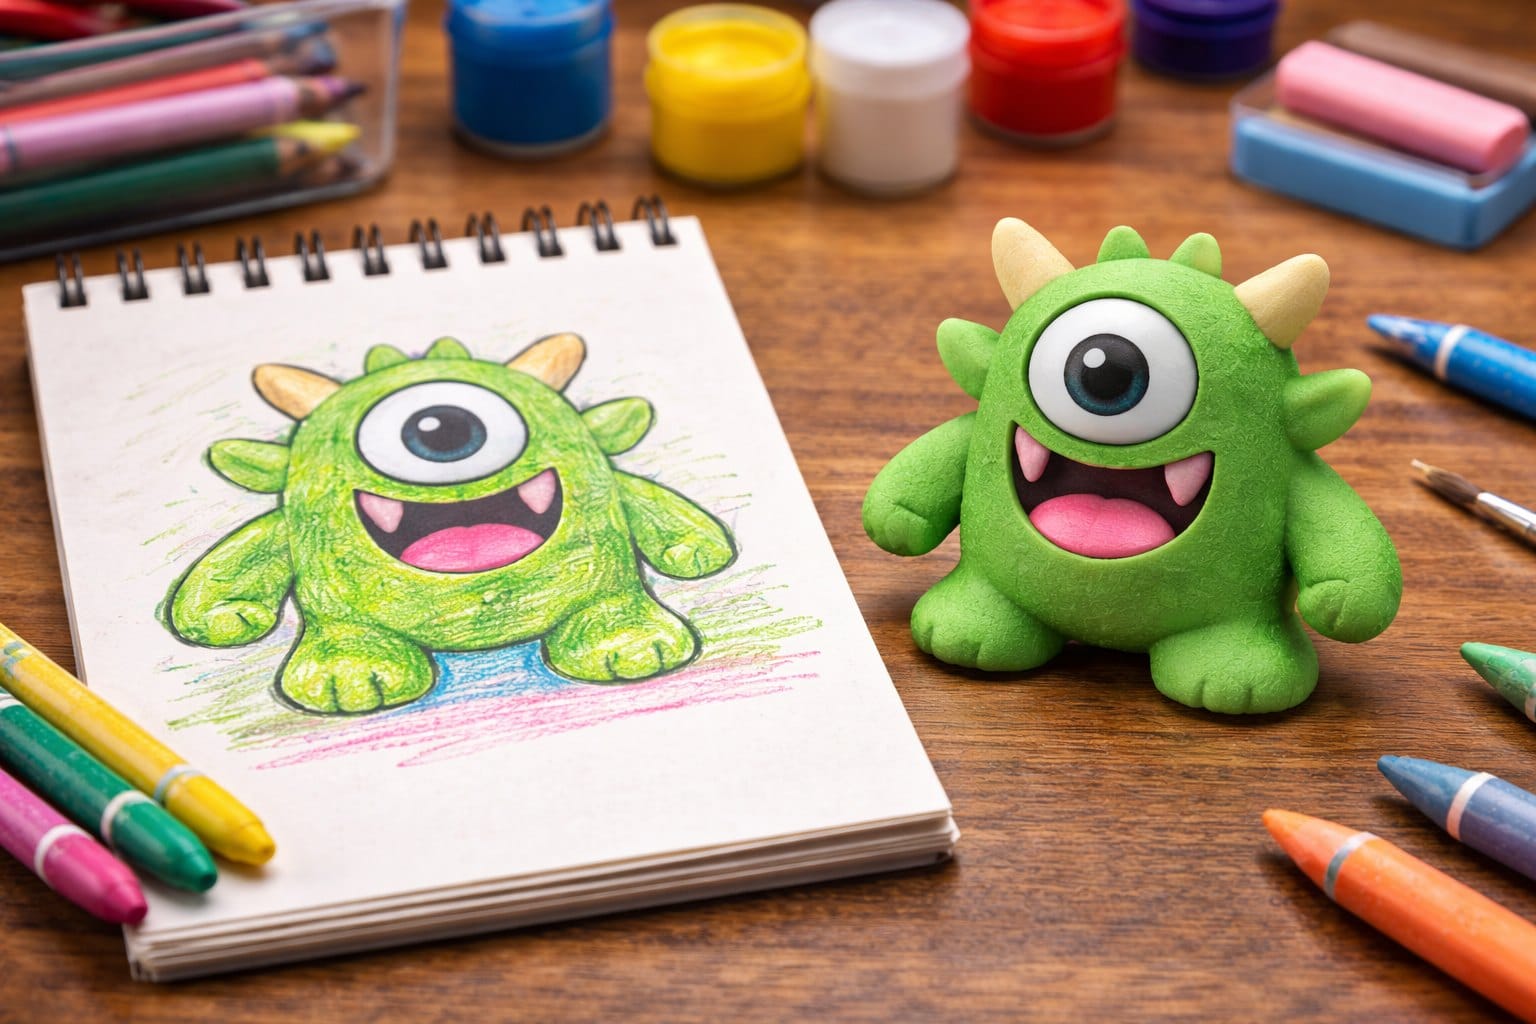
Example 2: Turning a Child’s Drawing into a Toy
Starting Point: A photo of a child’s crayon drawing of a simple monster character.
Process: First, enhance the image by increasing contrast and cropping tightly around the character. Upload to an image to CAD converter. The system interprets the drawing’s outlines and creates a three-dimensional representation of the monster.
Refinement: The generated model may be thin in places. Use a free mesh repair tool like Microsoft 3D Builder or Meshmixer to thicken thin areas to at least 2mm. Add a flat base to make the figure free-standing.
Printing: Print in a fun, bright filament color. Use 0.15mm layer height for good detail on the small features. Add supports for any outstretched arms or overhanging parts.
Result: A cherished keepsake that transforms a child’s imagination into a physical toy they can hold and play with. This demonstrates the emotional value that image to 3D technology can create.
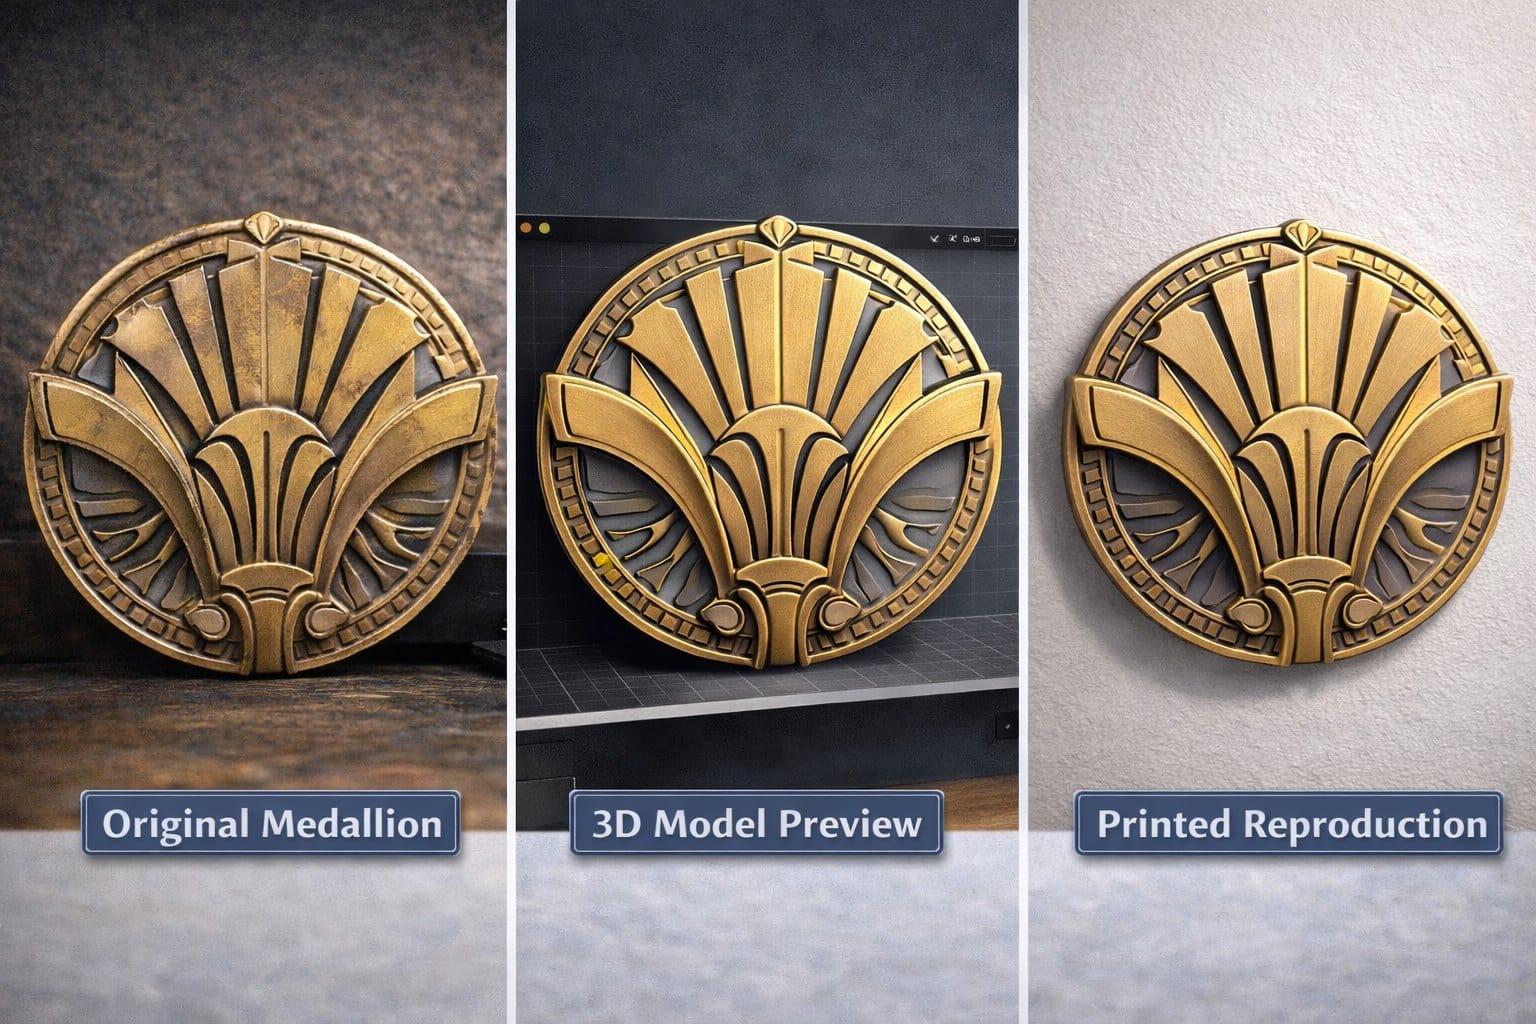
Example 3: Reproducing a Vintage Decoration
Starting Point: A photo of a vintage Art Deco wall medallion that you want to reproduce.
Process: Photograph the medallion straight-on with even lighting. Upload to PrintPal and apply a “smooth relief” recipe if available to create clean geometry suitable for a decorative reproduction.
Refinement: The generated model captures the design but may need manual cleanup. Import into Tinkercad or Fusion 360 (both offer free versions) to smooth rough areas and ensure consistent depth across the relief.
Printing: This type of decorative item prints well with a 0.2mm layer height. Consider printing slowly (40-50 mm/s) for better surface quality. A metallic or stone-like filament can enhance the vintage aesthetic.
Result: A faithful reproduction of a vintage decorative element at a fraction of the cost of purchasing an original or commissioning a custom sculpt.
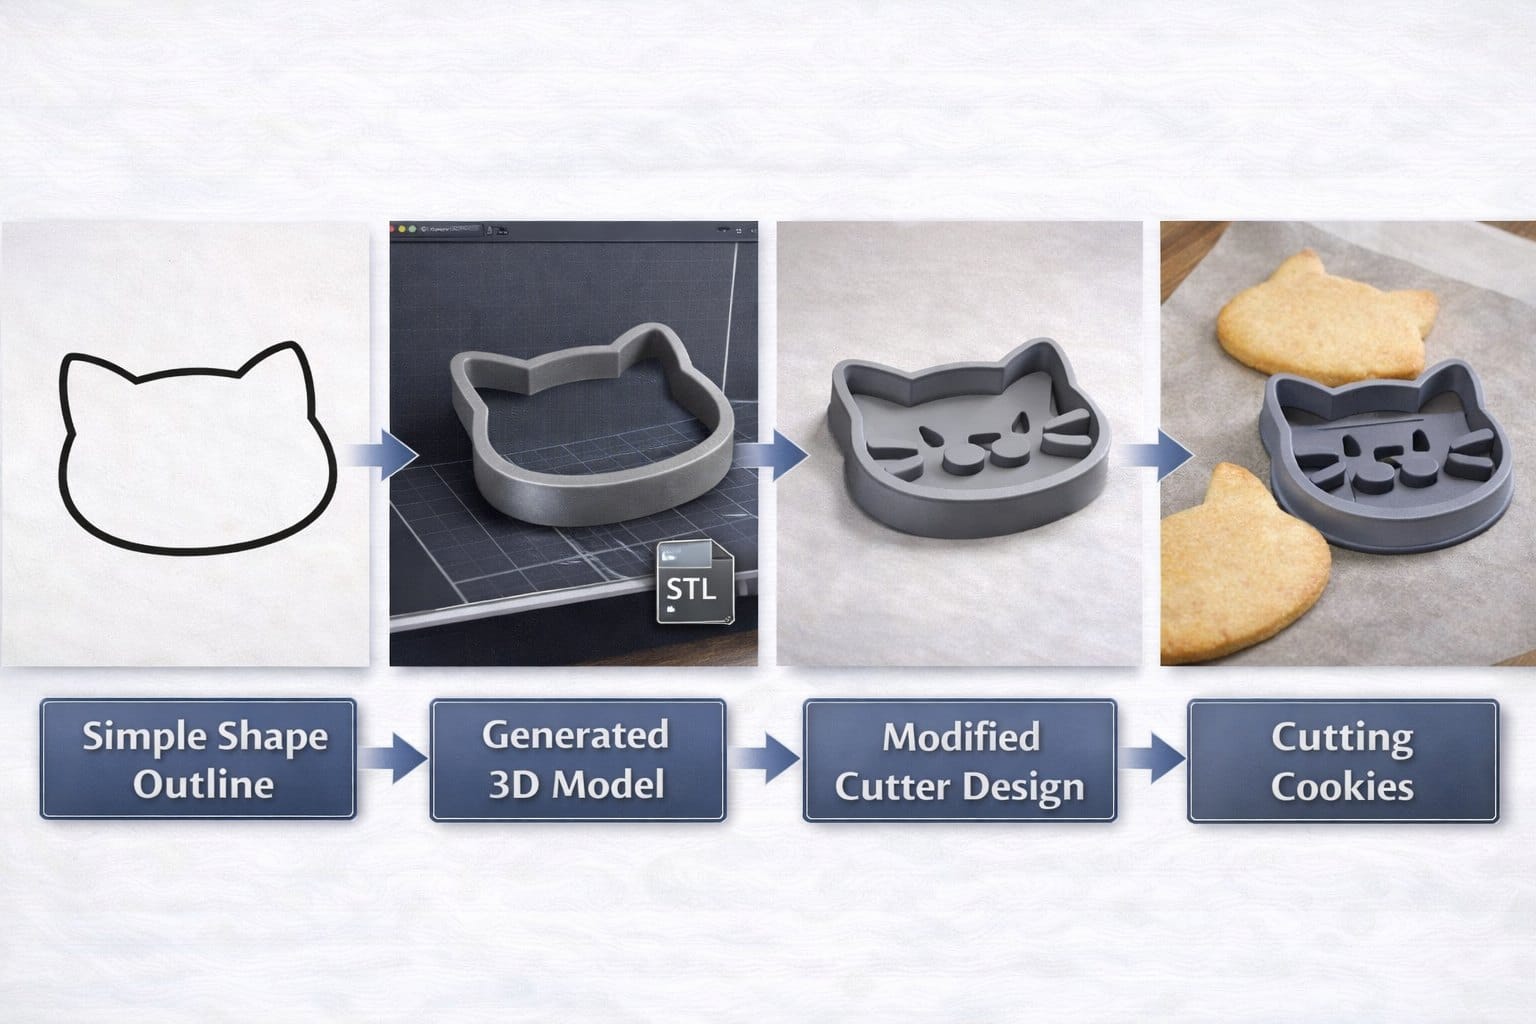
Example 4: Creating Custom Cookie Cutters
Starting Point: A simple line drawing or silhouette of a shape (star, animal, logo, etc.).
Process: Ensure your image has a clear, bold outline. Upload and generate the 3D model. The system creates a solid representation of the shape.
Refinement: This requires the most post-processing. Import the model into a free tool like Tinkercad. Extract just the outline by creating a cookie cutter wall around the perimeter. Remove the center fill, leaving a 3-4mm tall wall that’s 1-2mm thick. Add a handle or grip on top for easy use.
Printing: Use PETG or another food-safe filament. Print with 100% infill in the cutter wall for strength. No supports needed since cookie cutters print laying flat.
Result: Custom cookie cutters for special occasions, branded events, or personalized gifts. This example shows how image to 3D can be the starting point for further creative modification.
Getting Started with Free Image to 3D Tools
You do not need expensive software or subscriptions to begin generating 3D models from images. Several free options are available, each with different strengths.
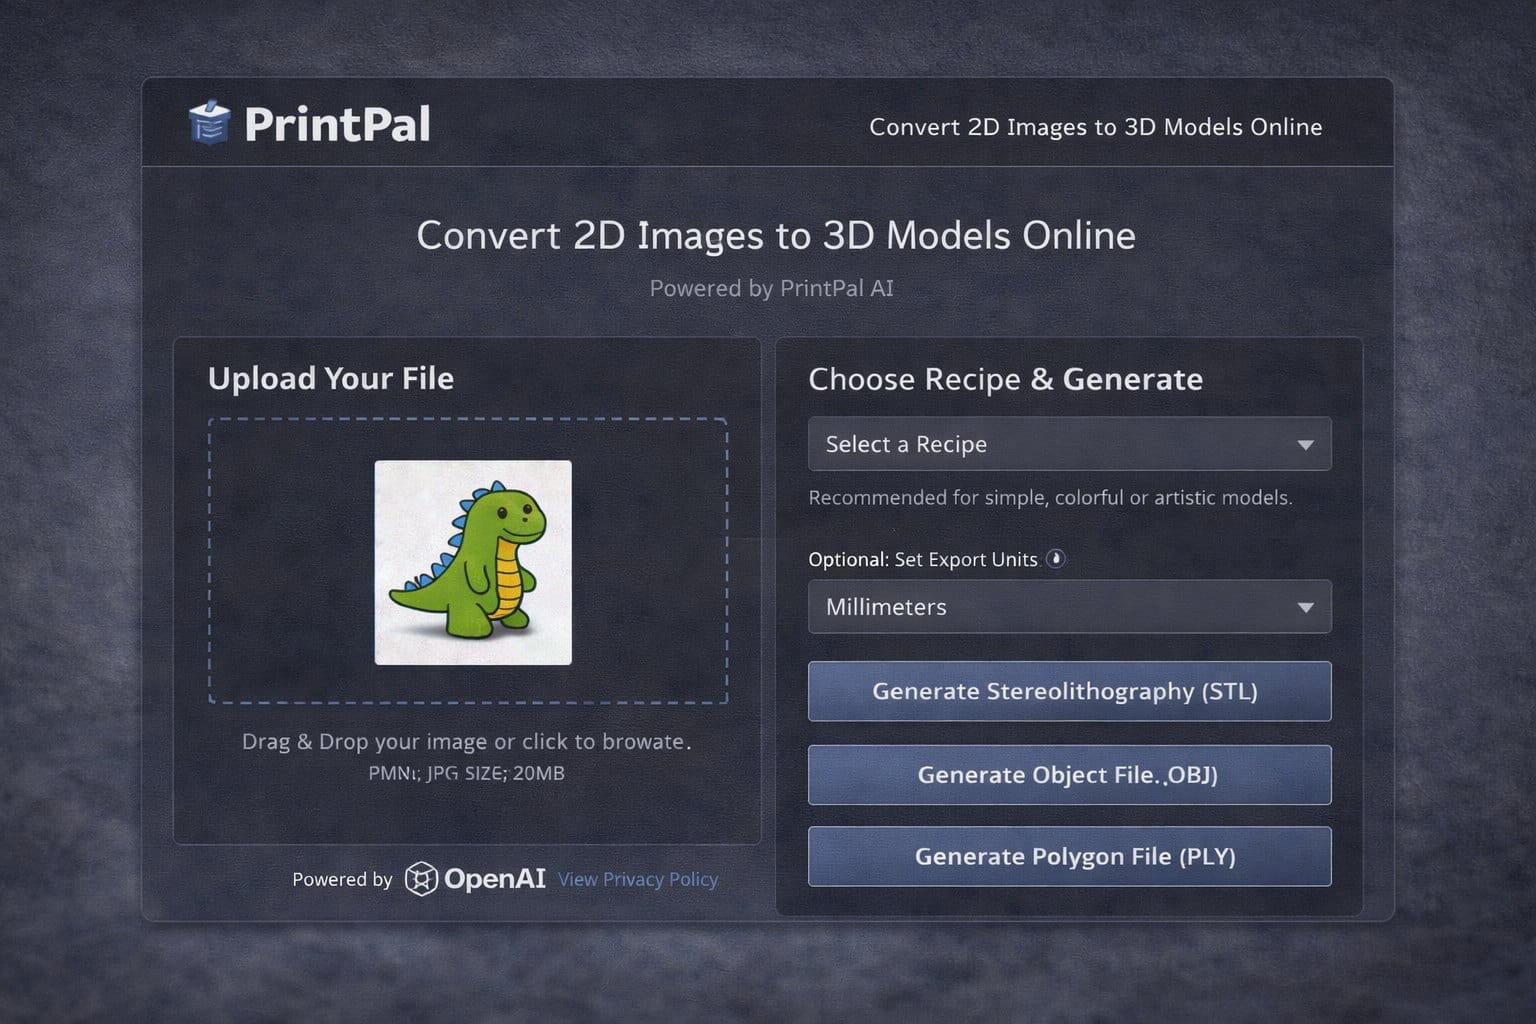
PrintPal: Free Image to CAD Conversion
PrintPal offers free 3D model generation from images with a user-friendly interface designed specifically for 3D printing enthusiasts. Key features include:
No Software Installation Required: Everything runs in your web browser. Simply upload an image and receive a downloadable STL file within minutes.
Style Recipe System: Choose from preset recipes that optimize your image for different types of models. These recipes are developed by the community and fine-tuned for printability.
Credit-Based System: Free accounts receive credits for generating multiple models. Additional credits can be earned through community participation or purchased affordably.
Integrated Community: Browse a gallery of free STL files created by other users. Download models for inspiration or print them directly.
Best Practices for Using Free Tools
Manage Your Expectations: Free image to CAD tools are incredibly powerful but not magic. Simple, clear images produce the best results. Complex scenes or low-quality photos may not convert well.
Iterate and Experiment: Generation is fast, so do not hesitate to try different images, crops, and settings. Each attempt helps you learn what works best.
Join the Community: Most platforms have forums, Discord servers, or community galleries. Learning from others’ successes and challenges accelerates your own progress.
Respect Licensing: When you generate a 3D model from an image, copyright still applies to the original image. Only convert images you own or have permission to use. Share your generated models with appropriate attribution.
Start with the Free Tier: Before investing in paid plans, exhaust the capabilities of free options. Many users find free tiers sufficient for their needs.
Conclusion and Next Steps
Image to 3D technology has made 3D model generation accessible to everyone, regardless of technical skill or CAD experience. Whether you want to create custom decorations, prototype product ideas, preserve memories, or explore creative possibilities, the ability to transform images into printable models opens up a world of opportunities.
The key to success lies in understanding the process, preparing your images thoughtfully, and being willing to experiment. Start simple, learn from each generation, and gradually tackle more complex projects as you gain confidence.
Your Action Plan
Step 1: Gather Your Images: Look through your photos, sketches, or digital designs. Identify 2-3 simple subjects that would make interesting 3D prints. Good first projects include logos, simple toys, decorative plaques, or basic shapes.
Step 2: Prepare Your Images: Use free image editing tools to crop, increase contrast, and remove backgrounds. Clean, clear input images produce the best results.
Step 3: Create Your Free Account: Sign up for PrintPal or another free image to CAD platform. Familiarize yourself with the interface and available options.
Step 4: Generate Your First Model: Upload your prepared image and generate your first 3D model. Download the STL file and inspect it in your slicer software.
Step 5: Print and Evaluate: Print your first model at a small scale. Evaluate the results and identify areas for improvement in your image preparation or generation settings.
Step 6: Iterate and Improve: Use what you learned from your first print to refine your process. Try different images, apply style recipes, and experiment with post-processing techniques.
Step 7: Share and Learn: Join community forums, share your results, and learn from other makers. The collective knowledge of the 3D printing community is invaluable.
Expanding Your Skills
Once you are comfortable with basic image to 3D conversion, consider these advanced techniques:
Combine Generated and Manual Modeling: Use generated models as starting points, then refine them in CAD software to add functional features or perfect the geometry.
Multi-Material Printing: Create models designed to print with multiple materials or colors, adding visual interest and functionality.
Batch Processing: Develop workflows for generating multiple models efficiently, useful if you are creating product lines or offering custom services.
Explore Commercial Applications: Many small businesses use image to 3D technology to offer personalized products, custom manufacturing services, or rapid prototyping solutions.
The future of 3D printing is increasingly accessible, and image to CAD technology is at the forefront of this democratization. With free tools, supportive communities, and continuously improving AI technology, there has never been a better time to start transforming your images into physical objects.
Start your image to 3D journey today, and discover how quickly you can turn creative ideas into tangible reality. Every 3D print model begins with an idea, and now that idea can be as simple as a photograph or sketch. The only limit is your imagination.