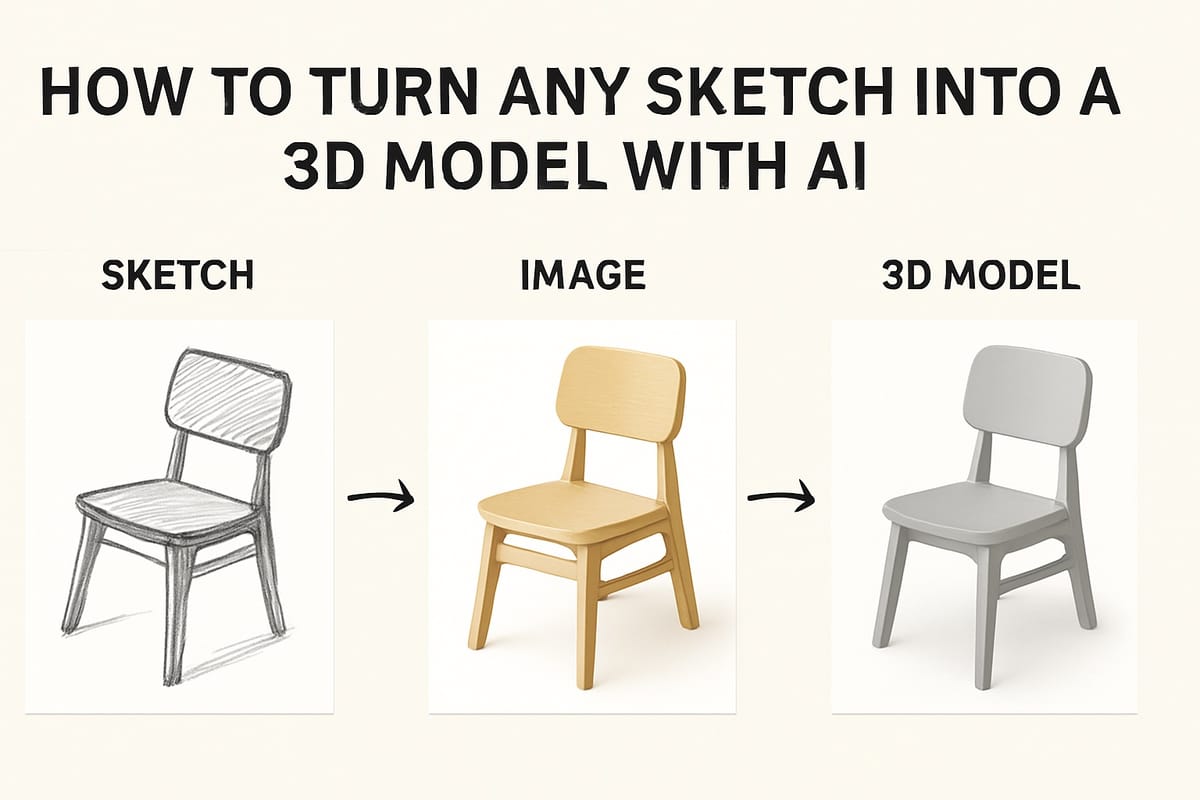
🖊️ How to Turn Any Sketch into a 3D Model with AI (In Minutes)

Have a product idea doodled on paper? A napkin sketch of a gadget? A quick logo concept with a visual twist?
With the power of AI and PrintPal’s Image-to-CAD tool, you can now turn rough sketches into fully usable 3D CAD models—ready for 3D printing, manufacturing, or product development.
This guide walks you through the full process, step-by-step. Whether you're an artist, engineer, hobbyist, or entrepreneur, this is the fastest path from idea ➝ image ➝ 3D model.
✨ Why Use AI to Convert Sketches to 3D?
Traditional modeling requires CAD skills, time, and effort. Now you can:
- 🧠 Skip the modeling process
- 🖼 Use AI tools to clean and enhance your sketch
- ⚙️ Feed the sketch into PrintPal’s Image-to-CAD engine
- 🧱 Output a usable 3D mesh within minutes
Perfect for prototyping, pitching ideas, or just bringing imagination to life.
✍️ Step 1: Create or Scan Your Sketch
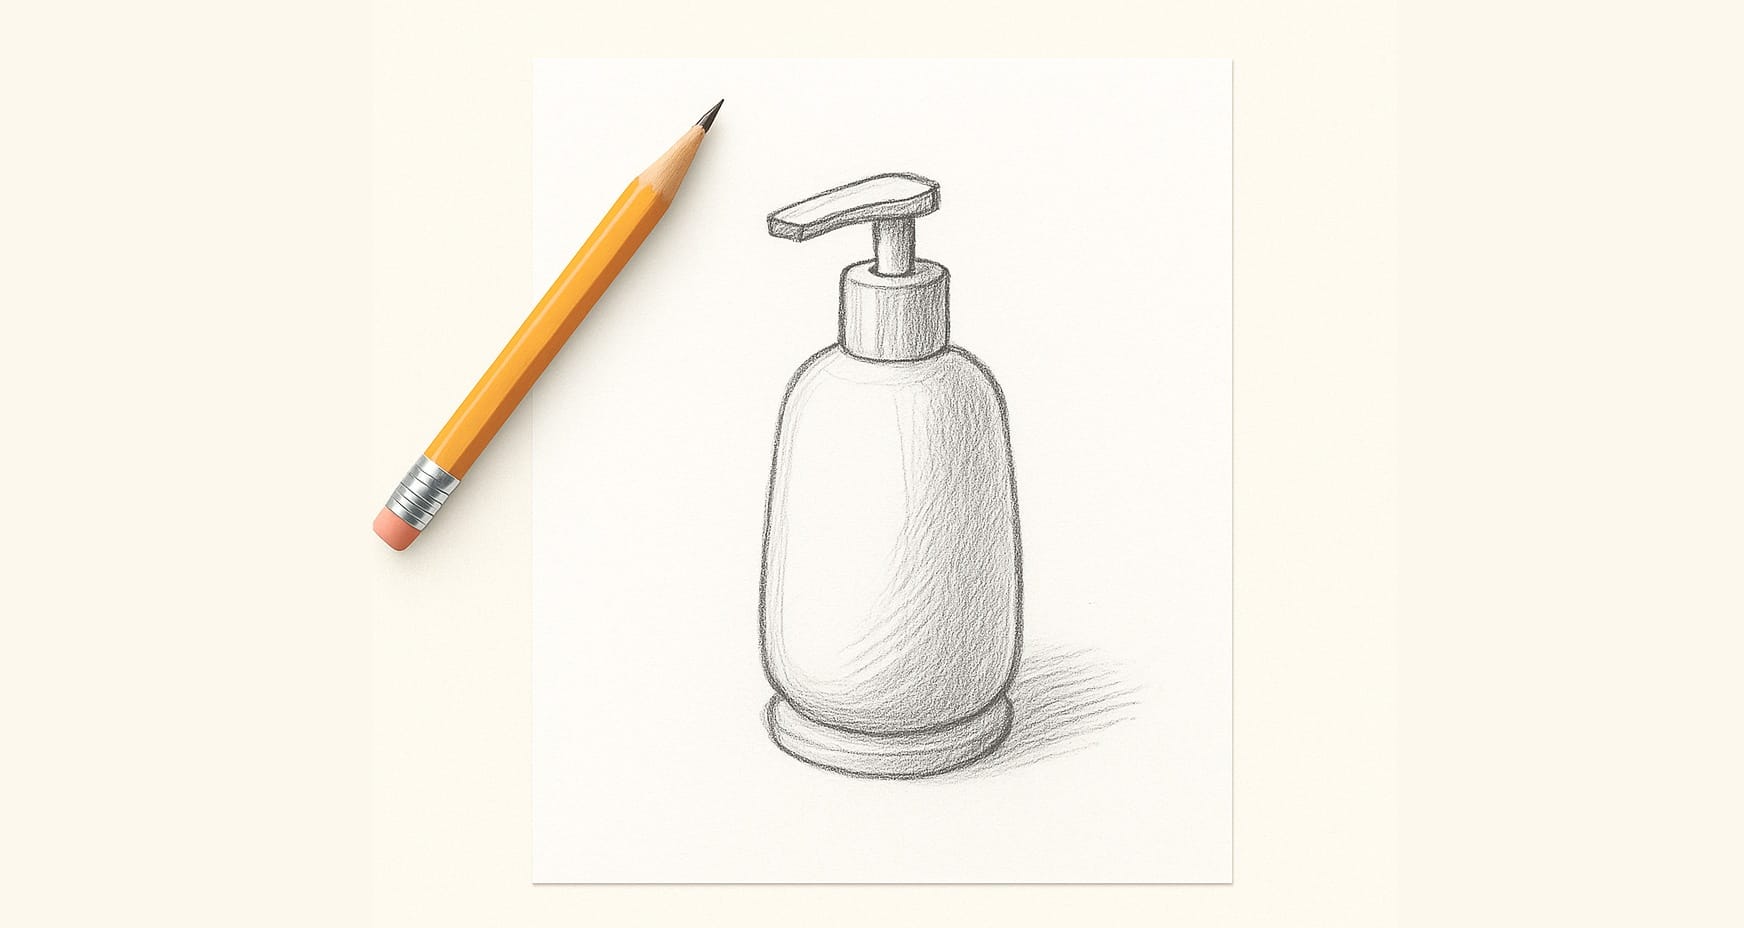
Start with a sketch that clearly shows the object’s shape. You can:
- Draw by hand on paper
- Use an iPad app (like Procreate or Concepts)
- Sketch in software like Figma, Sketchbook, or Photoshop
📸 Scan or photograph it under good lighting.
Tip: Avoid flat, side-only views. A 3/4 angle helps the AI understand the object's volume better.
🎨 Bonus (Optional): Enhance the Sketch with AI
If your sketch is too rough, try refining it into a clean rendering using:
- ChatGPT's image generation tool (type in a prompt like "a product design based on this sketch")
- Drawing over it with digital lines for clean vector export
This step isn’t required, but can dramatically improve the fidelity of the 3D output.
🛠️ Step 2: Upload to PrintPal’s Image-to-CAD Tool
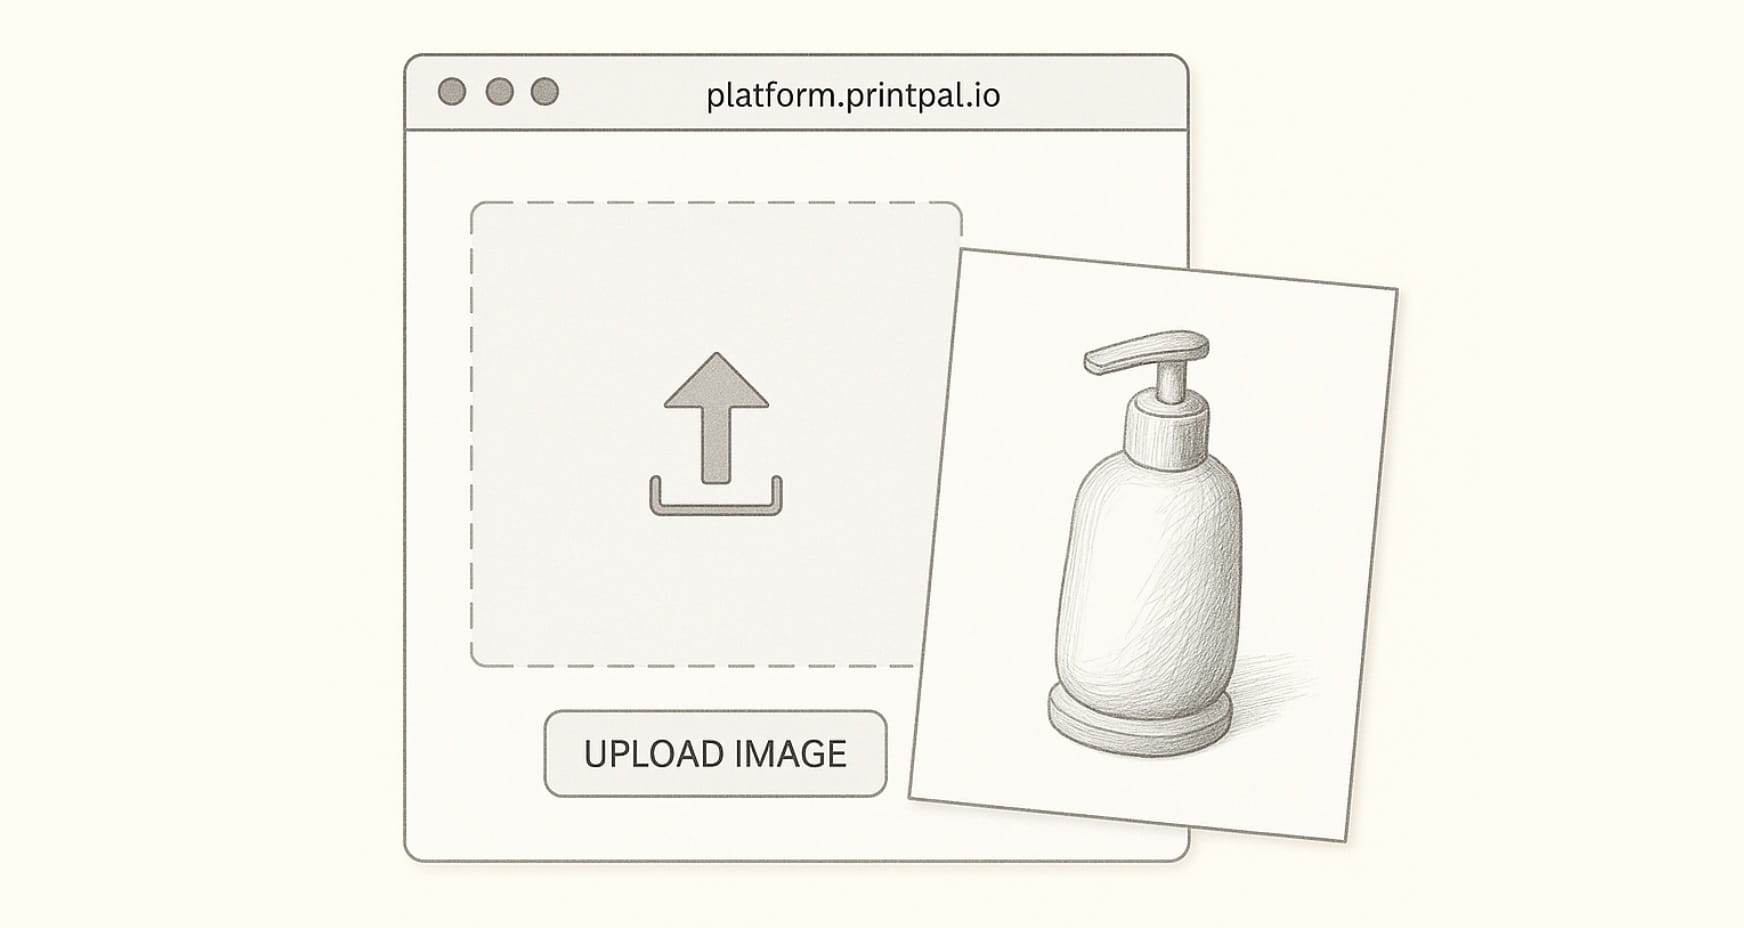
Head over to PrintPal’s Image-to-CAD Generator and upload your cleaned image.
✅ What happens behind the scenes:
- PrintPal uses AI + background removal to isolate the object
- A neural model interprets the geometry, perspective, and contours
- It generates a 3D mesh that approximates the shape
⚠️ Reminder: Make sure your image is clear, unshaded, and not too abstract.
👀 Step 3: Review and Use the 3D Model
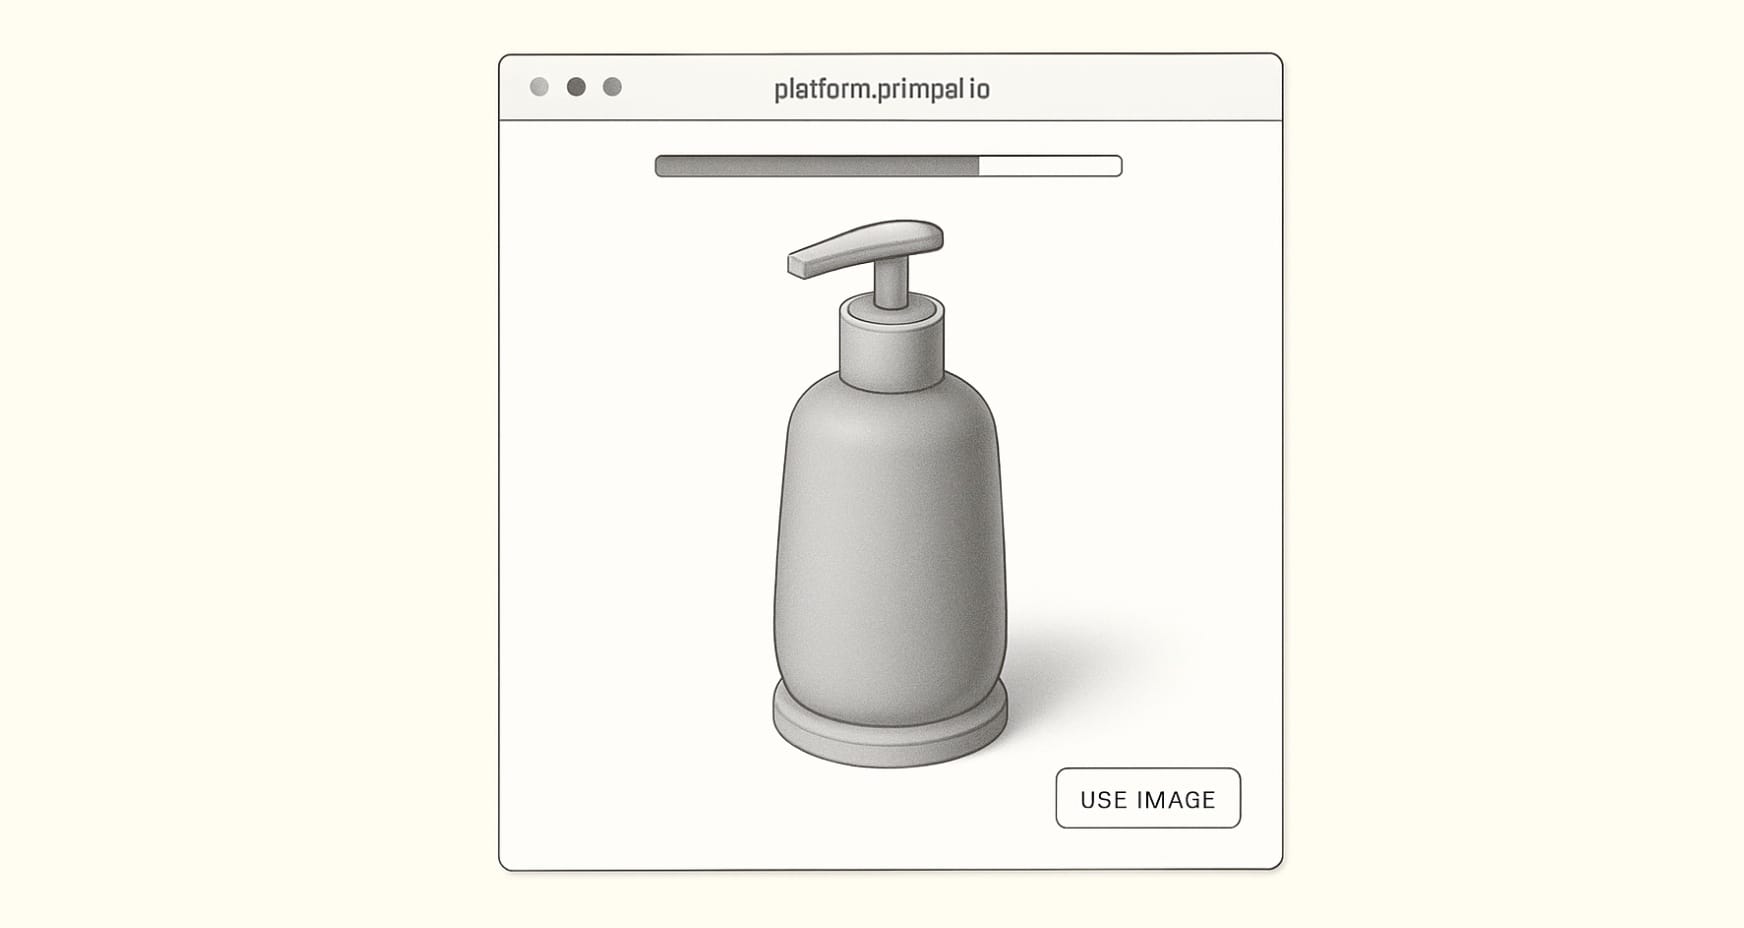
Once your model is generated, you’ll be able to:
- View it in 3D (right in your browser)
- Download it in standard formats (STL, OBJ, etc.)
- Edit it in Fusion 360, Blender, or Tinkercad
- Send it to a 3D printer or manufacturing service
You’ve just gone from a sketch to a tangible 3D object—with zero CAD experience.
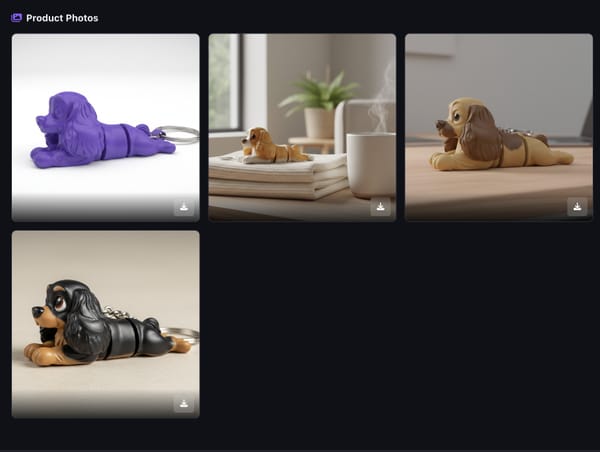
🧠 Example Sketch-to-3D Use Cases
- 🛏 Furniture concept sketched on a napkin
- 📱 Phone stand drawn in a notebook
- 🧽 Custom soap dish idea turned into a 3D print
- 🎮 Game controller holder designed by hand
- 🧸 Toy or action figure accessory drawn with pencil
💡 Pro Tips for Better Sketch-to-3D Conversion
| ✅ Do | ❌ Avoid |
|---|---|
| Draw full outlines | Messy or incomplete shapes |
| Use angled views | Straight-on or flat side views |
| Remove background | Photos with clutter |
| Use high contrast | Faint pencil or washed-out scans |
🚀 Turn Your Ideas Into Reality
PrintPal removes the friction between creativity and creation. If you can draw it, you can now model it—and even manufacture it—with just a few clicks.
Try it now 👉 PrintPal Image-to-CAD Tool