How to Turn Any Building Photo into a 3D Printable Architectural Model


Creating physical architectural models has traditionally required hours of manual work in CAD software, laser cutters, or expensive outsourcing. PrintPal's Architecture to 3D Model Generator changes that.
Upload a single photo of any building, house, or structure, and our AI generates a high-resolution, 3D printable model in minutes. This guide walks through the full process, from uploading your image to holding a finished 3D printed building in your hands.
What You Can Create
The tool works with virtually any type of architecture:
- Residential homes for real estate presentations or personal keepsakes
- Commercial buildings and offices for urban planning mockups
- Historic landmarks such as churches, castles, and monuments for replica collections
- Skyscrapers and high-rises for city dioramas and skyline models
- Concept renderings from architectural software like SketchUp, Revit, or Blender
If you can photograph it or render it, you can turn it into a 3D model.
Step 1: Prepare Your Image
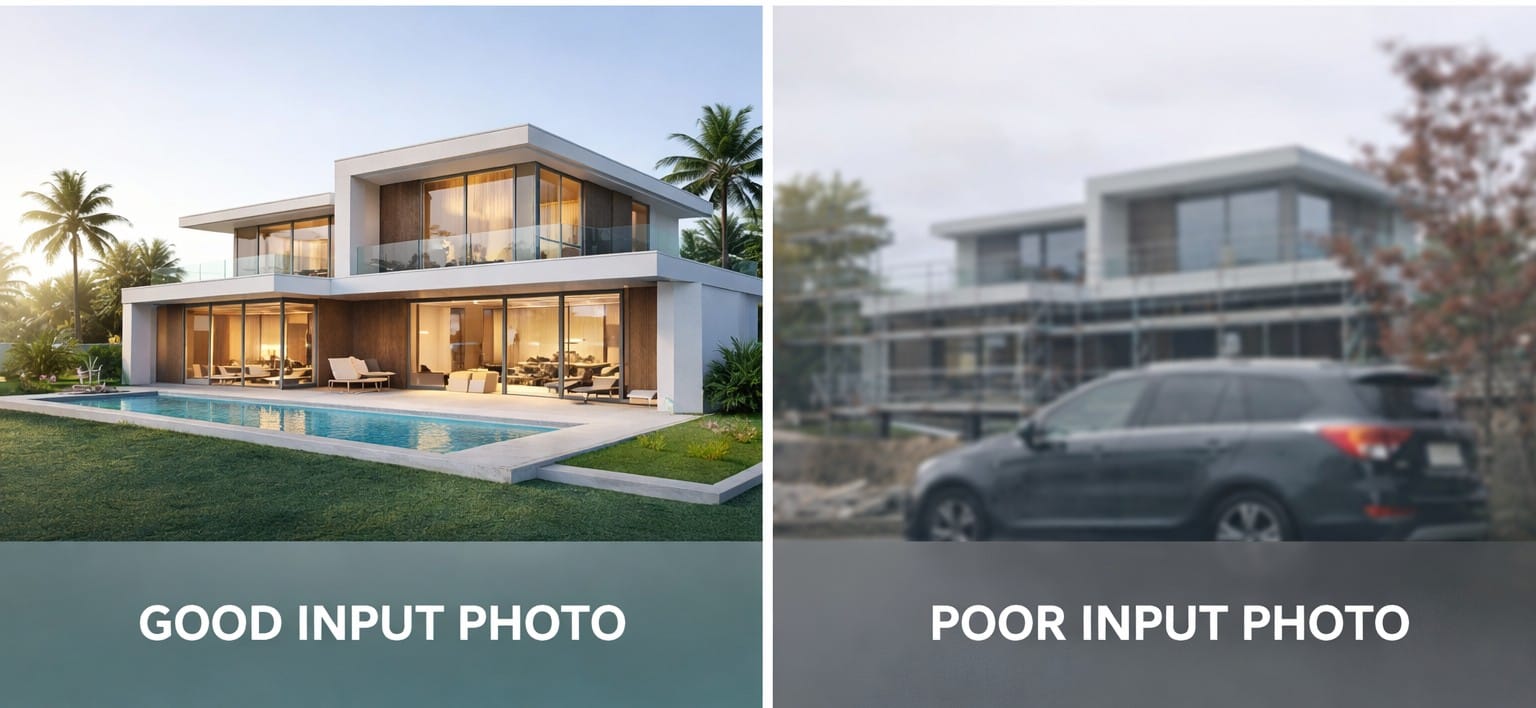
For the best results, start with a clear, well-lit photo that shows the full structure. Here are a few tips:
- Shoot from an angle that reveals at least two sides of the building. A straight-on facade shot will produce a flatter result than a three-quarter view.
- Avoid heavy obstructions. Trees, cars, or scaffolding covering large portions of the building will reduce accuracy.
- Use good lighting. Daylight with minimal harsh shadows works best. Overcast skies actually produce very clean results.
- Resolution matters. A phone camera photo is fine, but avoid heavily compressed or thumbnail-sized images.
Architectural renderings from CAD or BIM software also work well, especially isometric or perspective views with clean backgrounds.
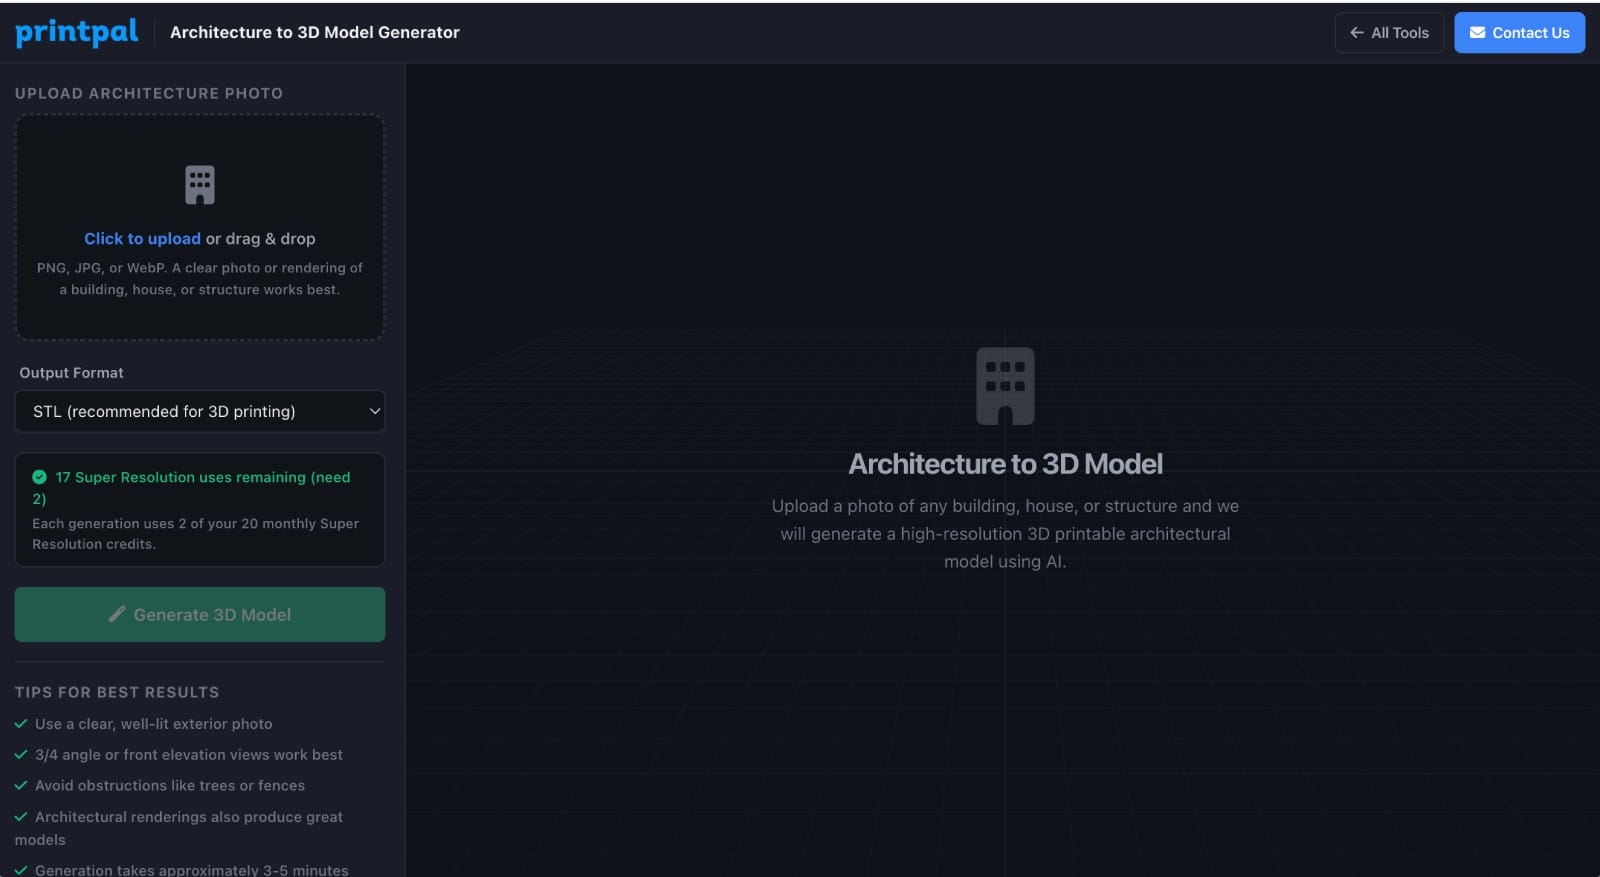
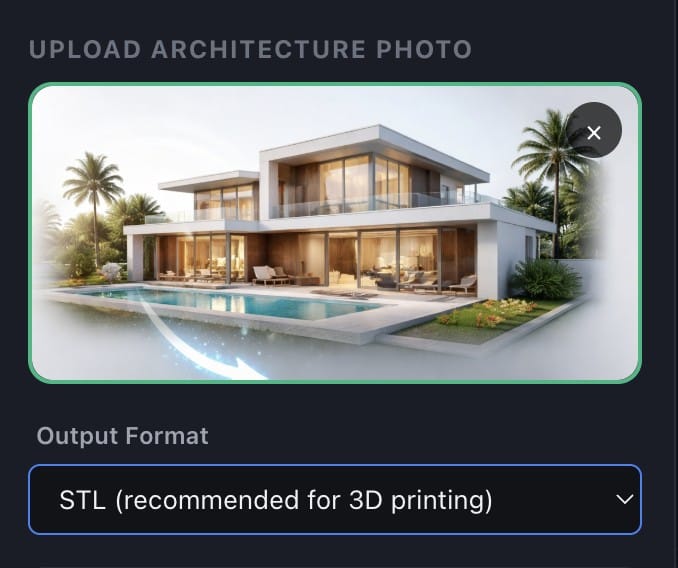
Step 2: Upload Your Image
Navigate to the Architecture to 3D Model Generator on PrintPal. You will see an upload area on the left side panel.
- Click the upload zone or drag and drop your image file.
- The tool accepts JPG, PNG, and WebP formats.
- A preview of your uploaded image will appear in the panel.
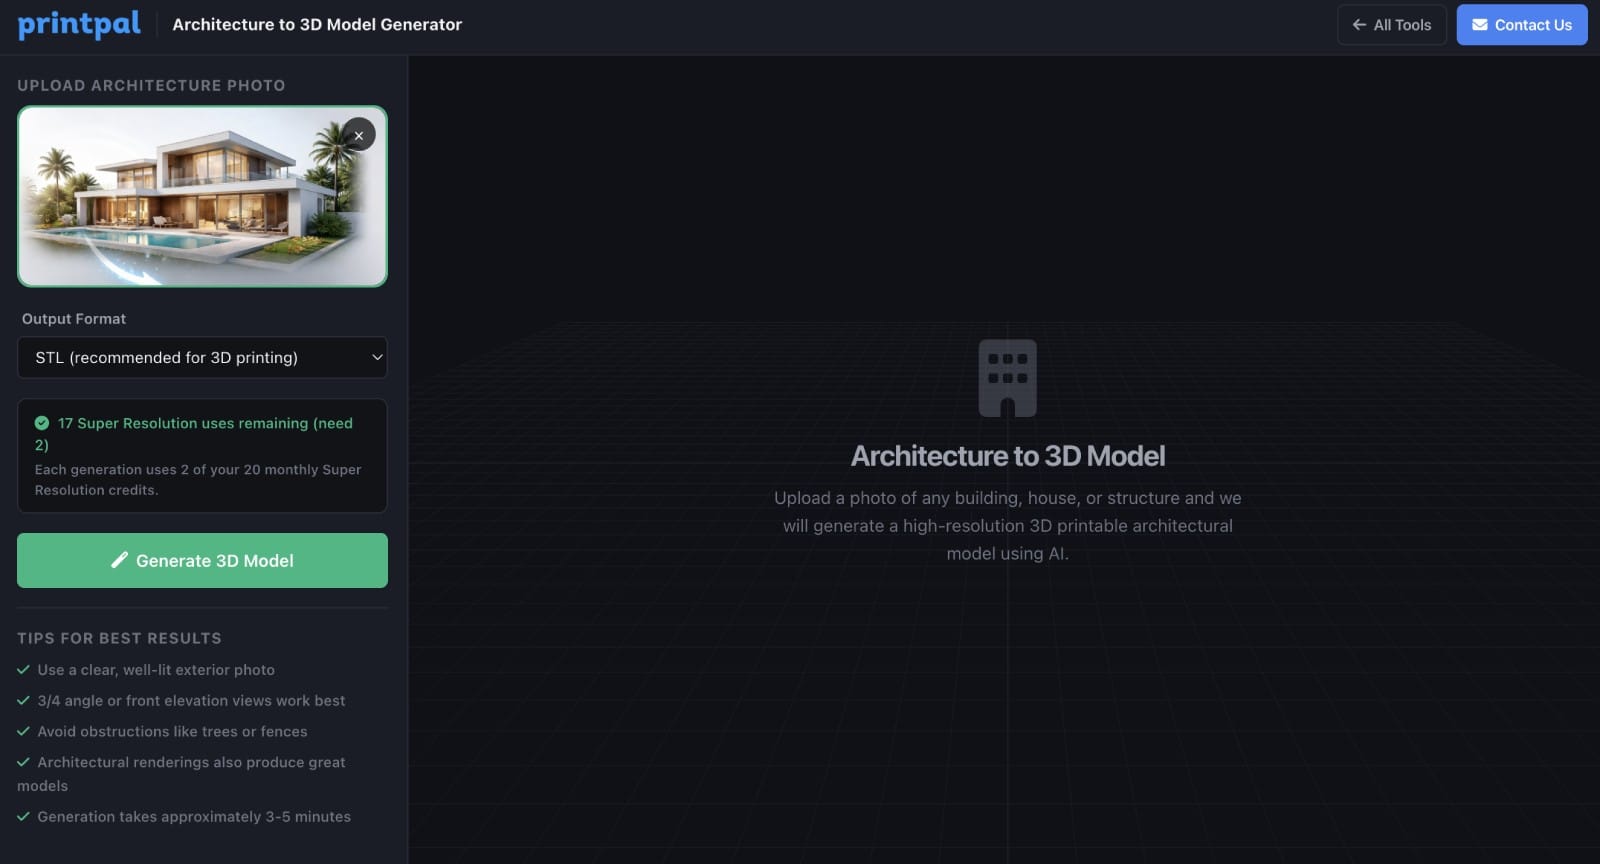
Step 3: Choose Your Output Format
Below the image preview, select your preferred 3D file format:
- STL (recommended for 3D printing). This is the most widely supported format across slicers like Cura, PrusaSlicer, and Bambu Studio.
- OBJ for use in 3D modeling software such as Blender, Maya, or 3ds Max.
- GLB for web-based viewers, AR/VR applications, or sharing online.
For most users who want to 3D print their model, STL is the right choice.
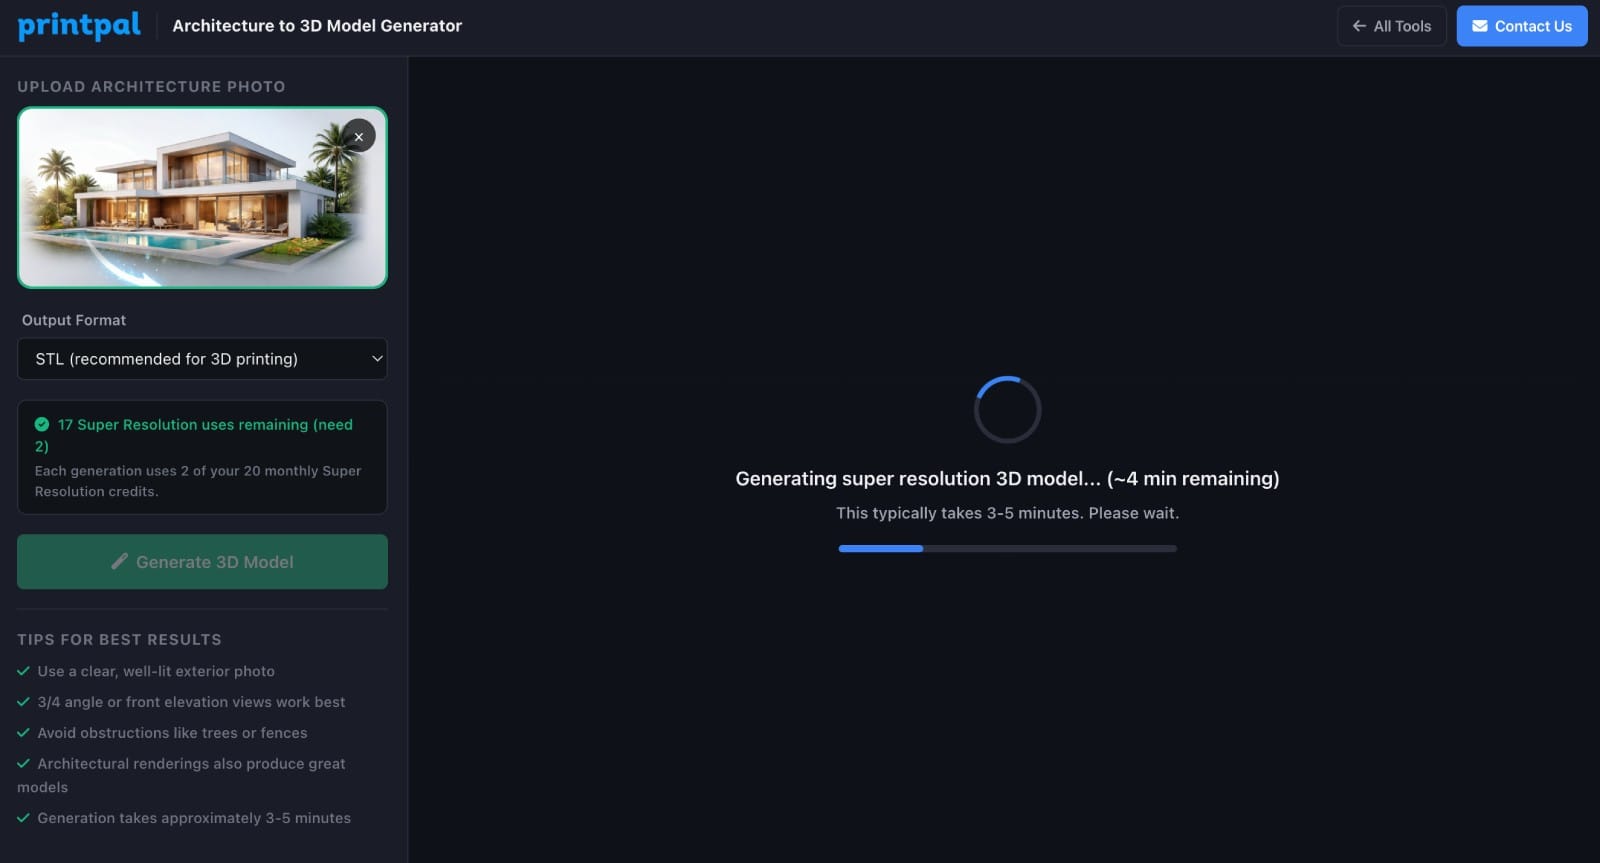
Step 4: Generate Your 3D Model
Click the Generate 3D Model button. The AI processes your image through a Super Resolution engine at 1024-cube resolution, producing a model with up to 1 million polygons. Generation typically takes 2 to 4 minutes depending on complexity. During processing, you will see a progress indicator. You do not need to stay on the page; the generation will complete in the background.
Step 5: Preview and Inspect
Once generation is complete, the 3D model appears in the interactive viewer. You can:
- Orbit by clicking and dragging to view the model from every angle.
- Zoom with the scroll wheel to inspect fine details like rooflines, windows, and structural features.
- Check proportions to see how well the AI captured the building's geometry.
The viewer runs entirely in your browser using Three.js, so there is no additional software to install.
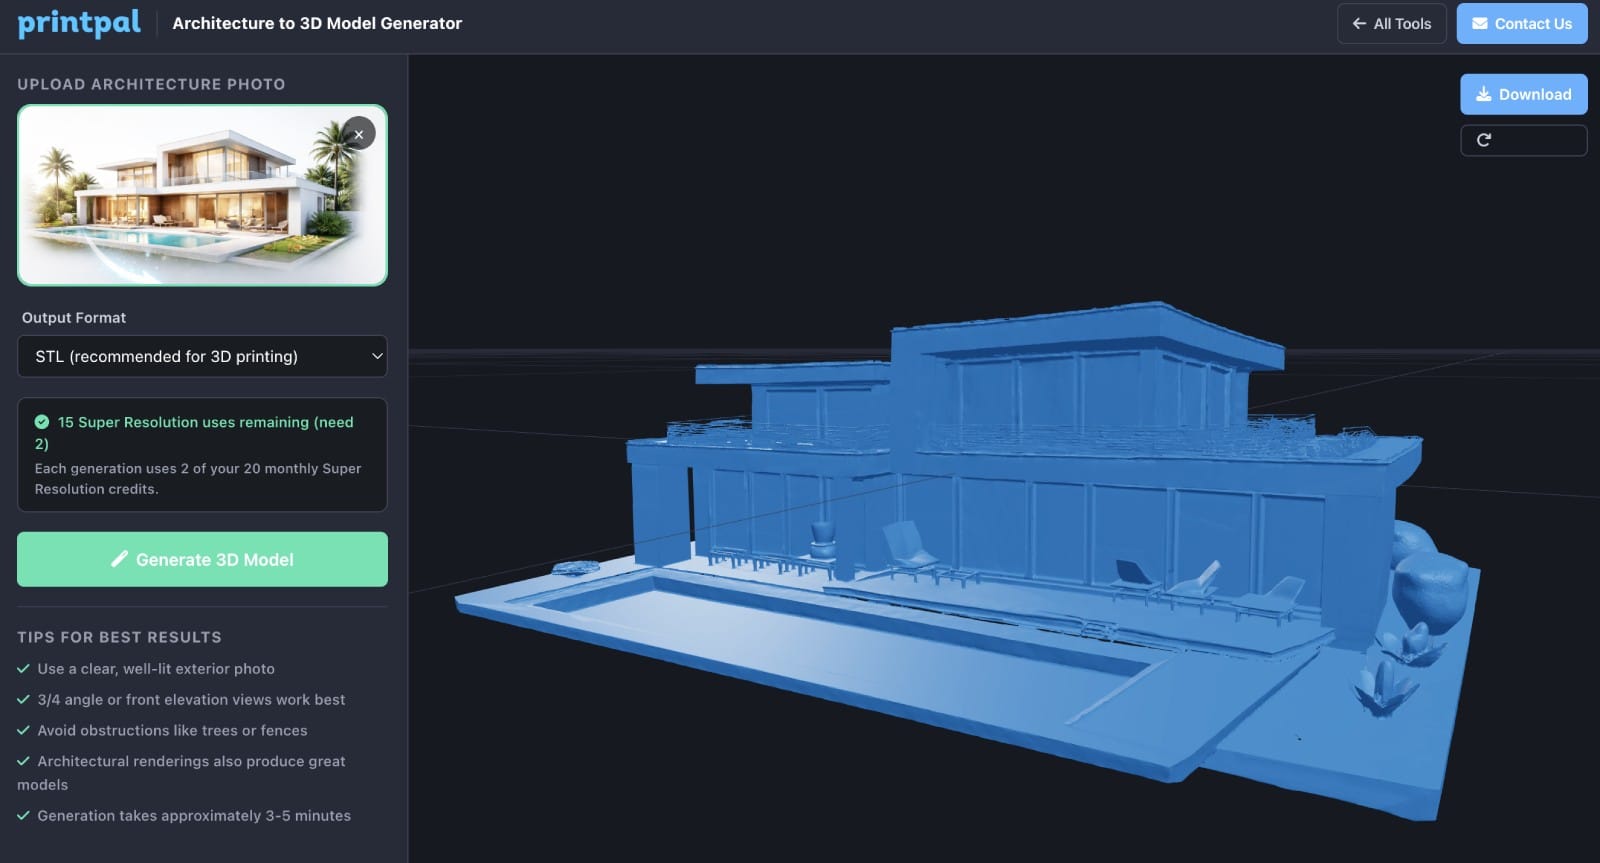
Step 6: Download Your File
Click the Download button to save the 3D file to your computer. The file is ready to open in your slicer or 3D software immediately. If you want the model in a different format, you can re-run the generation with another format selected.
Step 7: 3D Print Your Architectural Model
Open your downloaded STL file in your preferred slicer. Here are some recommended settings for architectural models:
- Layer height: 0.12mm to 0.16mm for crisp detail on edges and windows.
- Infill: 15 to 20 percent is sufficient for display models. Increase to 30 percent or more if the model needs to be structurally robust.
- Supports: Enable supports if the model has overhangs such as balconies, awnings, or cantilevered sections.
- Scale: Measure the model dimensions in your slicer and scale to your desired size. Common architectural scale ratios are 1:100, 1:200, or 1:500.
- Material: PLA works well for display models. Use resin printing for maximum detail on smaller scales.
[Image placeholder: Screenshot of the model loaded in a slicer (Cura or PrusaSlicer) with print settings visible][Image placeholder: Photo of the finished 3D printed architectural model on a desk or display surface]
Tips for Better Results
- Try multiple angles. If your first result does not capture a particular side well, upload a photo taken from a different vantage point.
- Clean backgrounds help. Cropping out surrounding buildings or landscape clutter before uploading can improve the AI's focus on your target structure.
- Combine with post-processing. Import the generated model into Blender or Meshmixer to add a base plate, smooth surfaces, or merge it with other models for a full diorama.
- Use renderings for concept models. If you are an architect or designer, export a perspective view from your CAD tool and run it through the generator for a quick physical prototype without manual modeling.
Common Use Cases
- Architecture firms producing quick physical mockups for client presentations
- Real estate agents creating 3D printed models of listed properties
- Students building portfolio-quality architectural scale models
- Urban planners generating city block and district models for review
- Hobbyists collecting miniature replicas of favorite buildings, landmarks, and monuments
- Model railroad and diorama builders adding realistic structures to layouts
Frequently Asked Questions
What file formats can I export?
STL, OBJ, and GLB. STL is recommended for 3D printing. OBJ and GLB are better suited for 3D modeling software and web applications.
What types of buildings work best?
Buildings with distinct geometry and visible architectural features produce the best results. Houses, skyscrapers, churches, castles, and monuments all work well. Flat, featureless structures may produce less detailed models.
Can I use an architectural rendering instead of a photo?
Yes. Isometric or perspective renders from SketchUp, Revit, Rhino, or Blender work as inputs. Clean renders with minimal background noise tend to produce the most accurate results.
How long does generation take?
Approximately 2 to 4 minutes per model.Is the model watertight and ready to print? In most cases, yes. The STL output is designed for direct use in FDM and resin printers. For complex models, you may want to run a quick mesh repair in your slicer or Meshmixer before printing.
Start generating your architectural models now at https://printpal.io/tools/architecture-3d-generator.